Create styles
In this article, you learn how to create your first style, from selecting a brand to uploading images and saving your work
Introduction & best practice
A style in Delogue is the central hub for product development, where you collect product specifications, images, materials, and supplier communication. To ensure smooth collaboration, create each style with clear naming, fill in mandatory fields, add reference images early, and update regularly so it remains a reliable single source of truth.
Table of contents
Before you start
Before you start creating your styles, make sure you have set up the needed Admin settings:
NOTE: Brand and Season are mandatory for creating a style. The supplier can be selected later. Group and Style Categories are optional.
Create styles
In the Styles section:
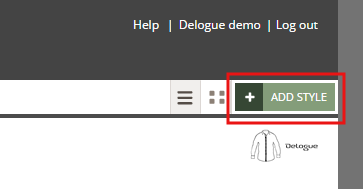
- Click the 'Add style' button in the upper right corner

- In the new style header, you will see several fields to select. Start by choosing the brand - if only one brand is added in Admin, it will be pre-selected
- Add the contact person for the style. By default, the user creating the style will be set as the contact person - this can always be changed
- Go ahead and type in the style name (which is mandatory) and style no. (that is optional)
NOTE: It is possible to set up an option to automatically generate style numbers - see how to do it here.

- Later on, you can select the supplier, as well as the supplier contact person (list of active supplier users from this supplier), season/project and group (optional)
- Description and categories fields are optional
- Lastly, upload the style image (right side) - it can be a .jpg, .png, .gif, .tif, .bmp

- When you are done, click the small green icon in the style header to save your new style
Good to Know:
- The primary option is, per default, set to "Yes". This field is used to manage integration with ERP, where the same style is made with multiple suppliers.
- Once you have created your first style, you can start refining the style specifications, publish it to your supplier and start asking for samples.
Add supplier
Once you have added all relevant style information (colour variants, item list, style files, measurements), you can add the supplier and supplier contact to the style header. After you add the supplier, it will be possible to publish the style towards the supplier and start communicating with the supplier contact.
Navigate to: Styles
- Choose the style from your list of styles
- Double click on the header page of the style to enter 'edit mode'
- Start typing the supplier name next to the field 'Supplier' - you will be able to choose from the list of suppliers you have created in Admin before
- Choose a supplier contact - you will be able to choose from a drop-down of supplier users that you have invited to the platform in Admin before
Change the supplier of a style
In case you are trying to change the supplier on one of your styles, the system gives you an error message with the following information:

- When changing suppliers, the system will make a complete copy of the style.
- The old version of the style will be set to 'Cancelled', and the previous supplier will still be able to see it
- Click 'yes' if you would like to copy all data, sample requests and communication - all data will be visible towards the new supplier
- Select 'no' if you do not want to copy communication and sample requests to the copied style
- Click cancel if you do not want to change the supplier
Advanced style setup
Extra field in style header
In Delogue you can, as an option, set up an extra field in your style header. This can be helpful, for example, to see the main item composition of a style or any other information that comes from a custom field, which provides you with extra information that you always want to see in the header of a style. Read more about it in an article, here.
Import style header picture
The Import Style Header Image feature allows you to bulk upload header images for your styles. I can save time and ensure visual consistency across your product catalogue. Read more about it in an article, here.
