Introduction & Best Practice
Categories in Delogue help structure workflows and maintain clarity by organising data of styles, items and compliance certificates and standards, by purpose. While optional, using categories is highly recommended - examples are available in each category of this article. Clear category definitions in Admin ensure consistency, improve searchability, and support scalable product development.
Table of Contents
Before You Start
1) To create categories for Styles and Items make sure the 'Company Admin' role is assigned to you.
2) To create categories for Compliance make sure the 'Company Admin' and 'Compliance Admin' roles are assigned to you as a user. To learn more about assigning different roles to a user, click here.
Categories For Styles
We recommend using the same category structure as your webshop. This ensures consistency and makes it easier to provide your customers with the data they need for their own stores. You can assign multiple categories to a style by separating them with commas. The style will then appear in the search results for all related categories.
NOTE: If you want to use multiple categories while working with an integration, make sure that the integrated system supports receiving multiple categories.
Create Style Categories
Navigate to: Admin > Categories > Styles
- Click the 'Add style category' button and a new table row will appear
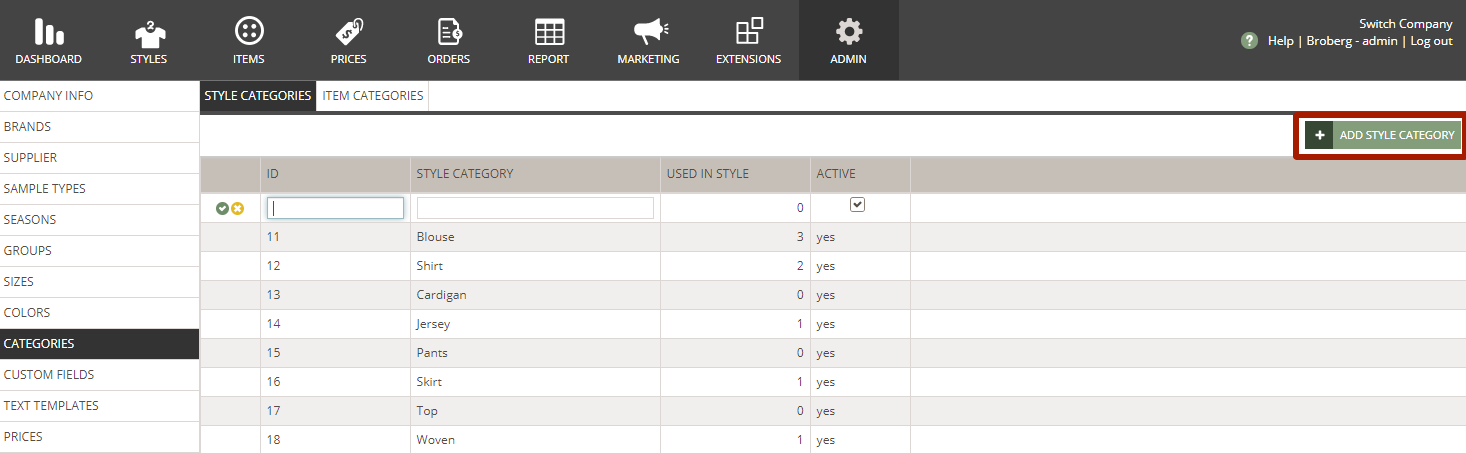
- Add category ID - used as a unique identifier, especially useful during data imports and exports, ensuring that information aligns correctly across systems
- Type a style category name - *mandatory
- Click the green 'save' icon to finish
Edit Style Categories
- To change the category name - mouse over the category name or double-click on it
- The row will be in edit mode
- Click the green 'save' icon to finish
NOTE: If you change the category ID it might have an impact on your integration
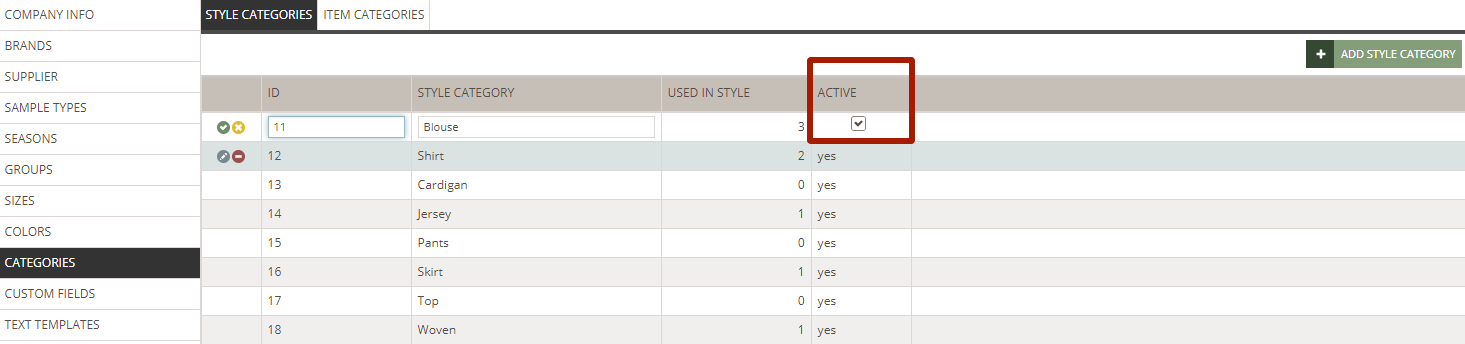
Deactivate & Delete Style Categories
You can deactivate categories if they should no longer be selectable for new styles. The deactivation will not affect the styles already using this category.
- To deactivate style categories select the category you want to deactivate and uncheck the option 'ACTIVE'
- Click the green 'save' icon to finish
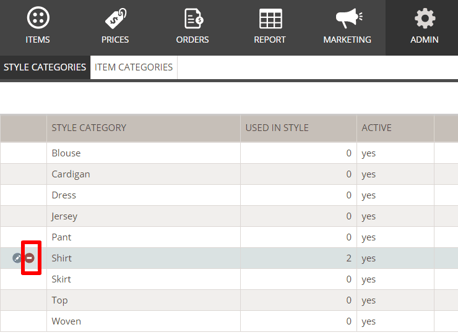
- Delete a category by hovering over the line and clicking the red 'delete' icon
- Click the green 'save' icon to finish
NOTE: If you delete a category that is used on styles already - the category will still be deleted and its value will be removed from those styles
Item categories are used to organise your item library of components for any style. In clothing, this could be fabrics, buttons, artwork etc. For shoes, it could be outer material, soles, laces etc.
Create Item Categories
Navigate to: Admin > Categories > Items
- Click the 'Add item category' button and a new table row will appear
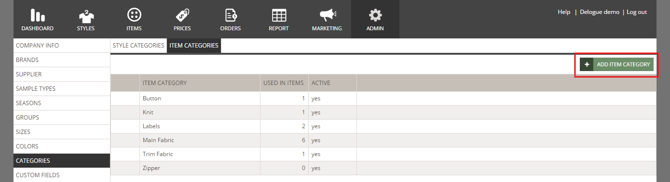
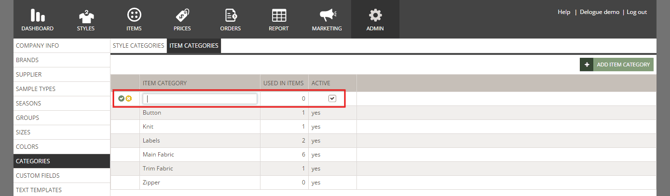
- Type a item category name - *mandatory
- Click the green 'save' icon to finish
- The column 'Used items' will display how many items are associated with the category
Edit Item Categories
- To change the item category name - mouse over the name or double-click on it
- The row will be in edit mode
- Click the green 'save' icon to finish
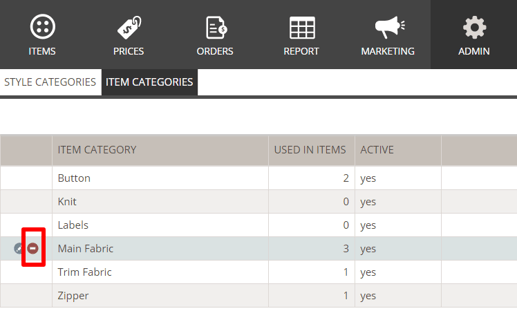
Deactivate & Delete Item Categories
You can deactivate categories if they should no longer be selectable for new items. The deactivation will not affect the items already using this category.
- To deactivate item categories select the category you want to deactivate and uncheck the option 'ACTIVE'
- Click the green 'save' icon to finish

- Delete a category by hovering over the line and clicking the red 'delete' icon
- Click the green 'save' icon to finish
NOTE: If you delete a category that is used on items already, the category will still be deleted, and its value will be removed from those items.
Categories For Compliance
When working with certificates and standards, you have the option to assign each certificate and standard to a category and a group in the header information, similar to how you organise styles. To enable this functionality, you must first set up the available categories and groups in the Admin section. These options will then appear in the dropdown menu when creating a new certificate or standard.
For example, you might want to create categories based on product types such as fibers, textiles, and footwear. While for groups you might want to organise certificates and standards by their purpose or focus, such as sustainability, chain of custody, social responsibility and product safety. Read more about how to set up groups here.
For additional filtering options, you can filter certificates by setting up custom fields for more specific attributes or classifications. Read more about how to set up custom fields here.
Create Compliance Categories
Navigate to: Admin > Categories > Compliance
- Click the 'Add category compliance' button and a new table row will appear
- Add category ID - used as unique identifier, especially useful during data imports and exports, ensuring that information aligns correctly across systems
- Type a compliance category name - *mandatory
- Click the green 'save' icon to finish

Edit Compliance Categories
- The columns 'Used in standards' and 'Used in certificates' will display how many certificates or standards the category has been used in
- Set the compliance category to active or inactive - when you create it, it will by default be set to active
- You can filter the content of each column by hovering over the column header
- Click on the 'three-line' icon and choose your filtering criteria
- Reset the filtration by clicking on the yellow 'Clear Filter' button

Delete Compliance Categories
- Delete a compliance category by hovering over the line and clicking the red 'delete' icon - if a compliance category is in use, it will not be possible to delete it
- Click the green 'save' icon to finish
