Introduction & Best Practice:
On style level you will find a sub-tab called 'Sample Request'. Here you will be able to ask your supplier to produce samples for approval.
The sample card will contain information about the amount, size and color that is requested by you. The supplier can easily find all the needed details to be able to produce the sample in the sample card.
Once you have published a style, you can start requesting samples. You will only be able to plan sample requests as long as the style is unpublished. After publishing the style, you can change the sample to be requested.
If you want to advise your supplier on future samples, set these samples to 'Planned' and request them once the previous sample is approved.
This can be used for booking capacity at the suppliers, without asking them to start making the samples. As soon a you are ready for the supplier to start, you change the state of the samples to 'Requested'.
Table of Contents:
- Before making Sample Requests
- Create Sample Request
- Update the quantity on the sample card
- Update the deadline on the sample card
Before making Sample Requests
1) Make sure that sample types are created in the Admin section
2) Make sure that the size range is selected on the Measurement chart
3) If you want to request a specific color, make sure the style color is added in the Item list
Create Sample Request
There are 3 different ways to create sample requests, and we will guide you through each options:
- 'Add a new sample request' on the style.
- 'Import' samples requests from another style
- Make samples through 'Batch action' (read the article here.)
NOTE: To use the feature of 'Batch Actions', your company must have the Professional license subscription.
Lets start with the first option 'Add a new sample request':
Step-by-Step guide:
1. Go to style > Sample request
2. Click the 'Add new sample request' thumbnail

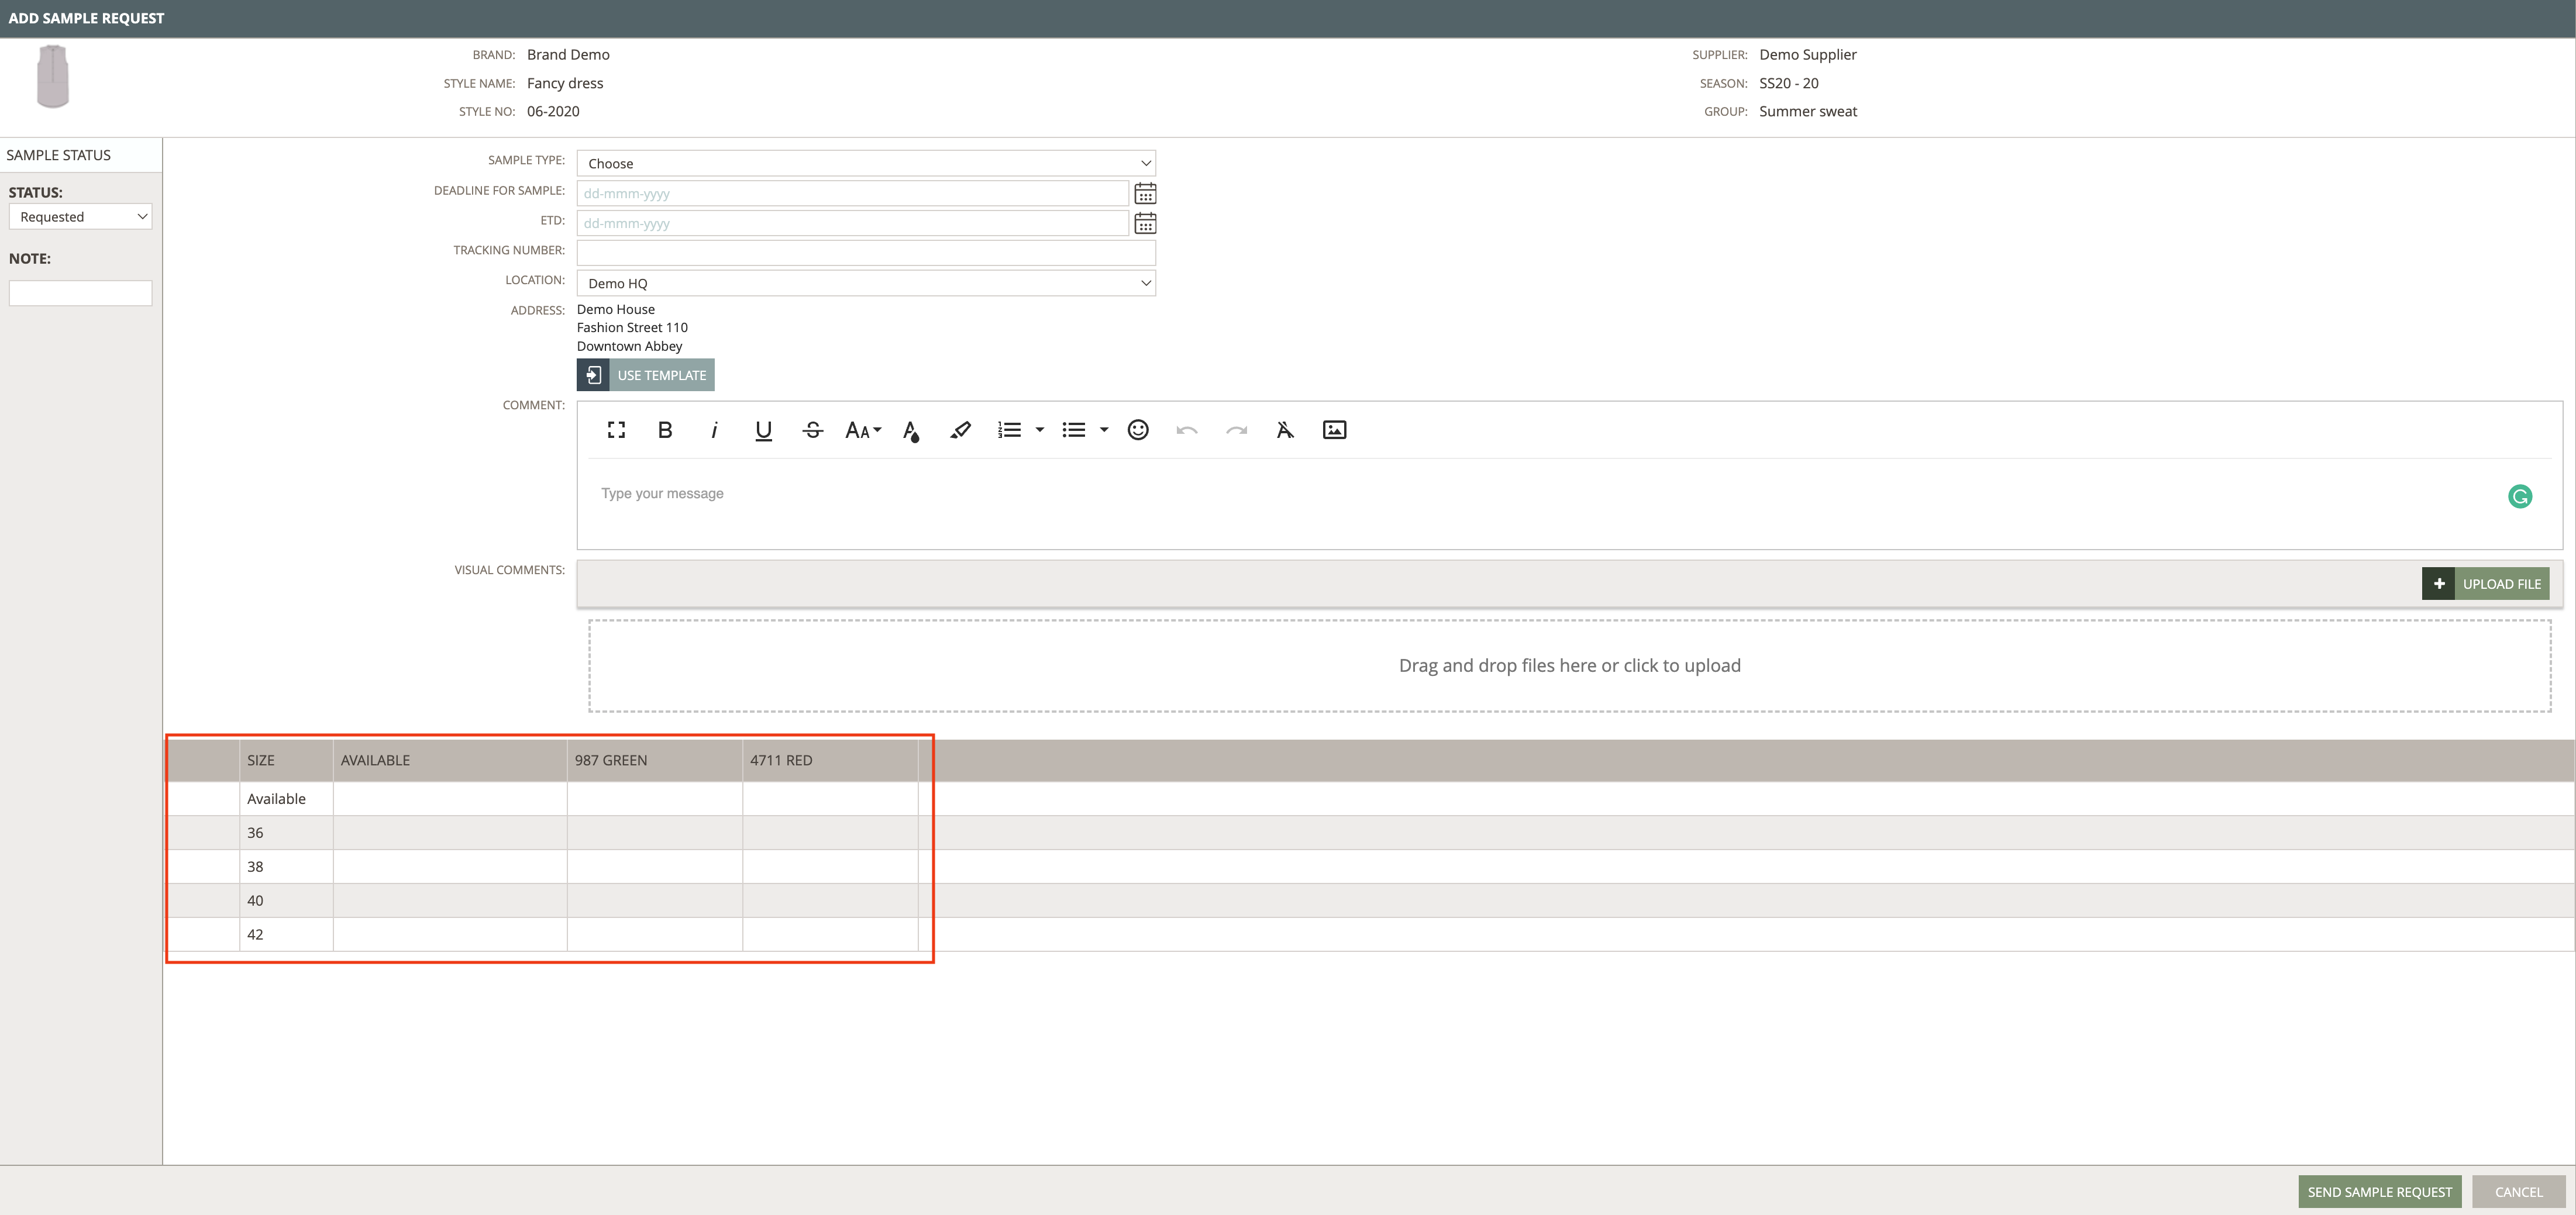
3. A pop-up window will show.
- Select your 'sample type'.
- Choose the 'deadline' (If you have added milestines when creating 'Seasons' in admin, the deadline for the given sample will appear here).
- Leave the 'ETD' field blank (The supplier will fill it out with when they expects to send the sample).
- Leave the 'Tracking number' field blank (The supplier will fill it out once the sample has been sent).
- Select a 'Sample location' (read here how to set up sample location)
- You can also write a comment/note and attach files to your request (optional).

NOTE: Learn more about how to use the 'Text Templates' for your comments here.
- Use the table to add the quantity per size and color you want to request. Mouse hover on each size - or double click - and click the edit icon to add the values. The 'Available' columns allows you to request an available color and/ or size.
- If you work with products e.g. shoes, where there is a need for ordering half samples instead of pairs, please not that this is also possible.
- Make sure that your Size Range allows Half Samples (learn all about size ranges here).
- Add '0.5' in the selection of size and color.

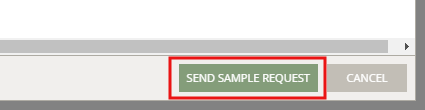
- Once you're done, click the 'Send sample request' button at the bottom right corner of the pop-up window:
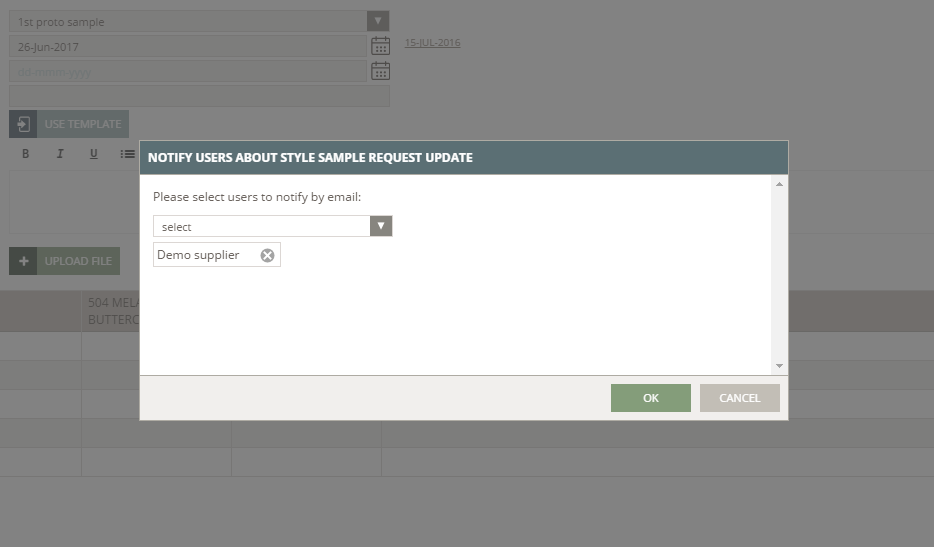
4. To complete the process, select who should be notified by email about this request - the supplier contact person is selected by default but can be removed.
5. If you choose not to notify anyone, the supplier contact will receive a notification inside Delogue but no additional email.
Import your Sample Requests
If you need to create multiple sample requests on the same style, and you don't want to add them one by one, you can choose to import them from another style.
Step-by-Step guide:
1. Go to style > Sample request.
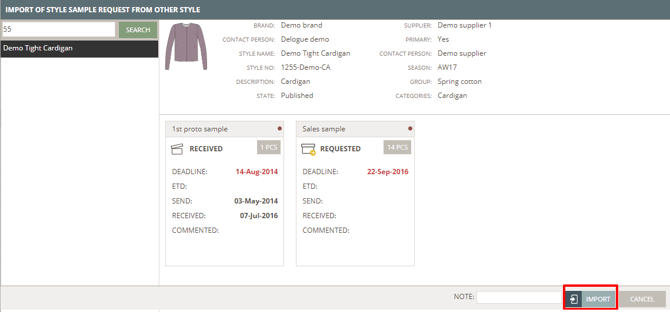
2. Click on the 'Import' button in the right corner.

3. A pop-up window will show.
4. Search for the Style you want to import your Sample Requests from.
Once you have found the correct Style you will see the basic Style Data and it's Sample Requests.
5. You now have different options:
Import (keeping deadlines)
Here you simply click on 'Import' button and all the Sample Requests - except those that are in Cancelled state - will be imported.
But they will be imported in 'Planned' state.

- They will keep the deadline - if they had one.
- They will keep the same Sample Type.
- They will have quantities if quantities are in the same size range and same colors.
- They will have quantities if there are quantities in Available - with the same Size Range and same Color.
- They will have no quantities if Size Range is different between the style they were imported from and the one they are imported into.
- They will have no quantities if Size Range is the same but different colors between the style they were imported from and the one they are imported into.
You can choose to import Sample Request from many different Styles - if you need that. They will always be added on top of those Sample Requests that are already on the Style you import into.
It is not possible to import Sample Request on a Style that is in 'Work In Progress' state.
Calculate the deadlines
When you are importing your Sample Request you have the option to let the system calculate the deadlines of the imported Sample Requests, based on the deadline distribution on the Sample Request you import from.
You can decide if you want to calculate the starting date or the ending date.
- Choose 'Start' or 'End'
- Select the date - using the calendar picker or type in the date.
![]()
- Once you click on 'Import' - all the imported Sample Requests will have their deadlines calculated.

Adding a Note to the sample requests
- With the Import feature, it is also possible to add a Note during the Import of your Sample Requests.
![]()
- Once you have clicked on 'Import' - the Note will be visible on the Sample Request cards.

- The Note can be edited from the Sample Request pop-up.
- The supplier will be able to read this Note.
Update the Quantity on the Sample Card.
You can change your quantity directly on the sample cards in all sample states except 'commented'.
Step-by-step guide:
1. Just click on the grey box, showing the amount.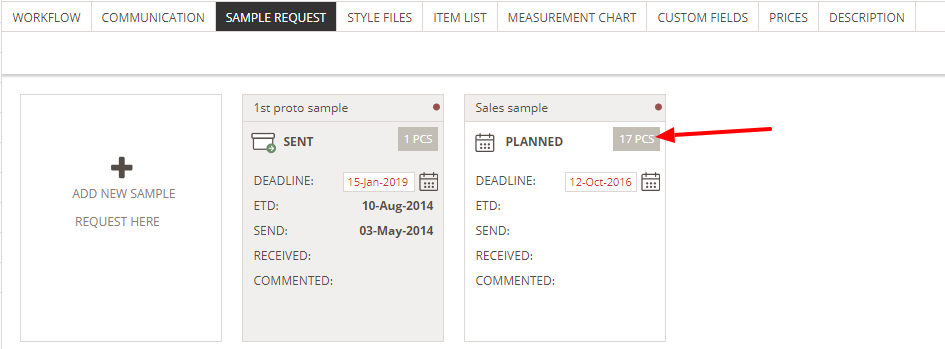
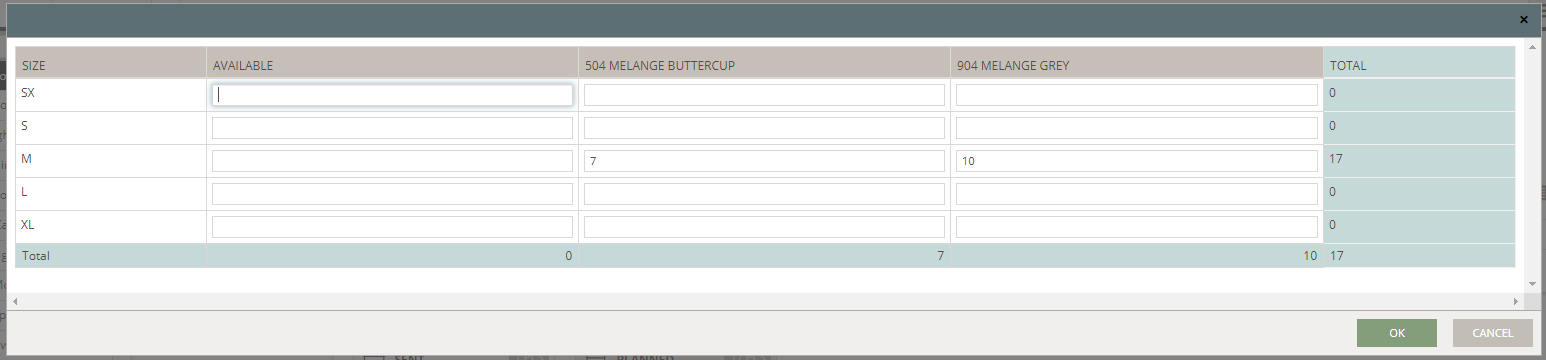
2. A pop-up will appear.
3. Click on the 'edit' pin - Suppliers can not change the quantity, but only read the info.

4. Once you have typed in your needed values - click on "OK" and your values will be saved and will now be displayed on your Sample Request pop-up and on your Sample card.
Update the Deadline on the Sample card
You can change the deadline directly on the sample cards in all sample states except 'commented'.
Simply click on the calendar and select the wanted date.
