Introduction & Best Practice
In Delogue, Brands help you organise and manage your product data across different labels within your company. By setting up brands, you can separate product information, certificates, and workflows for each label while still working in one shared platform.
Table Of Contents
- Before you start
- Step-by-step guide
- Create a brand
- Brand logo
- Edit brand
- Filter the list of brands
- Delete/deactivate brand
Before you start
1) Make sure the 'Company Admin' role is assigned to you as a user. To learn more about assigning different roles to a user, click here.
Step-by-step guide
Create A Brand
To be able to create styles and items in Delogue, you first need to create one or more brands.
Navigate to: Admin > Brands
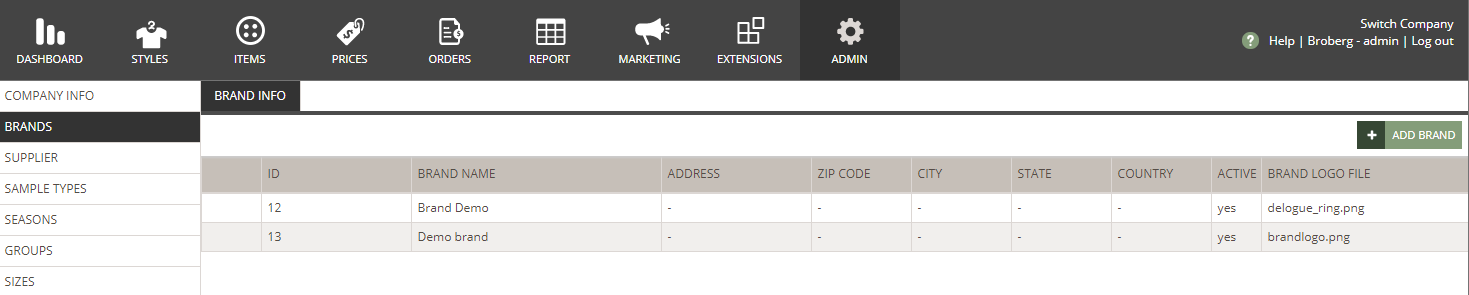
- Click on the green 'Add brand' button - a new row will be added to the Brand table
- Add brand ID - used as unique identifier, especially useful during data imports and exports, ensuring that information aligns correctly across systems
-
Type in the brand name - *mandatory
-
Add Address, ZIP Code, City, State and Country
- Any new brand will be set by default to active and can be set to inactive after being saved
- Inactive brands can not be selected on any styles or items
- Click 'Upload' to upload a brand logo
- To finish, click the green 'Save' icon

brand logo
- For the upload of the brand logo, all image formats are supported, like: .jpg, .png, and .gif etc.
- You cannot use .pdf, .ai, and .eps formats for the upload of brand logos
- The brand logo will appear on any style or item header which is associated with the specific brand

- In case a user has access to several platforms, when logging in, the brand logo will be displayed as the account preview. Read more about users with multiple logins here.

Edit brand
You can edit a brand name, address and logo at any time.
Navigate to: Admin > Brands
- Hover over the brand name you want to edit
- Double click or click on the 'Pen' icon
- Change brand name, address or brand logo
- Use the 'Active' toggle to set a brand as active or inactive
- To finish, click the green 'Save' icon
NOTE: Your changes will apply to all the styles/items using this brand.
Filter the list of brands
If you have more than one brand created, it is possible for you to filter the list of brands. Read more about filtration principles in Admin here.
Delete or deactivate a brand
If you no longer need a brand, you can choose to either delete or deactivate it.
Navigate to: Admin > Brands
- To deactivate a brand, hover over the brand name you want to edit
- Double click or click on the 'Pen' icon
- Use the 'Active' toggle to set a brand as active or inactive - the brand will no longer be selectable for any newly created styles/items, but will still appear on existing styles/items where it has been used
- To delete a brand, hover over the brand name you want to delete
- Click on the red 'Delete' icon
- Click on 'Yes, delete' to confirm
NOTE: Brands used in styles and items cannot be deleted.
Next Steps
Designer has access to more than one company
