Introduction & best practice
When you log in to Delogue PLM, you will see all the styles your customer has assigned to you in the style list on the left side of the platform. For a style to appear, your customer must first publish it. If you still cannot see the style, please check with your customer to ensure that you have been granted access to the relevant brand.
Table of contents
- Find a style
- Style work in progress
- Find specifications
- Print style specifications
- Download specifications to Excel
- Video guide - working with styles
Find a style
When you log in to Delogue, your styles will appear in a list of styles on the left side of the screen. When clicking on the style name, all the style information will be displayed.
- When selected, the style name is displayed with a dark colour background:

- Use the 'Sort by' drop-down menu to filter your style list by style number or style name. This will help you keep track of the specific styles you are in charge of.
Link from your email notification
When you receive an email notification about styles from Delogue, the link in the email will direct you to the specific style.
Search & filter to find a style
Find below the links to the articles that describe the following functionalities in Delogue:
- How to use the Quick Search functionality
- How to use the Filter functionality
- How to use the Recent filter
Save your favourite filter
Find below the link to the article that describes the following functionality in Delogue:
- How to: save favourite filters
Style work in progress
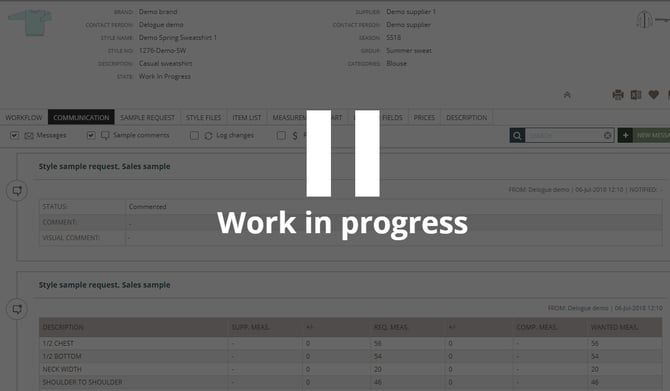
In Delogue, designer users can set a published style to the 'Work in Progress' (WIP) state. When a style is in WIP, you, as a supplier user, cannot make any changes to it; you can only view the style header.
- You will see a grey overlay on the style when in the 'Work in progress' state
The following tabs will be affected when a style is in WIP:
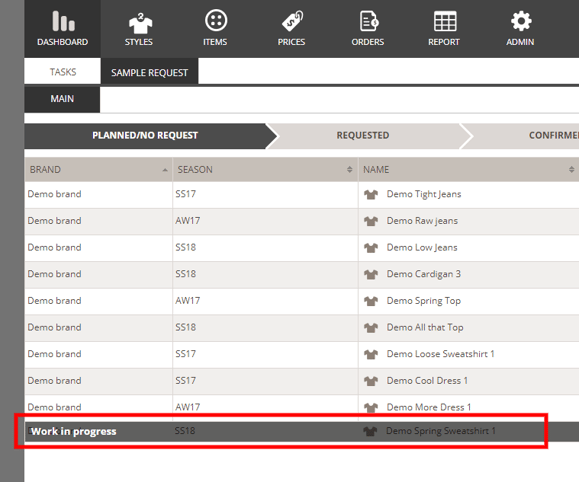
Dashboard > Sample Requests: A WIP style will be marked with an overlay visible for both you and your customer(s). Sample requests on styles in WIP cannot be edited or moved on the dashboard.
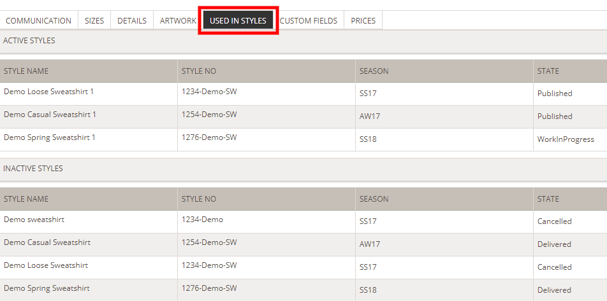
Items: In the 'Used in Styles' subtab, WIP styles will be listed in the 'Active Styles' section. You will see the state listed under the 'State' column.
Report > Sample Request overview: All sample requests belonging to a style in work In progress will have a grey overlay, and users cannot click on the style.![]()
Find specifications
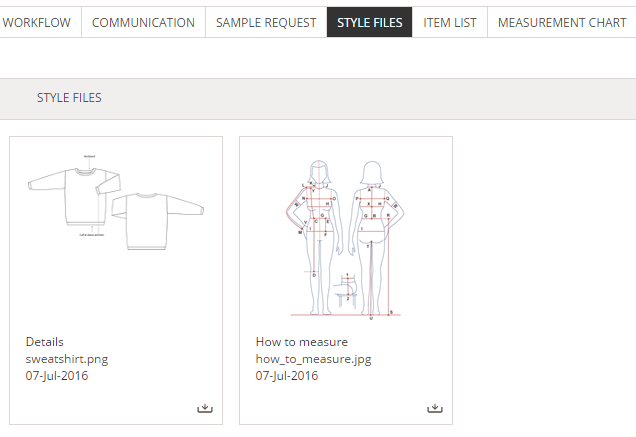
Style files
All files related to your styles will be uploaded under the Style Files subtab.
Navigate to: Styles
- Choose the specific style from the style list
- Click on the 'Style Files' subtab
Upload files to a folder
Navigate to: Styles
- Choose the specific style from the style list
- Click on the 'Style Files' subtab
- Click the 'Upload File' button

- Select a file from your computer
- You can upload all file formats, but only images (png, jpg) and PDF documents will generate a preview and appear when printing or exporting to Excel
- Type in the file name in the pop-up window
- Optionally, you can add a note to your file under the field 'File Note'
- Once you are done, click the green 'save' icon to upload the file

NOTE: Only the preview of the first page of an uploaded PDF will be displayed. Download the entire PDF for a full overview of all pages.
View your files
Once you have uploaded files, you might need to view them in detail.
Navigate to: Styles
- Choose the specific style from the style list
- Click on the 'Style Files' subtab
- Click on the file/image to open the file or click on the file name
- Any image or PDF will be opened in a new window or tab, depending on your browser settings

Download files
Navigate to: Styles
- Choose the specific style from the style list
- Click on the 'Style Files' subtab
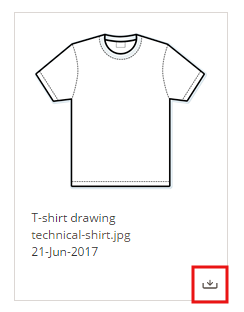
There are two ways to download a file in Delogue PLM:
Option 1- Click on the 'download' icon in the bottom right corner of the file thumbnail
Option 2
- Click on the file/image to open the file or click on the file name
- Click the 'download' button in the bottom right corner of the file pop-up

Add folders
Create new folders to organise and overview all your files. This is very handy when you need to share files with your customers, for instance.
Navigate to: Styles
- Choose the specific style from the style list
- Click on the 'Style Files' subtab
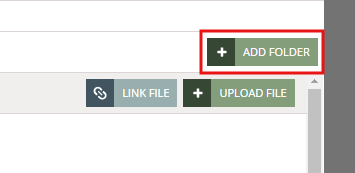
- Click the 'Add Folder' button
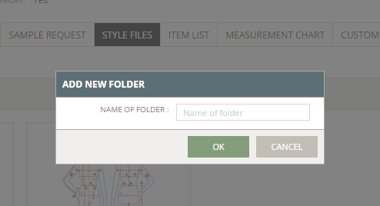
- In the pop-up window, type in the folder name
- Click 'OK' to save
Item list
Navigate to: Styles
- Choose the specific style from the style list
- Click on the 'Item List' subtab
The item list contains all the components of a specific style/product. Here, you will be able to find details of placement, amount and colour combinations. You can also see if the quality and colours are approved, indicated with red and green dots. If you are the supplier of an item, a link to the item library will appear.
It varies from brand to brand how detailed they make their item list, so if you have any doubts, please get in touch with your client.
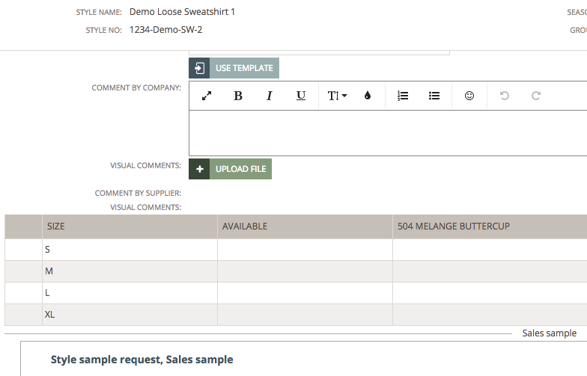
Size chart
The size chart section shows you the available style measurements for your customer.
Navigate to: Styles
- Choose the specific style from the style list
- Click on the 'Size Chart' subtab
NOTE: All customers select a size range to be able to make sample requests.
Sample request
The Sample request section is where you find all requests made by the brand including the sample status and deadline.
Navigate to: Styles
- Choose the specific style from the style list
- Click on the 'Sample Request' subtab
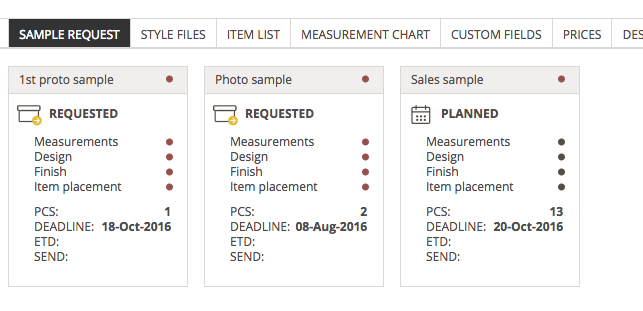
- To find details about quantity per colour/size, double click on the sample request
To read in detail how you can work with sample requests, find the 'Working with Sample Requests' article here.
Custom fields
Your customers can create different kinds of custom fields for both styles and items. When they create a custom field, they can define any field to be visible to you. They can also allow you to edit data. If that is the case, you will see a small edit icon, which enables you to make changes to the custom field.
The following steps describe how you can view and edit custom field data:
Navigate to: Styles/Items
- Choose the specific style/item from the style/item list
- Click on the 'Custom Field' subtab
- View/type in the needed value(s)
- Click on the 'save' icon

Barcodes
When your customer is using the Barcode module in Delogue you can access this information and see style variant barcodes under the SKU subtab.
Navigate to: Styles
- Choose the specific style from the style list
- Click on the 'SKU' subtab
- Choose the 'Barcodes' subtab
- If your customer has assigned barcodes, you will be able to see them in the column named 'Barcodes'

NOTE: As a supplier user, you can NOT edit or assign barcodes yourself.
Assortments
When your customer is using the Assortments module in Delogue, you can access this information and see assortments of style variants under the SKU subtab.
Navigate to: Styles
- Choose the specific style from the style list
- Click on the 'SKU' subtab
- Choose the 'Assortments' subtab
- You can view all assortments on a style
- You see an overview of the style variant, quantity per style colour and style size

Print style specifications
You can easily print style specifications.
Navigate to: Styles
- Choose the specific style from the style list
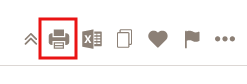
- Find the 'print' icon on the right side of the style header
- In the pop-up window, select the style parts you want to print using the checkboxes

- Click the green 'print' button
- A new browser window will open with the print preview
- Select your printer (if it's not selected by default)
- Choose how many copies you need to print
- Change the document layout to 'Landscape'

- Click the blue 'print' button at the top to print your style
NOTE: Only style files in image format will appear in printing.
Download specifications to Excel
You can easily download the style specifications using the export function.
Navigate to: Styles
- Choose the specific style from the style list
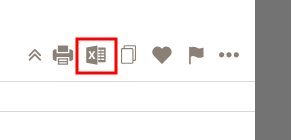
- Find the 'Excel' icon on the right side of the style header
- In the pop-up window, select the style specification you want to export using the checkboxes

- Click on the green 'export' button and the Excel file will be downloaded to your computer
- When you open your Excel file, you will notice that there are several tabs - one per style specification you selected
NOTE:
- PDFs are only shown with a thumbnail of the first page - you can always find the entire PDF by clicking on the link below the thumbnail.
- For images, you might see a smaller version of the image - you can find the original image by clicking on the link below the image.
- Word documents, Excel sheets, etc., can not be shown inside the Excel file - here you will need to click on the link to the respective files.

Video guide - working with styles
Description
The video guide explains the following topics for supplier users:
- Styles section & style list
- Style Files subtab and functionalities
- Item List subtab and functionalities
- Size Chart (former Measurement Chart) subtab and functionalities
- Export and print style specifications
- Search and filter styles
- Create favourite filters
Next steps
Supplier: working with reports
Supplier: working with sample requests