Introduction
Supply chain mapping gives you visibility into the full production journey behind your styles and items. When you create a mapping request, you select the process categories relevant to your product. Your supplier then confirms which specific processes they perform within those categories.
You do not need to know every individual process your supplier uses — select the categories that apply, and your supplier fills in the operational detail.
Table of contents
- Video Guide
- Before you start
- How to create a mapping request. Step-by-Step guide
- Publishing the request to the Supplier
- Tracking request status
Video Guide
Before you start
- Make sure you are logged in to your Delogue brand account
- Confirm that your supplier has been converted to the Supplier Portal — mapping requests can only be sent to Supplier Portal accounts (read more here)
- Have a clear idea of which styles or items you want to map
NOTE: The Supply Chain Mapping tool is an add-on Delogue module that requires a license for the brand user. Contact the support for more info.
How to create a mapping request
Navigate to Delogue 2.0 > Click on the Mapping Request menu on the left-hand side menu.
Click 'New Request' to get started.
Step 1 — Basic details
- Select the supplier — this determines which styles and items are available in Step 2
- Assign a contact person on the supplier's side
- Add a reference number - most likely a PO number
- Add an optional order name
- Select a purchase order estimated time of delivery (ETD) date
- Click Continue
Step 2 — Add styles
-
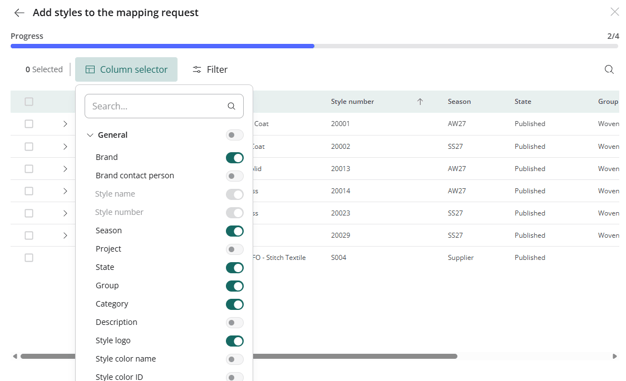
You now have a full list of available styles from the selected supplier.
- Notice that the column selector allows you to customize the view, making the selection much easier. Just toggle in the columns you want to see:
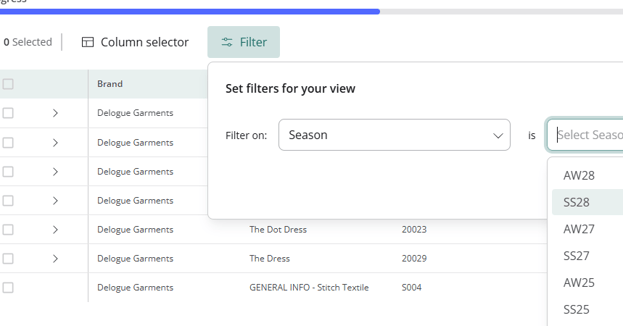
- Use the filter to filter in the chosen columns:
-
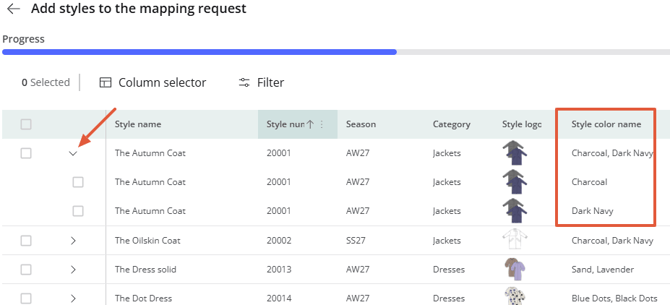
Search for and select the styles you want to include. You can add multiple styles to a single request.
- Use the drop-down arrow to select styles on color level.
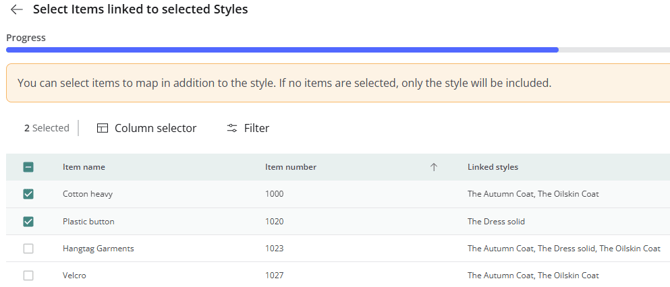
Step 3 — Add items
- From your chosen styles, now select the items from the BOM/item list you want to map by selecting the checkboxes. If no items are selected, only the style will be included
Step 4 — Select process categories
This is where you define the scope of the mapping.
-
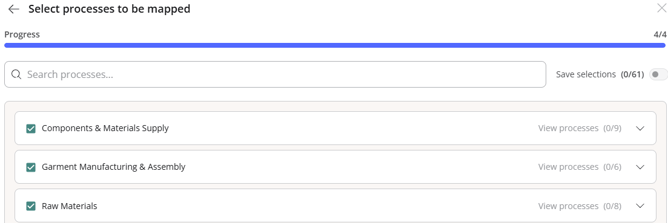
Choose from 6 predefined process categories:
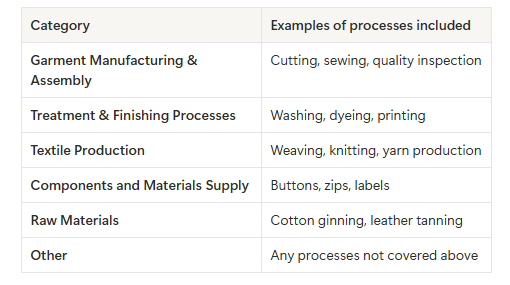
Each category shows the number of processes it contains.
-
Click on a category to expand and preview the individual processes within it.
- Select the checkboxes next to the categories you want the supplier to map. You can select one or multiple categories.
TIP: You do not need to know exactly which individual processes your supplier performs. Select the categories that broadly apply to your product — your supplier will identify the relevant processes within each.
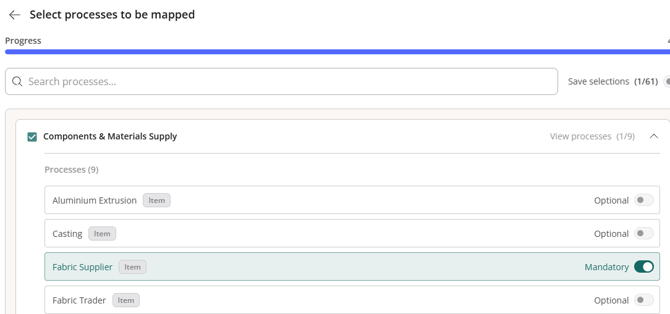
Step 5 - Setting mandatory processes
If there are specific processes that must always be mapped, you can mark them as Mandatory.
- Expand a category to view individual processes
- Toggle the Mandatory switch next to any required process. Mandatory processes are locked and cannot be deselected by the supplier — they will always appear in the mapping.
Step 6 - Saving your selection for future requests
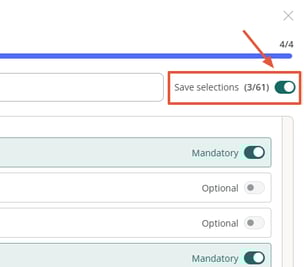
TIP: Once you have completed your process selection, and before you click submit, you can save your selections for use in future mapping requests.
- Check the 'Save selection for next mapping request' option before you proceed to save the selection
Step 7 - Submitting a draft request
After completing all 4 steps:
-
Click 'Submit'.
-
This creates a draft request that is not yet visible to your supplier. You can still edit styles, items, and processes at this stage. The column "Actions" shows the status of the request.
Publishing the request
-
When you are satisfied with the request, click 'Publish'.This sends the request to your supplier and triggers an email notification to the contact you selected.
The request moves to Requested status.

Editing the request
-
After publishing, you can still edit the process selection until the supplier has confirmed processes (i.e., moved the request to Initiated status).
-
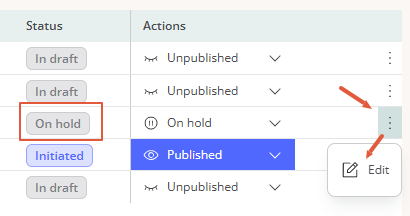
Styles, items, and other details cannot be changed once published, unless you change the status to "On hold".
- When the request is "on hold", click on the 3 dots on the right-hand side of the request to edit:
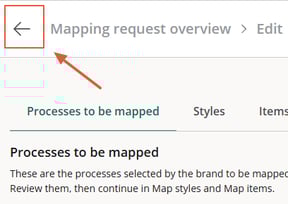
- Now you can edit the request, and the system will automatically save your corrections.
- Use the arrow back to come back to the overview of mapping requests
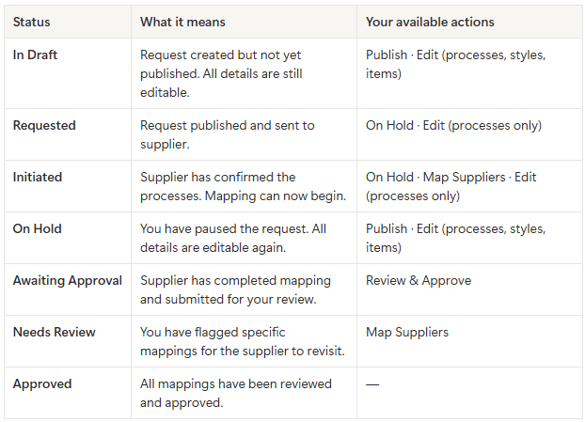
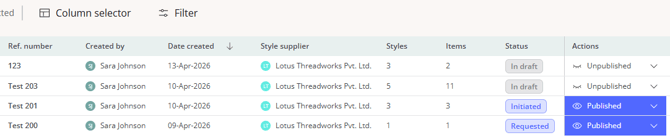
Tracking request status
You can monitor all mapping requests from the Mapping Request overview. Each request shows its current status, the associated supplier, and the number of styles/items included.