Introduction & best practice
The Colors section in Admin is a centralised library for creating and selecting colors used in sales and production orders, ensuring consistency and reducing errors when adding colors to styles and items.
Table of contents
Before you start
1) Make sure the 'Color Admin' role is assigned to you as a user; otherwise, it will NOT be possible to see this section. To learn more about assigning different roles to a user, click here.
2) To set up your colors in multiple languages, you have to create the additional language in Admin first. To read more, click here.
3) Use a Pantone code under 'Color Reference' to generate a colored swatch both by Style Color Names and in Item Colors.
4) For the use of 'Color Group', you need to create groups under the subtab 'Color Groups'.
NOTE: To minimize manual work, you can import colors from an Excel file through the import function. Read more about the Color Import here.
Step-by-step guide
Creating colors
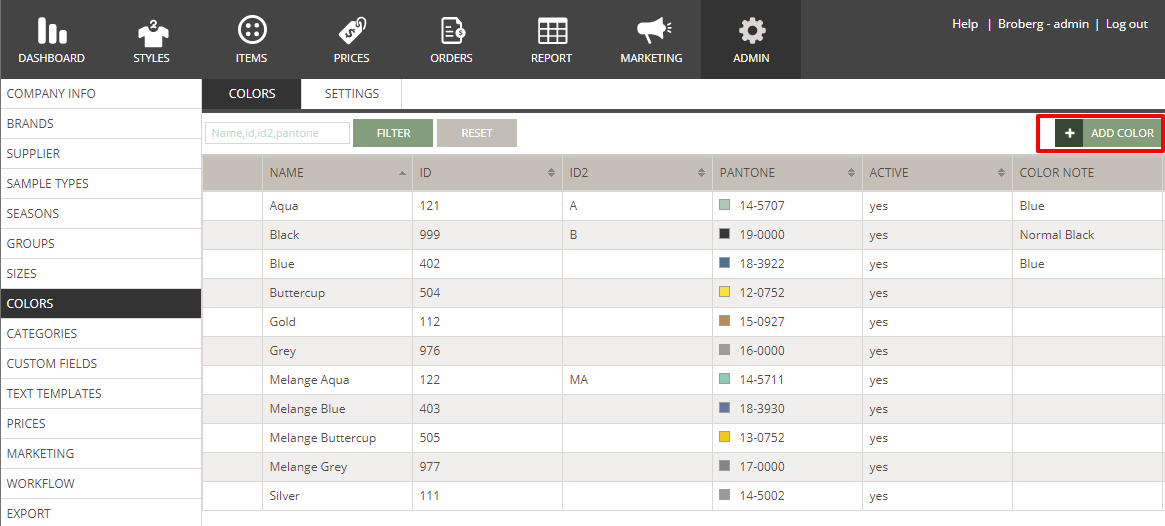
Navigate to: Admin > Colors
- Choose the subtab 'Colors'
- Click the 'Add style color' button
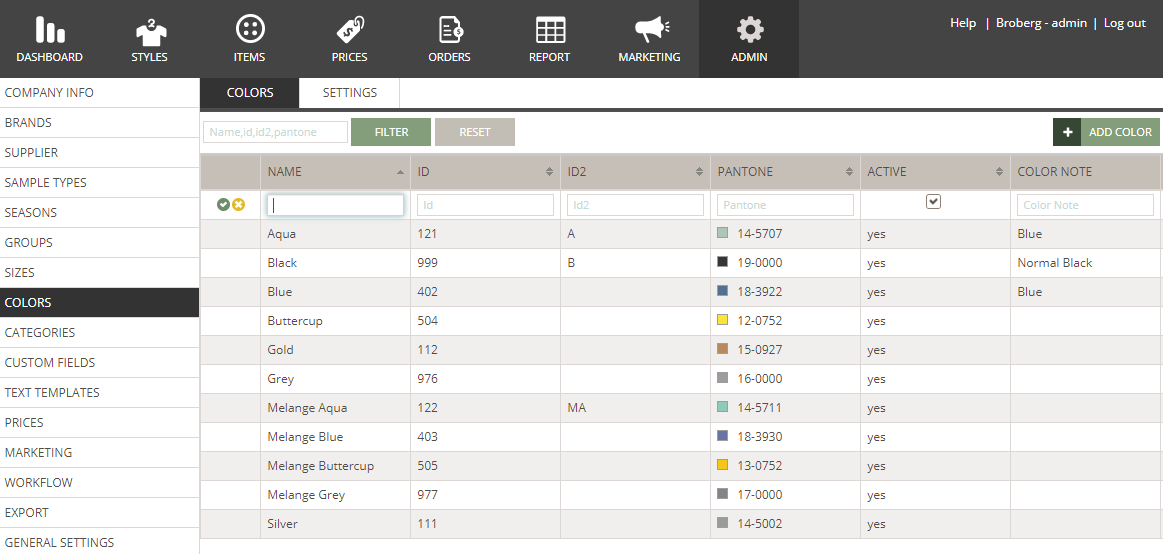
- In the new table row, type in the color name
- Type the ID and the ID2 (both is optional) - used as a unique identifier, especially useful during data imports and exports, ensuring that information aligns correctly across systems
NOTE: The ID is often used as a part of the SKU that can be generated per style. So it is important to consider the logic. If you already have color codes in the ERP or other system, this code must be used as the ID for colors in Delogue.
- Type a Pantone number - this field is optional
- When adding the Pantone code (e.g. 17-1463 or 17-1463 TCX), a colored swatch is displayed, as you can see in the images above and below
NOTE: You cannot create style colors with the same combination of Name and ID. This is to ensure valid data for ERP solutions.
- The color is set to 'active' by default
- To use a color note is optional, and the information cannot be seen in the platform (read more below)
- Add a color group if needed - read more below
- Click the small green 'save' icon to save
Changing color ID's
If you need to change either the color ID or color ID2, the system comes with a pop-up. The pop-up informs you that the changes made in the IDs will be updated on any sample request where this color is in use.
You can find more advanced color settings for color IDs in the advanced color settings article here.

Renaming colors
You can change the names of your colors whenever necessary.
Navigate to: Admin > Colors
- Choose the subtab 'Colors'
- Hover over the color name
- Click the blue 'edit' icon, or double-click on the table row
- Type in the new name
- Click the small green 'save' icon to save your changes
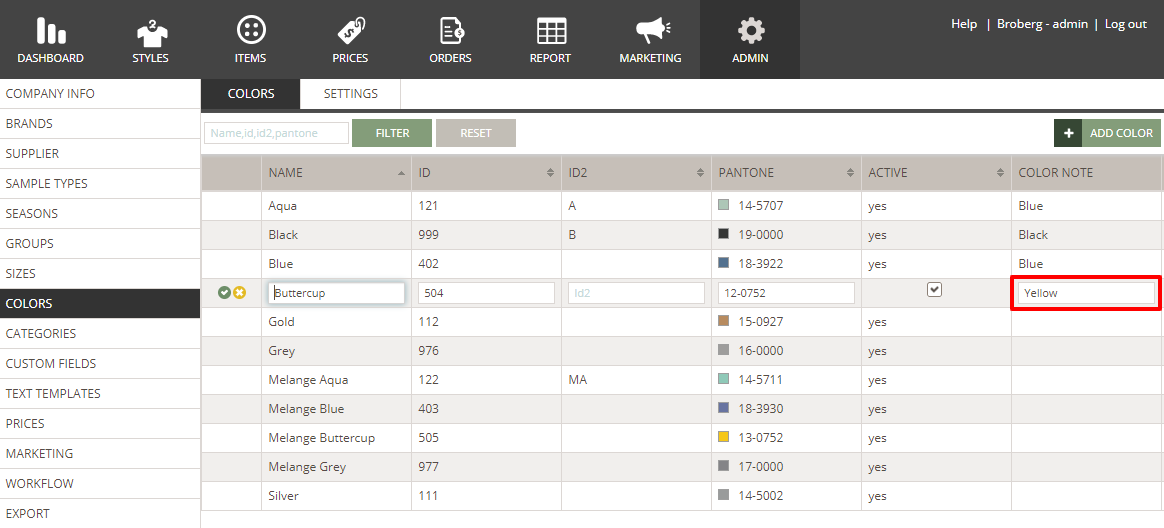
Use color notes
For each color you can add a Color Note - here you can type in extra info if you need it. The Color Note will be exported when you export to XML or make an FTP export, but it will not be displayed on the platform.
Use color groups
For e-commerce searchability purposes, it can be useful to assign colors to color groups. For example, if you want your customer to be able to search for all blue color variations of a product.
NOTE: To use the Color Group feature, your company must have the Professional license subscription.
Navigate to: Admin > Colors
- Choose the subtab 'Color Groups'
- Click 'Add color group'
- Type a group name - e.g. main group of colors like 'Blue', 'Red' and 'Yellow'
- Define a color group ID if needed - used as a unique identifier, especially useful during data imports and exports, ensuring that information aligns correctly across systems
- New color groups will be set to active and can be set to inactive after saving
- Click the small green 'save' icon to save your changes

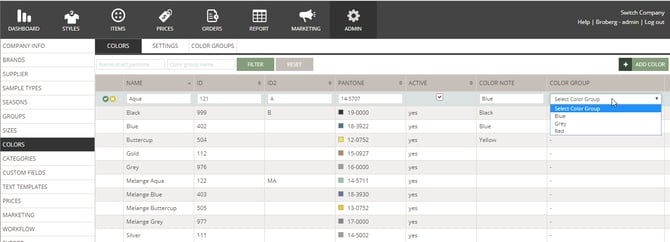
Assign colors to color groups
It is now possible to assign single colors to a Color Group.
Navigate to: Admin > Colors
- Choose the subtab 'Colors'
- Hover over the color name
- Click the blue 'edit' icon, or double-click on the table row
- Select the needed color group from the drop-down
- If you needed, a color can be assigned to multiple color groups
Remove colors from color groups
It is possible to remove colors from color groups after they have been added.
Navigate to: Admin > Colors
- Choose the subtab 'Colors'
- Hover over the color name
- Click the blue 'edit' icon, or double-click on the table row
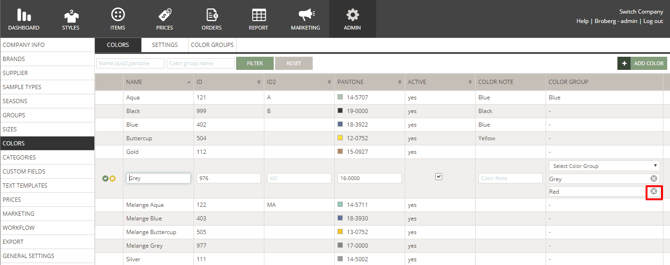
- Click on the grey 'cross' next to the color group name you want to remove your color from
Delete color groups
In case you want to delete a color group - this can be done. Important for that is that the color group in question has no colors assigned to it. You will be prompted to transfer these colors to a different color group.
Navigate to: Admin > Colors
- Choose the subtab 'Color Groups'
- Hover over the color group name
- Click the blue 'edit' icon, or double-click on the table row

- After colors are transferred, the color group will be deleted
NOTE:
- You will ONLY see Color Groups in Admin - it will not be displayed anywhere on your styles or items.
- Color groups will be exported with your XML or web service.
- You can export color groups as an option in your Custom Report.
Deactivate a color
To deactivate a color, select the color you want to deactivate and un toggle the slider in the column 'ACTIVE'.

Advanced color settings
After setting up the basic color library, you can enhance your use of colors in Delogue with advanced features. You can enable multiple languages for your colors, set advanced Admin color settings and efficiently update or upload new data using the import function.
Integration with your ERP
If you are going to integrate with an ERP provider, make sure that the IDs and style colors have the same structure as the ERP. For some ERP systems, it is a requirement that the ID have the same number of digits on all colors.
Unsure of what rules to follow?
- Please reach out to your ERP provider for guidance.
Use multiple languages
It is possible to include colors in different languages.
Read more about how to set up additional languages here.
Color import
It is possible to import and update colors to Delogue from an Excel file.
Read more about the color import here.
Advanced color settings
Configure your style and item colors with the advanced color settings in Admin.
Read more about it here.