Table of Contents
Step-by-step Guide
Add Users
In the process of getting you and your brand started, it is important to add your colleagues and team members to Delogue PLM so you can start collaborating. Follow the steps below to invite them:
Navigate to: Admin > Company Info > Company Info
- Click on 'Add user'

- Type a user name under 'Name' - *mandatory
- Type the user's email address under 'Email' - *mandatory
- It is optional to also fill in a first name and last name
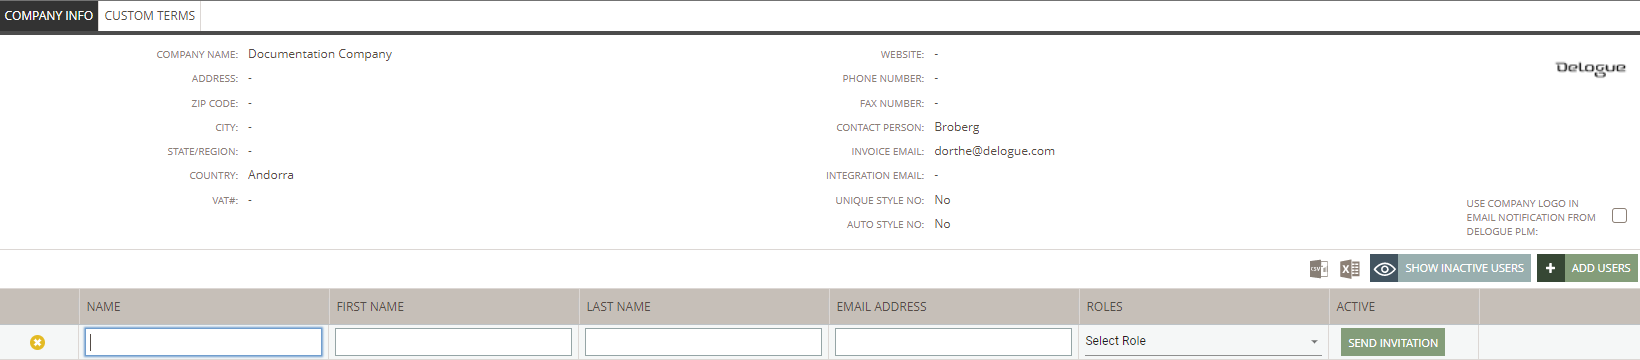
- Choose the user roles from the drop-down - a user must have at least one role assigned
- Click on the green 'Send Invitation' button - the user will receive an email invitation
Resend User Invitation
If a user has not yet been activated, you can send him/her a new invitation. To do so:
Navigate to: Admin > Company Info > Company Info
- Mouse over the user information and click the blue 'edit' icon
- Click 'Resend invitation' - the user will receive an email invitation
User Roles & rights
There are different user roles in Delogue. According to what your colleague should work within Delogue they will need different user roles. Any Admin User can assign roles to other colleagues.
Based on your user profile, we recommend the following roles:


There is also the option to add on Order and Marketing modules that then can be added as roles to the users if relevant.
Editing Users
There are several things you can edit once a user has been added.
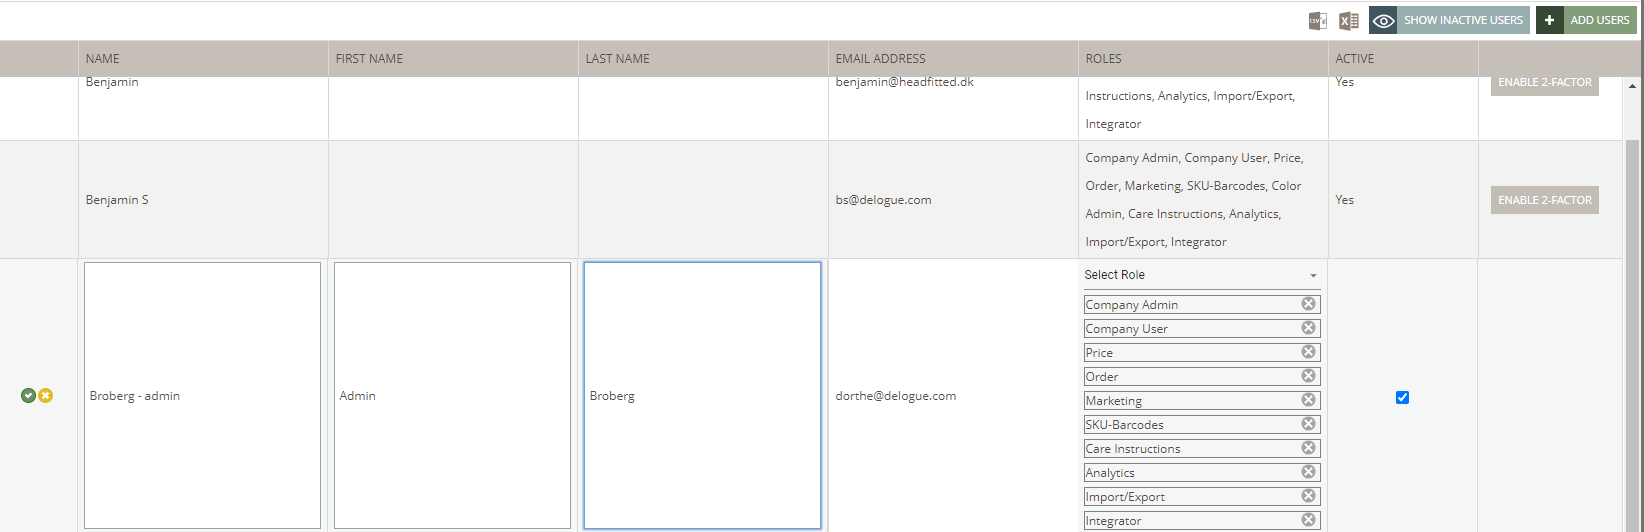
Update user roles
Navigate to: Admin > Company Info > Company Info
- Mouse over the user information and click the blue 'edit' icon
- Click on 'Select Role' - the menu of available roles will be displayed
- Click on any role that you want to assign to the user - any active user has to have at least one role assigned
- Click on the grey 'cross' icon to remove a role from the user
- Click the green button to save your changes
- Refresh the browser
Update user information
Navigate to: Admin > Company Info > Company Info
- You can change name, first name, and last name of an already added user
- Click the green button to save your changes
- Refresh the browser
- The email address of an already existing user can not be changed
- In case a user has a new email, you must first deactivate the user and then create a new account with the new email
- Tasks and contacts can be transferred - read more below
Deactivate/Delete Users
If one of your colleagues has left your company, you might want to deactivate their account.
Navigate to: Admin > Company Info > Company Info
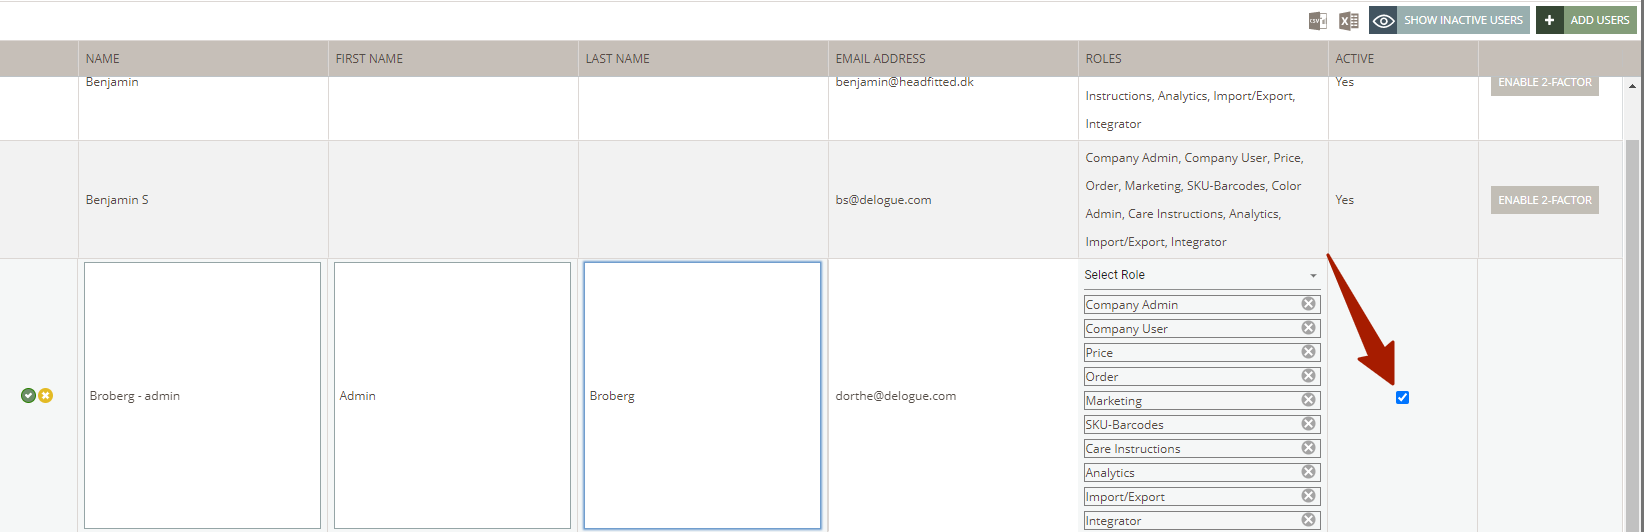
- Mouse over the user information and click the blue 'edit' icon
- Remove the check mark under column 'Active'
- Click the green button to save your changes
- Refresh the browser
You might end up having some colleagues that never activated their account. You can delete these colleagues from your list of users.
- Mouse over the user information - the delete icon will appear
- Click on the red 'delete' icon
- Confirm that you want to delete the invited user

Transfer User contacts And tasks
If your colleague is responsible for managing any styles, items, or tasks but is unavailable due to prolonged absence or leaving the company, you can transfer these responsibilities to another colleague within your organisation. This feature can be very useful in ensuring that important tasks are not missed or delayed. Another scenario could be that you need to change the email address of an existing user.
The steps below explain how you can transfer tasks and contact duties to someone else:
Navigate to: Admin > Company Info
- Choose the user to transfer tasks and contacts from
- Click on the grey 'Transfer' button
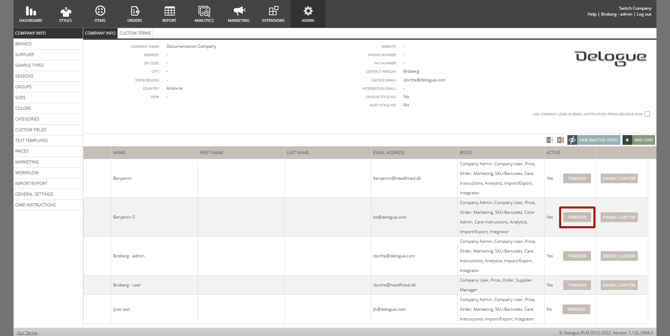
- Choose the user name you want to transfer all style and item contacts to
- Choose the user name you want to transfer all tasks to
- Click on 'OK' - all contacts and tasks will be tranferred
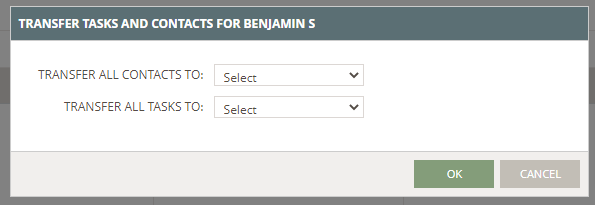
NOTE:
- You transfer all tasks and/or all contacts - it is not possible to select which one you transfer
- Brand contacts from Compliance certificates are not transferred and will have to be changed manually
Hide Inactive Users
In case you have a lot of inactive users on your user list - it might help your overview if you hide the inactive users.
- Click on the blue 'Hide Inactive Users' button - you can at any time display them again by clicking on the button once more

NOTE: Inactive users do not occupy license seats within your company's account.
Export User list
To get an overview of all your users, you can export the list of users from the Company Info page as Excel or CSV file.
- Click on the 'export' icons - the file will be downloaded with all created user information

Next Steps