Introduction & best practice
On the style page you will find a sub-tab called 'Workflow'. This is the place to make a to-do-list of tasks that needs to be done for the specific style. The tasks can be added as single tasks or from the workflows created in the Admin section.
The list can help every team member to overview all coming deadlines of the style and the tasks can be divided between brand users and supplier users.
INFO: Learn more about building your workflows through this guide.
Table of content
- Add Workflow to Styles
- Add extra Tasks
- Import workflow
- Edit a Task
- Working with Tasks
- Filter Tasks
- Sorting
Add workflows to a style
In the Styles section:
1. Start by selecting the style you want to add a workflow to
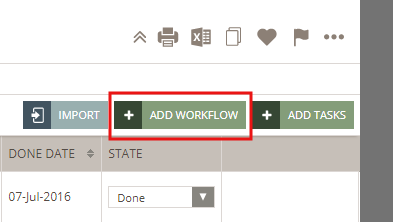
2. Go to the 'Workflow' sub-tab and click the 'Add workflow' button
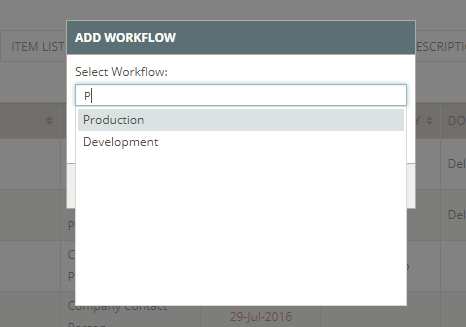
3. In the pop-up window, select the workflow you need - simply start typing the name of the workflow and a list of the workflows added in the Admin section will appear.
4. Add a deadline (*mandatory) - the system will automatically calculate the correct deadline based on the 'Days before deadline' defined in the Admin section.
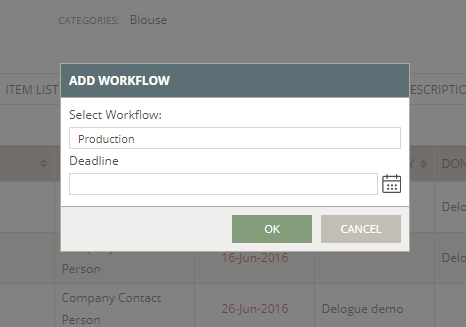
5. Click OK to save.
If you need to add more than one Workflow, simply go through the same steps mentioned previously.
Add extra tasks to a specific style
When you need to add more single tasks specifically for a style:
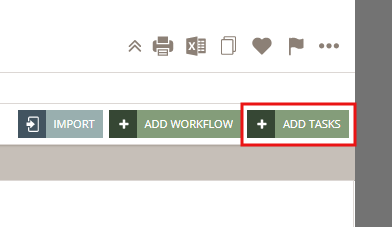
1. Select the style and click the 'Add Tasks' button
2. In the new table row, fill in the required info: task name, assigned to, deadline.You can also connect the task to one of your workflows by selecting the workflow name in the drop-down.
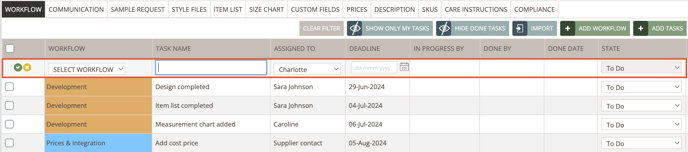
NOTE: By default, the system will assign you to the task but you can change this setting. Any tasks you add to your style will not have any influence on the workflow you created in the Admin section - they are only for this specific style.
Import workflow
Another way of creating tasks on your style is to import from another style.
1. Click on 'import'

2. In the import pop-up window, search for the style you want to import from.
A preview of the style's tasks will be displayed.

3. Click on 'Import'
All tasks will be imported with the same assignee and same deadline.
Edit a task
To edit a task on a style level:
1. Select the task row(s) that you want to edit.

2. A pop-up will appear in the right bottom corner.
3. You can make changes to:
- Workflow name
- Assigned to
- Taskname
- Set deadline or Move deadline
INFO:
'Set deadline' means that you choose a specific date for the task.
'Move deadline' allows you to push the deadlines with a specific amount of days - keeping the relation between the selected tasks.
- Delete Deadline
- State
- Delete the task(s)
NOTE: Anything you edit here, it will not have any influence on the workflow you created in the Admin section - they are only for this specific style.
Working with your tasks
When working with tasks, it is important to keep them updated so you always have an accurate knowledge of your process.
You can set your tasks to To Do, In Progress and Done according to your workflow.
Simply use the drop-down menu in the State column for this matter. The system will automatically log who has changed the state of the task and on what date it happened to help you keep track of all information.

It is also possible to remove a task from the 'Done' state and set it back to either 'To Do' or 'In progress'.
Filter tasks
On top of the workflow table, you can choose to filter your tasks by hiding all the done tasks and/or choose to only see your tasks.
Simply click on the buttons 'Show only me tasks' or 'Hide done tasks'.

Sort by
You are able to sort your workflow in any order you want, using the different filter options for each column. By default, the system sort tasks by 'Deadline' but if it makes more sense for you to sort on something else - you can do it so.
Filter in columns
You can also make a filter for each column - so you change the order of the list of tasks.
1. Mouse over a column name and click on the menu icon

2) Make your selection of filter by following the filter option.
Click on the 'Apply' button.

