Comment Fields for Sample Types - Admin Setup
If you want to divide your sample comments into different topics, or gather all comments in one comment field the Comment Fields for Sample Types allows you to set up your own preferences in Admin
Introduction & best practice
Comment Fields are used when you comment on sample requests. By default, a set of comment fields is created: Measurement, Design, Item Placement, and Finish.
Some brands prefer to disable some of these and/or create their own comment fields. This article guides you through the setup of comment fields in the Admin section.
Table of Contents
- Disable comment fields
- Create a new comment field
- Set comment field to internal
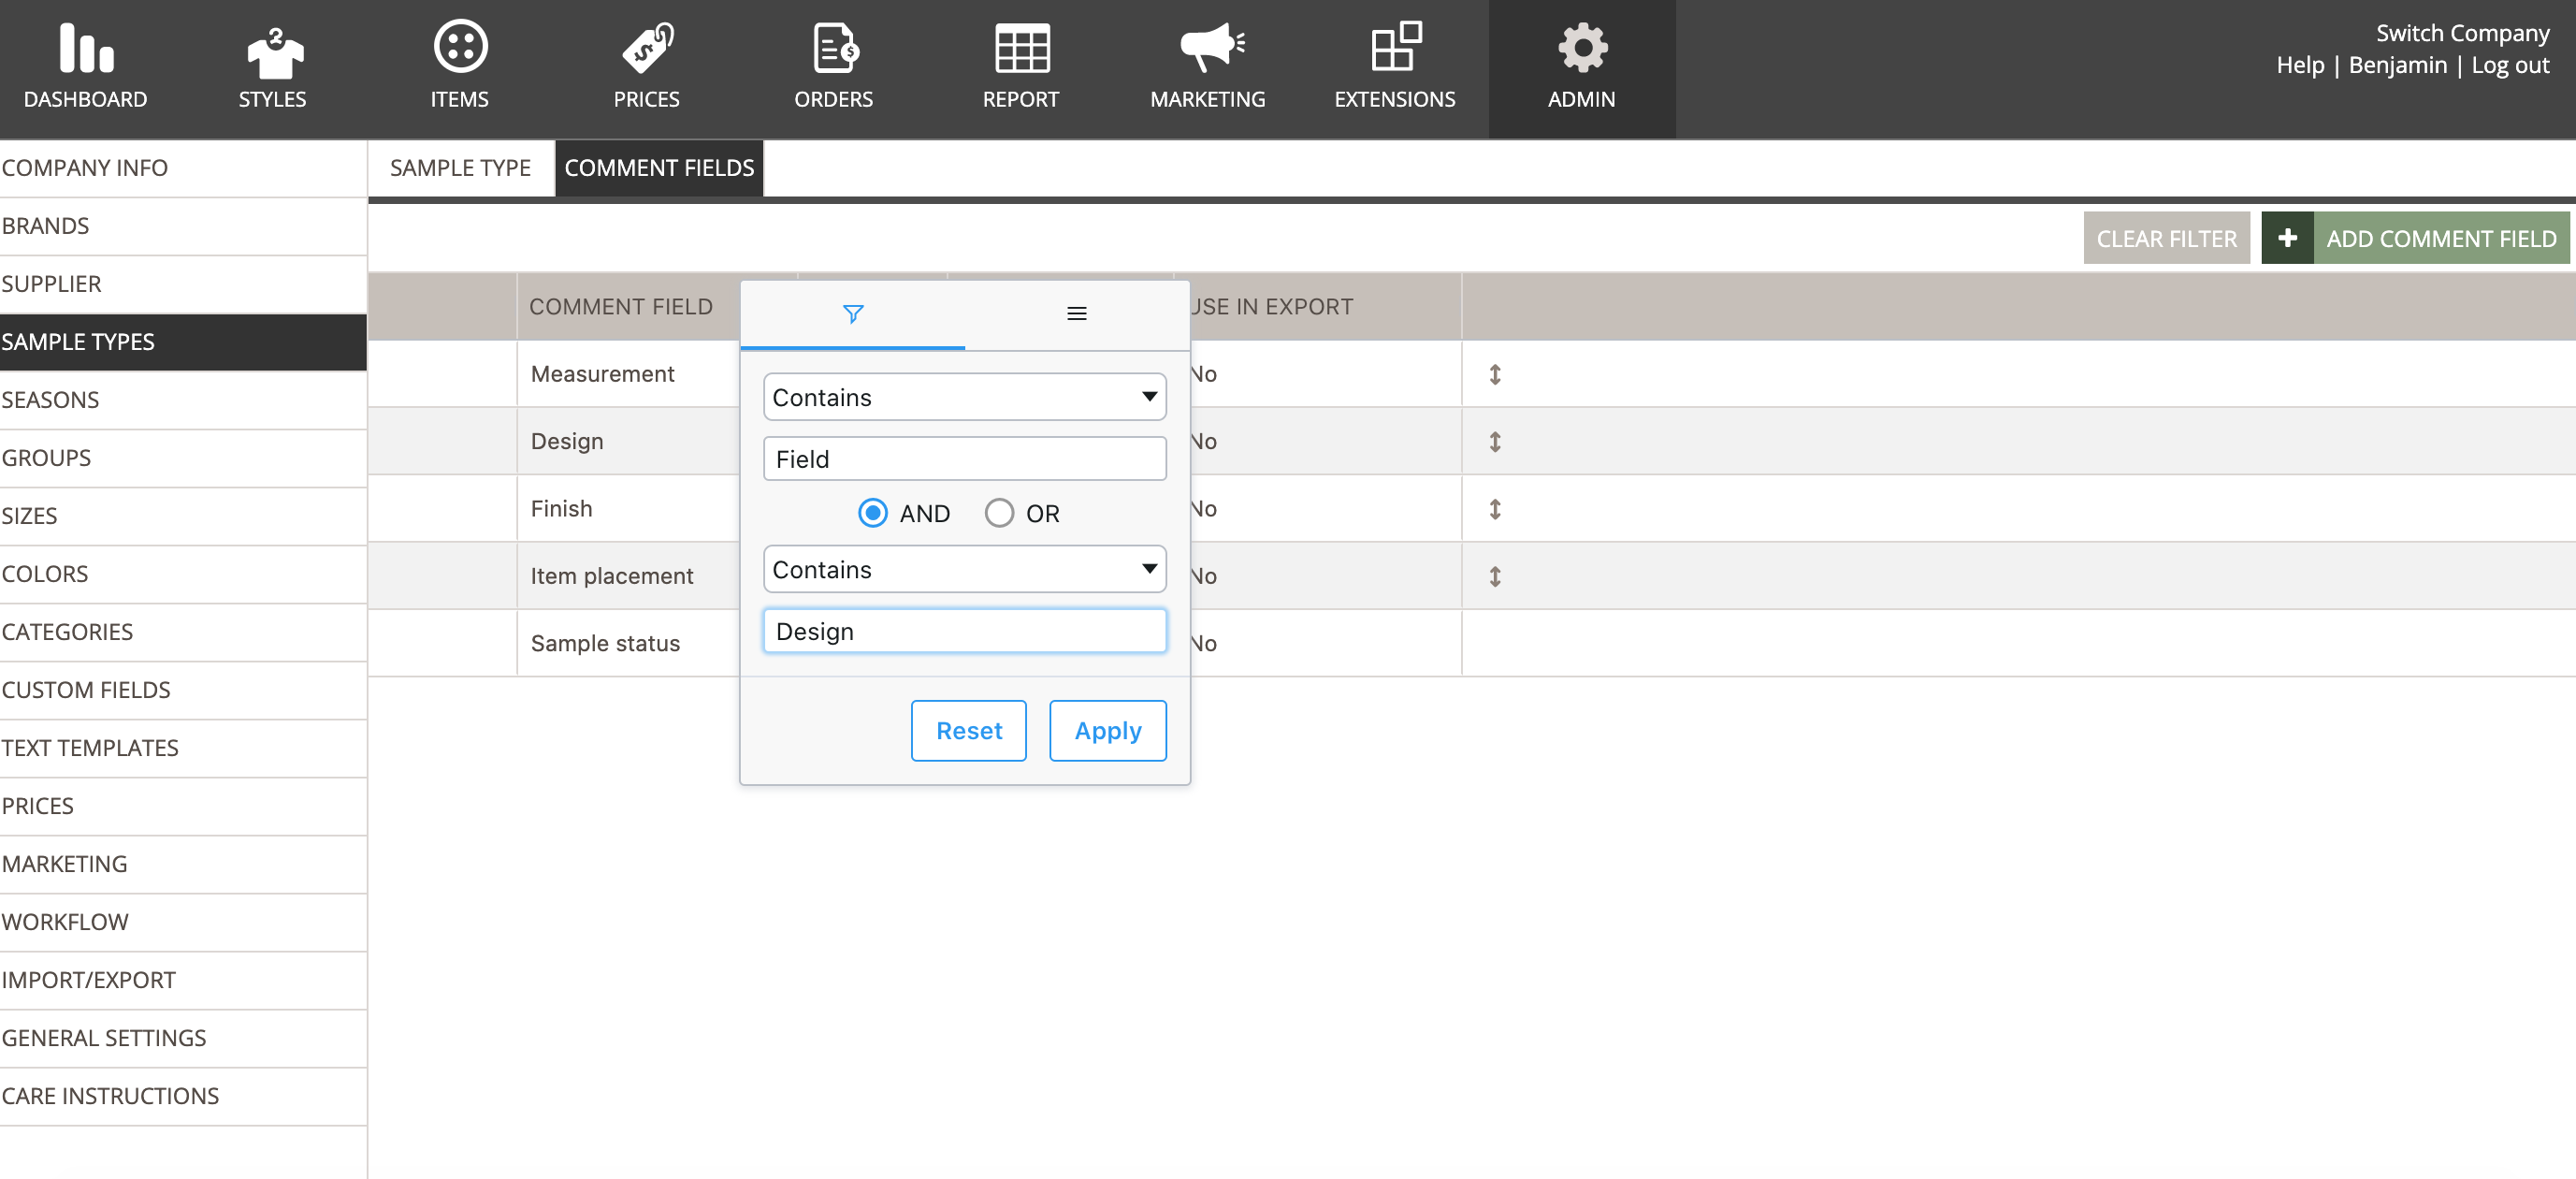
- Filter the list of comment fields
Disabling comment fields
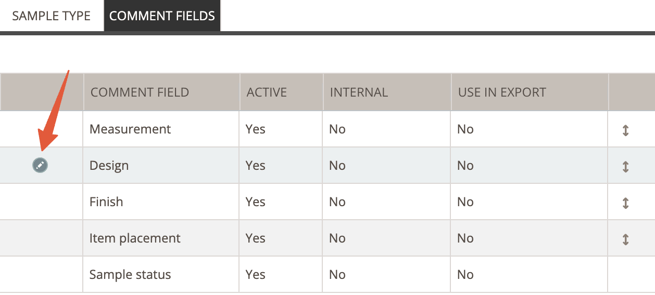
Navigate to: Admin > Sample Types > Comment Fields
- Set the comment field you want to disable to edit mode by clicking on the 'pen' icon
- Toggle off the toggle under column 'active' to inactivate the comment field
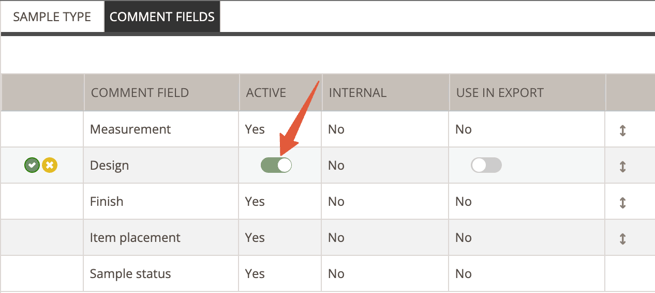
NOTE: Next time you create a sample request, this structure will be used. All existing sample requests will not be changed - it only applies to all newly created sample requests.
Creating a new comment field
Navigate to: Admin > Sample Types > Comment Fields
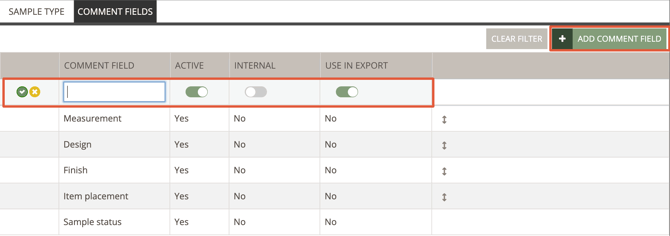
- Click on the 'Add comment field' button
- Enter a name for the new comment field
- Click on the 'save' icon
NOTE:
- You can drag and drop the order of the fields, which will be reflected when you are commenting on your received samples.
- This change will not happen on all existing sample requests, but it will be added the next time you create a sample request on a style.
Setting a new comment field to internal
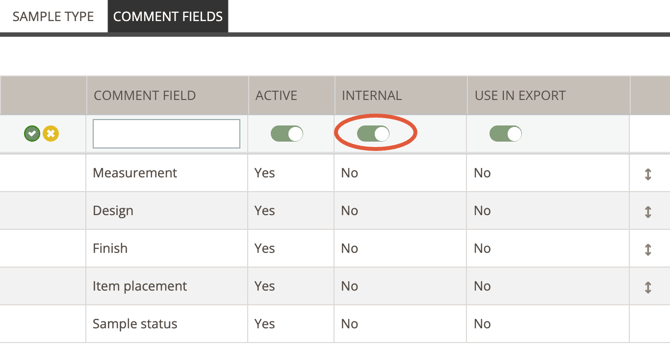
You can set any new comment fields you create to internal. However, the default comment fields provided by Delogue cannot be set to internal. This means your suppliers will always be able to see these fields unless you make them inactive. In contrast, custom comment fields that you create can be marked as internal, ensuring that your suppliers will not have access to them.
Navigate to: Admin > Sample Types > Comment Fields- Slide the toggle to the right on the comment field you want to make visible only internally
- Click on 'save' to save the new setting
NOTE: This change will not happen on all existing sample requests, but it will be reflected on any newly created sample request.
Filter the list of Comment fields
If you have created multiple comment fields, it is possible to filter the list of comment fields for a better overview. To read more about filtering options in Admin sections, read here.

Next steps
