Introducing The New Size Chart Functionalities
The Size Chart is a key functionality in Delogue. Below you can learn about the overall tools of the Size Chart and how you can expand the view to get a more focused working area on the screen.
Introduction & Best Practice:
The grading and construction of a Size Chart requires an overview and focus. The Delogue Size Chart allows you to resize columns, add overall comments and "How to measure" files, and choose what information to see on the screen.
The expanded view allows you to see a larger section of the Size Chart without needing to scroll horizontally. This improved layout gives you more space on your screen, removes all other disturbing information, and makes it easier to work on your size data - and you can zoom further in if needed.
Table of Contents :
6. Expanded Size Chart Functionalities - Webinar
SIZE CHART SETTINGS:
Navigate to: Styles > Size Chart
NOTE: you can choose to hide or show the settings at the top of the Size Chart
- Size range: Select the size range you want to use in the style
- Unit: Choose if you want to work in Centimeters, Inches, or Millimeters (define the default unit by navigating to: Admin > Sizes)
- Grading Size: Select the Grading Size you want on the style
- Active/Inactive sizes: de-select the sizes, from the size range, you do not want to use by removing the tick next to the size.
- Show: tags, gradings inactive sizes: choose what you want to see by toggling the green dot to the right (= visible) or to the left (= hidden)
- Column width: adjust the width of the columns in the Size Chart to better fit your data. Simply drag the column edges by their names to make them wider or narrower.
SIZE CHART ICONS:

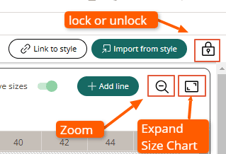
- Zoom: in or out on the size chart by clicking on the magnifying icon. The selected zoom level is saved for each style, ensuring you can easily pick up where you left off without needing to reconfigure your settings.
- Lock: Unlock the Size Chart. When unlocked, the supplier can adjust and change the Size chart, which is locked by default.
- Expand: the Size Chart (read more below)
SIZE CHART COMMENTS:
Navigate to: Styles > Size Chart > Comments
- Click on the pen to add general comments to the Size chart. Use the usual formation tools to make your text clear and easy to read.

NOTE: This is not where you add sample comments, only general size/measurement specifications. Sample comments should only be added in sample request
SIZE CHART FILES:
Navigate to: Styles > Size Chart > Files
- Click on the cross or "upload files" to upload the files related to the Size Chart. We suggest you upload your "How to Measure" drawing here. The file can also be downloaded directly from this position.
- Add as many files as you need.
- Click on the file for an expanded view, and use the zoom function for even more details
- PDF (multi-page) can be read, without download, page per page
- WORD documents can be read on the screen, also if they include more than one page
- EXCEL files with more than one tab can likewise be read directly on the screen (without download)

EXPAND THE SIZE CHART:
Navigate to: Styles > Size Chart > Expand
- Click on the icon EXPAND
- You now have an enlarged version of the Size Chart and more space on the screen. All other functions of Delogue are hidden.
- Scroll both sideways and up and down.
- Choose in the right-hand corner if you want to see Comments and Files next to your Size Chart
- Use the magnifying tool to zoom further in
- Everything you do in the expanded view is saved just like when you work in the "normal" view.
- Click on the cross in the right-hand corner to return to the "normal" view.
Expanded Size Chart Functionalities - Webinar
Description
The webinar gives you a guide to the expanded size chart functionalities in Delogue.
It showcases the following new features:
- expanded view for easier data management
- zoom and scroll options for better navigation
- enhanced file handling that keeps your documents accessible
NEXT
To learn about using inches and fractions in your Size Chart read the following articles:
