Introduction & Best practice
Do you want to make sample requests on more styles in one action? Or maybe for an entire collection with fewer clicks? Then you should try using Delogue's Batch actions.
This feature allow you to create and manage your Sample Requests in a smarter and easier way.
Are you collections divided between different suppliers? No worries!
This feature allow you to make sample across suppliers and you can write individual messages to each of your suppliers.
NOTE: To use this feature, your company must have the Professional license subscription
Table of Contents
- MAKE A BULK ACTION
- BATCH CREATE SAMPLE REQUESTS - SELECT STYLES
- BATCH CREATE SAMPLE REQUESTS - HEADER
- BATCH CREATES SAMPLE REQUESTS - SAMPLES PR. STYLE
- CREATE AND NOTIFY ABOUT BATCH ACTION SAMPLE REQUESTS
- MAKE UNPUBLISHED STYLES INTO PUBLISHED
MAKE A BULK ACTION
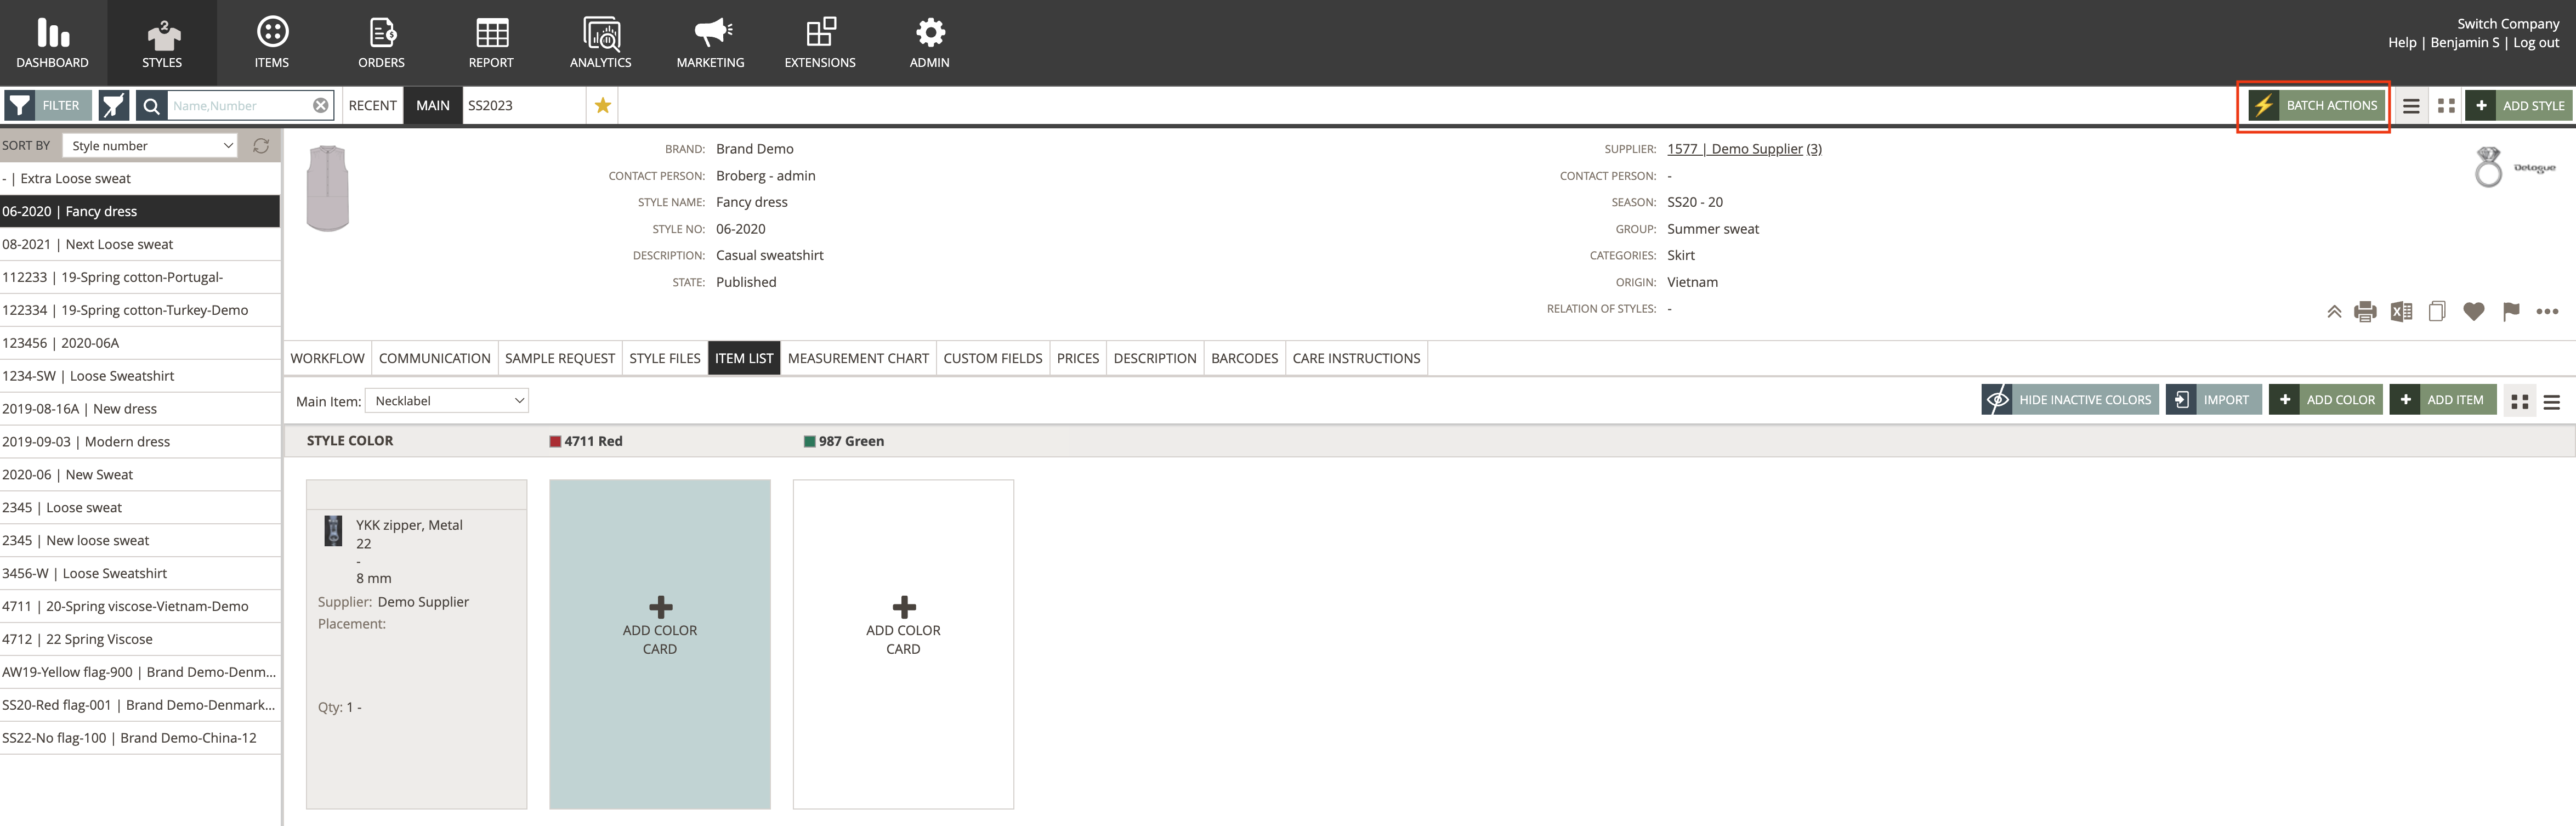
To make a Bulk Action, you have to go to the Style section.
Here we will see the button "BATCH ACTIONS" in the top right corner.
Click on the button.
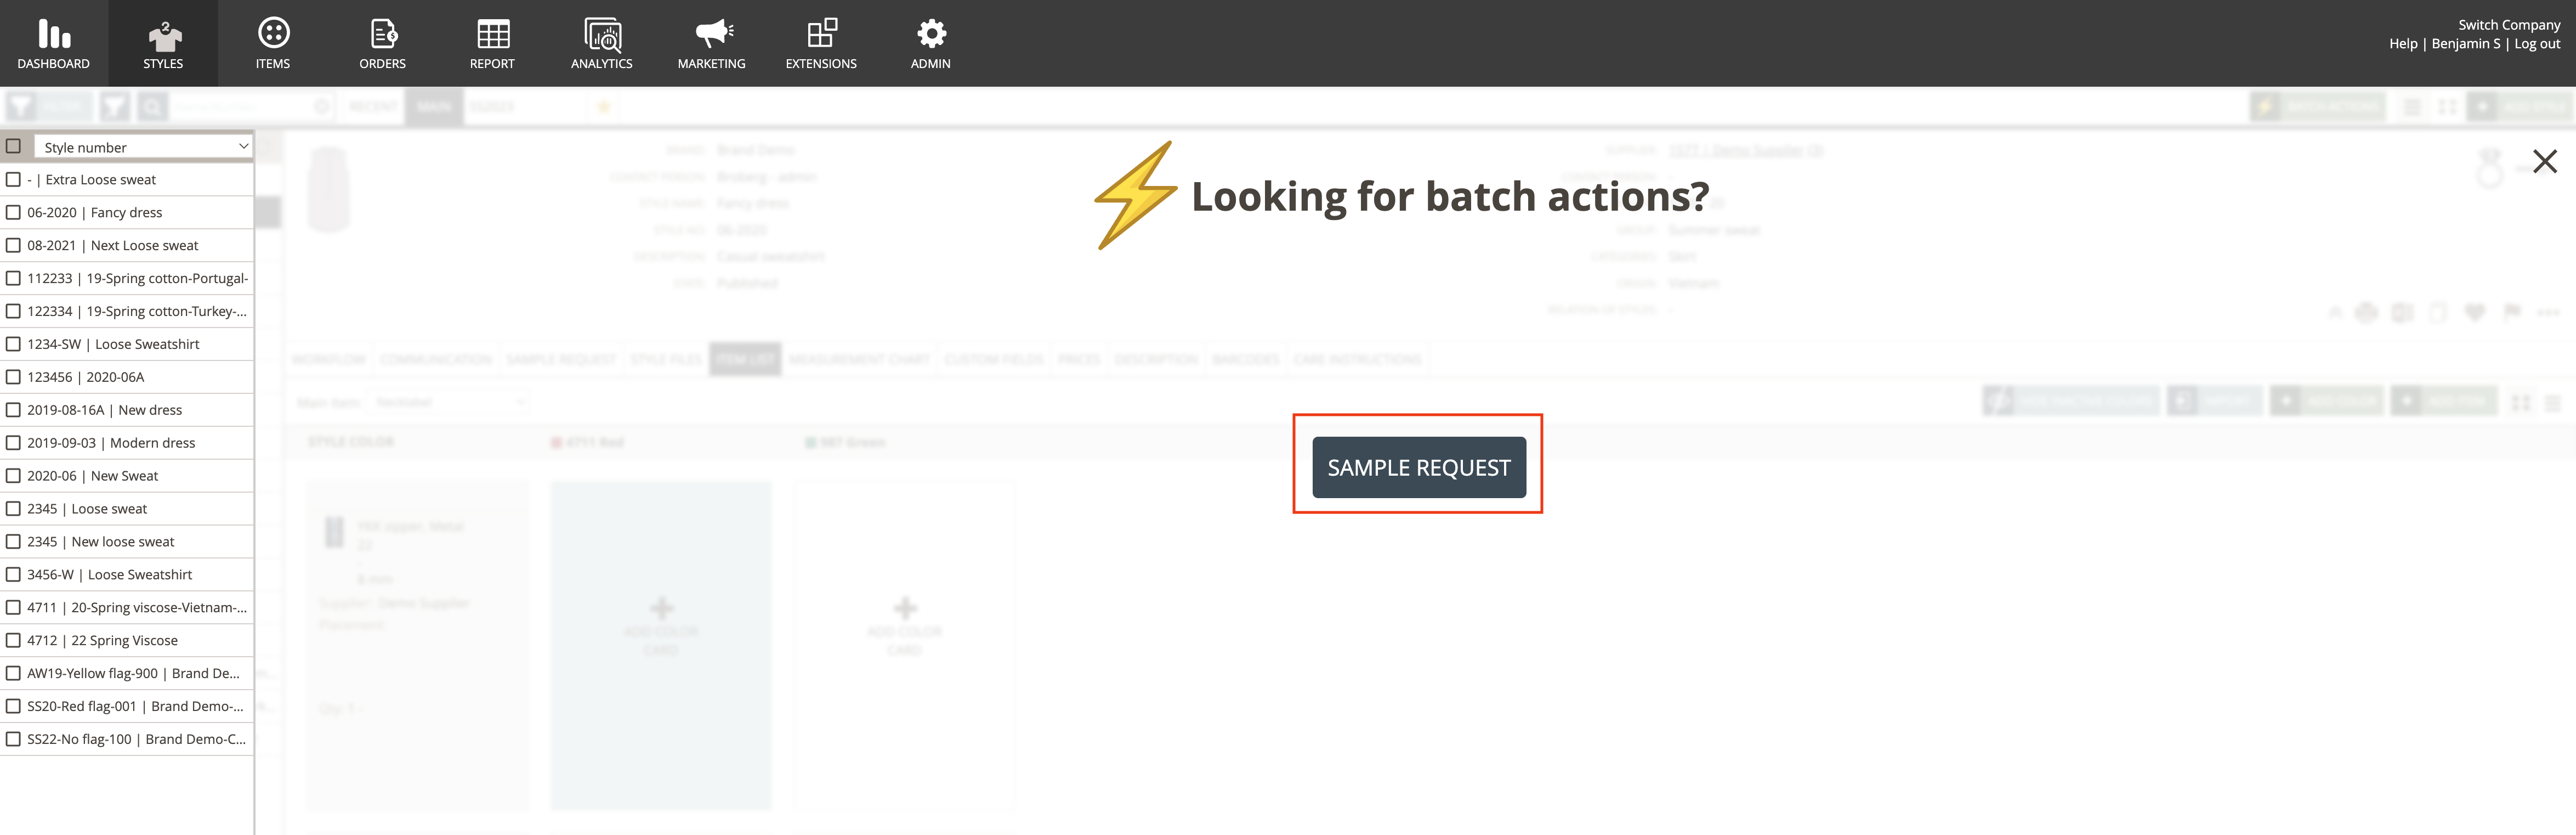
You now see a splash screen asking, which Batch Action you would like to do. Later on, you will have multiple options here. But for now, simply click on the button "Sample Request".
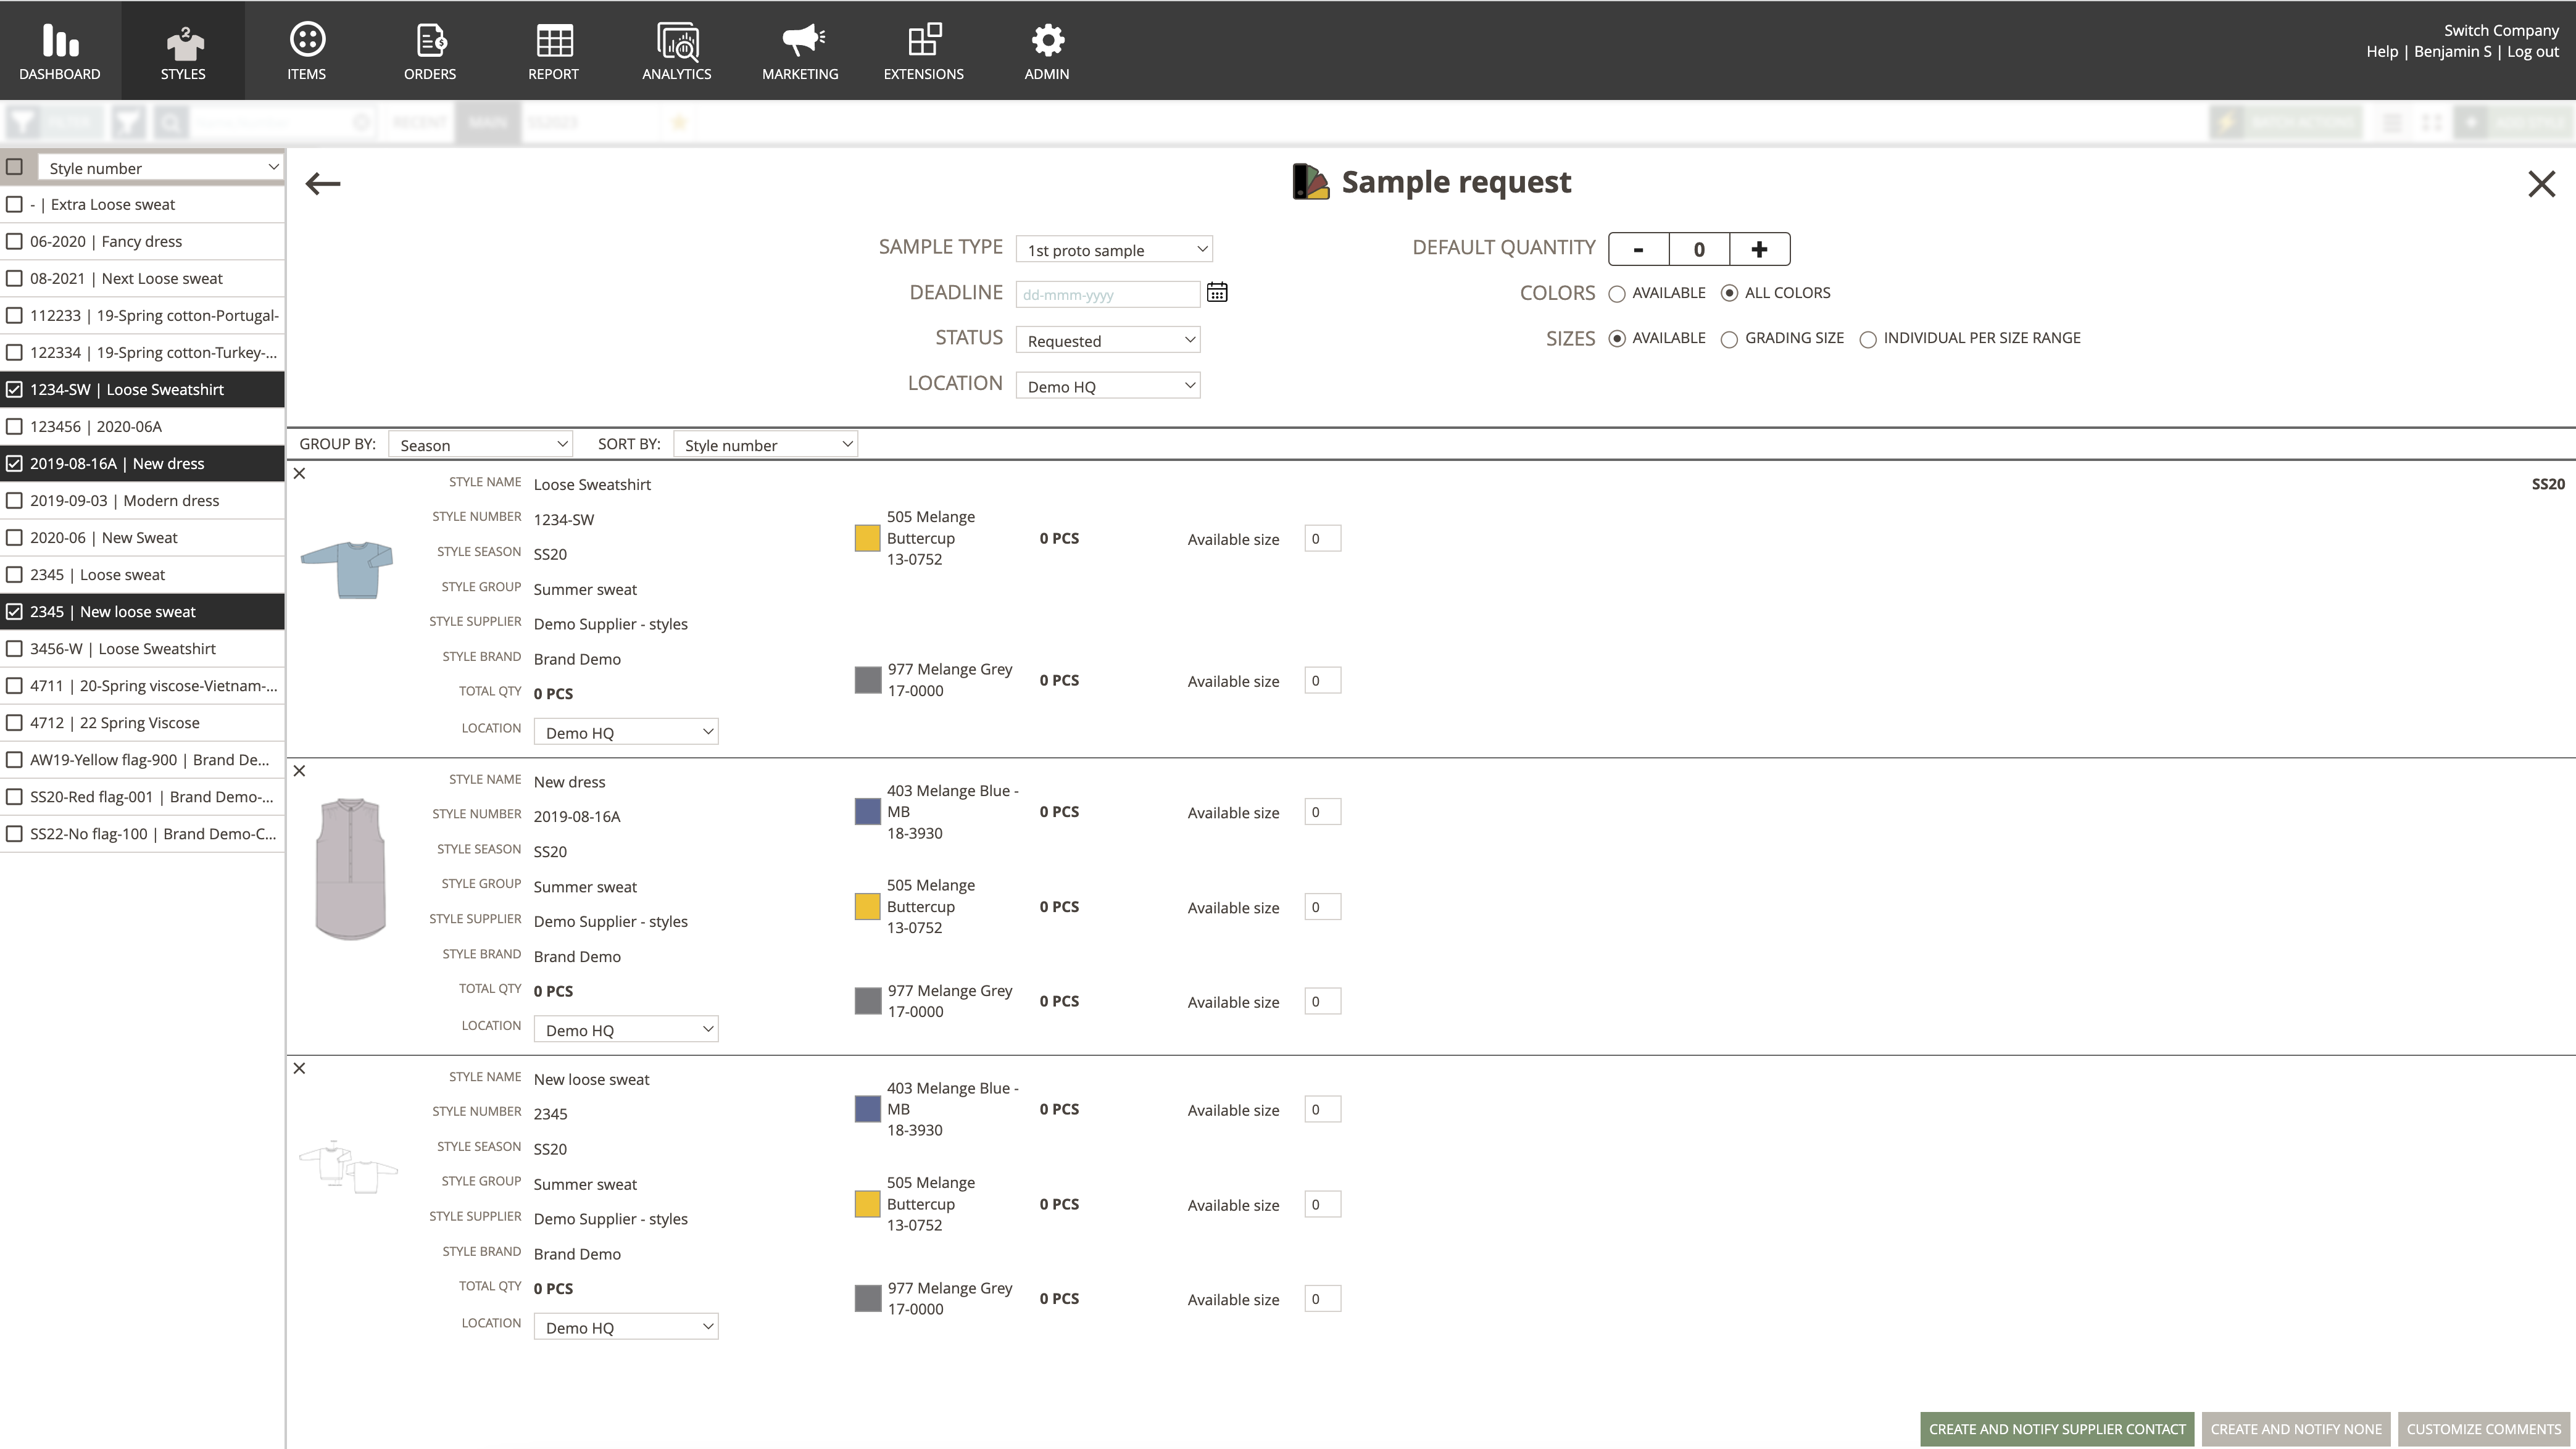
Here you will see a pop-up.
The pop-up consists of a header area, a list of your styles - and an area for the selected styles and their Samples.
On the top left, there is a back button and at the top right, there is a close button.
BATCH CREATE SAMPLE REQUESTS - SELECT STYLES
To make a Batch Action, you need to select the styles you want the sample request to be created in.
You can find the styles you want by using the Filter and Sort By functions.
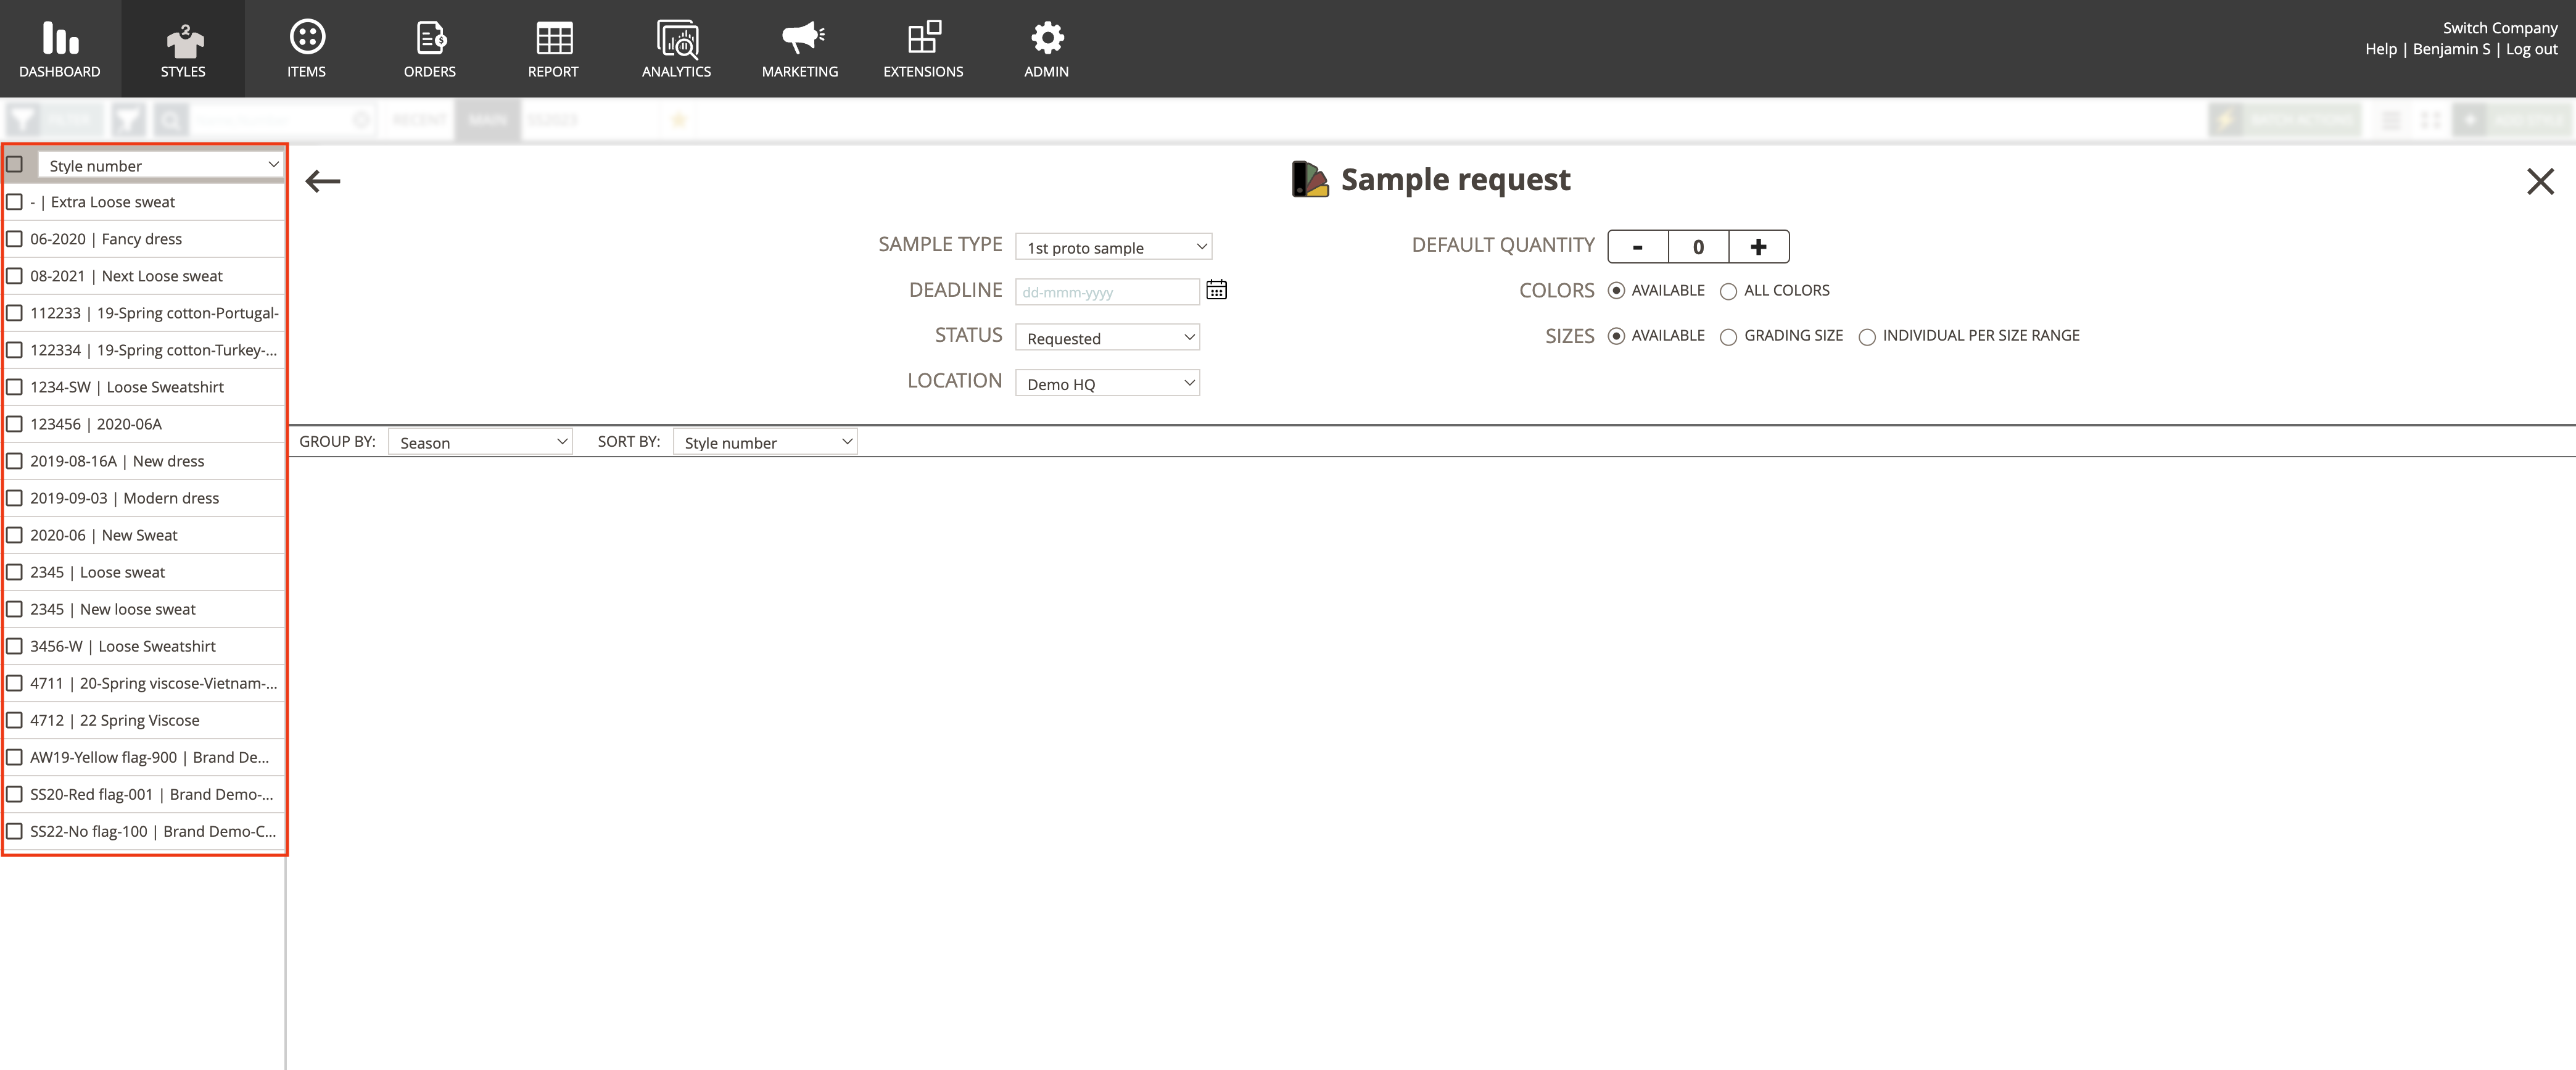
Simply click on the checkbox for the styles in the list at the left, to select the styles.
When you have selected styles, samples will occur in the second column.
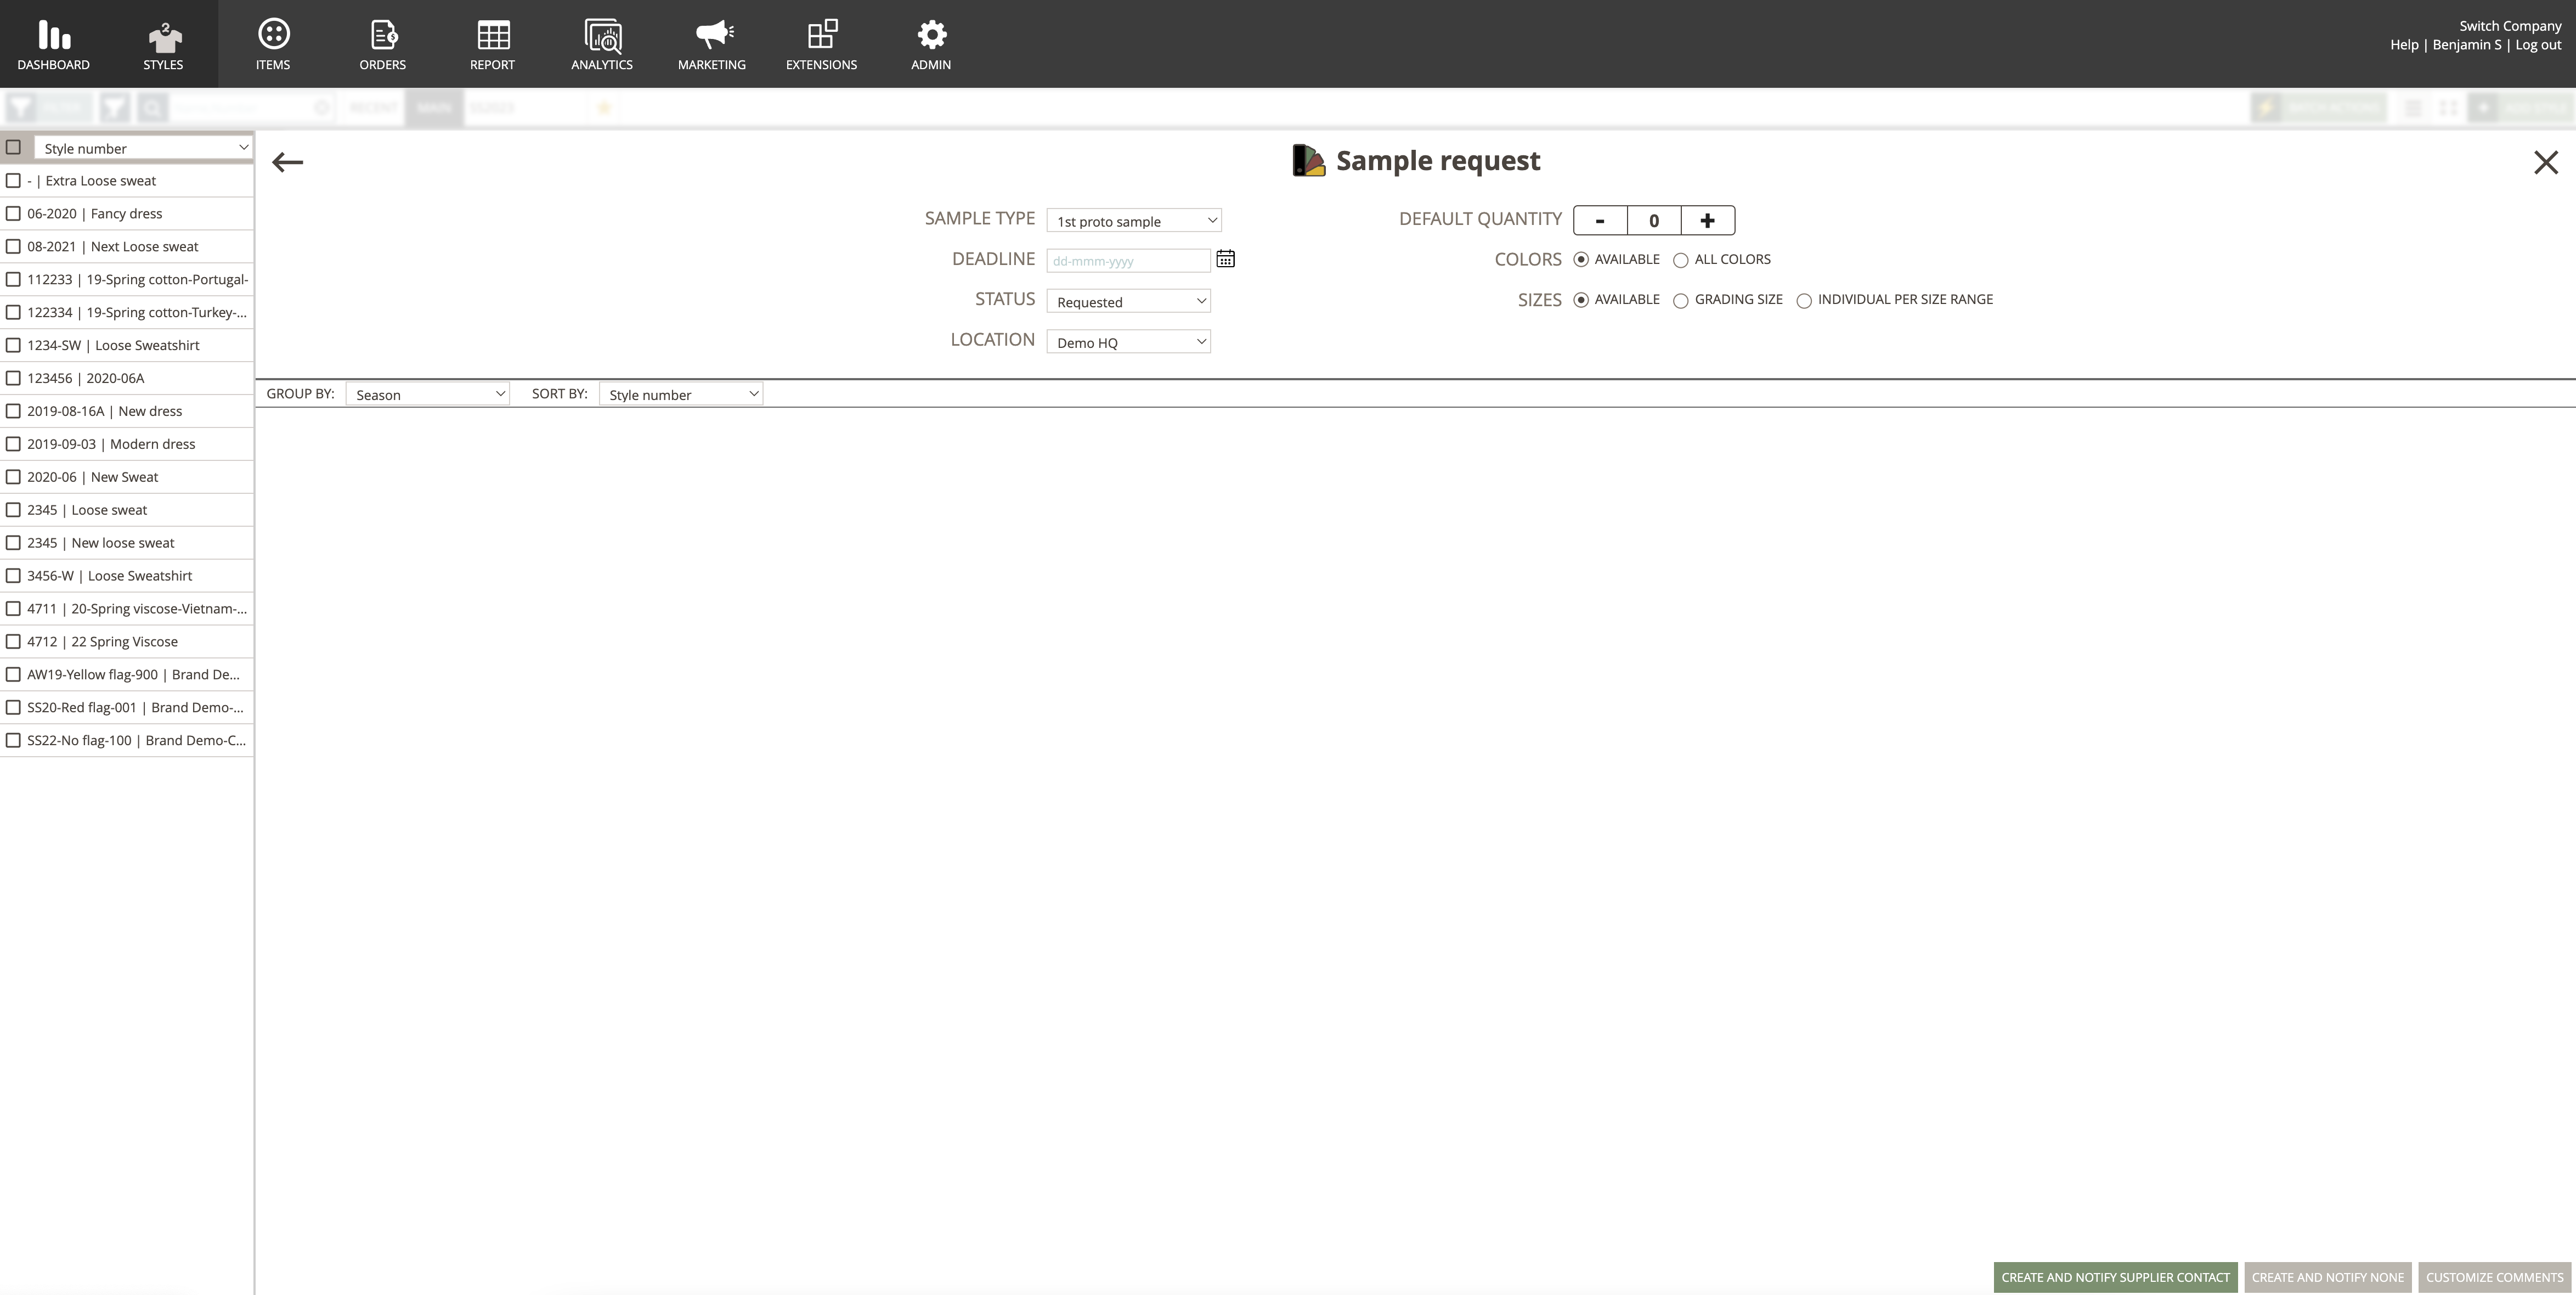
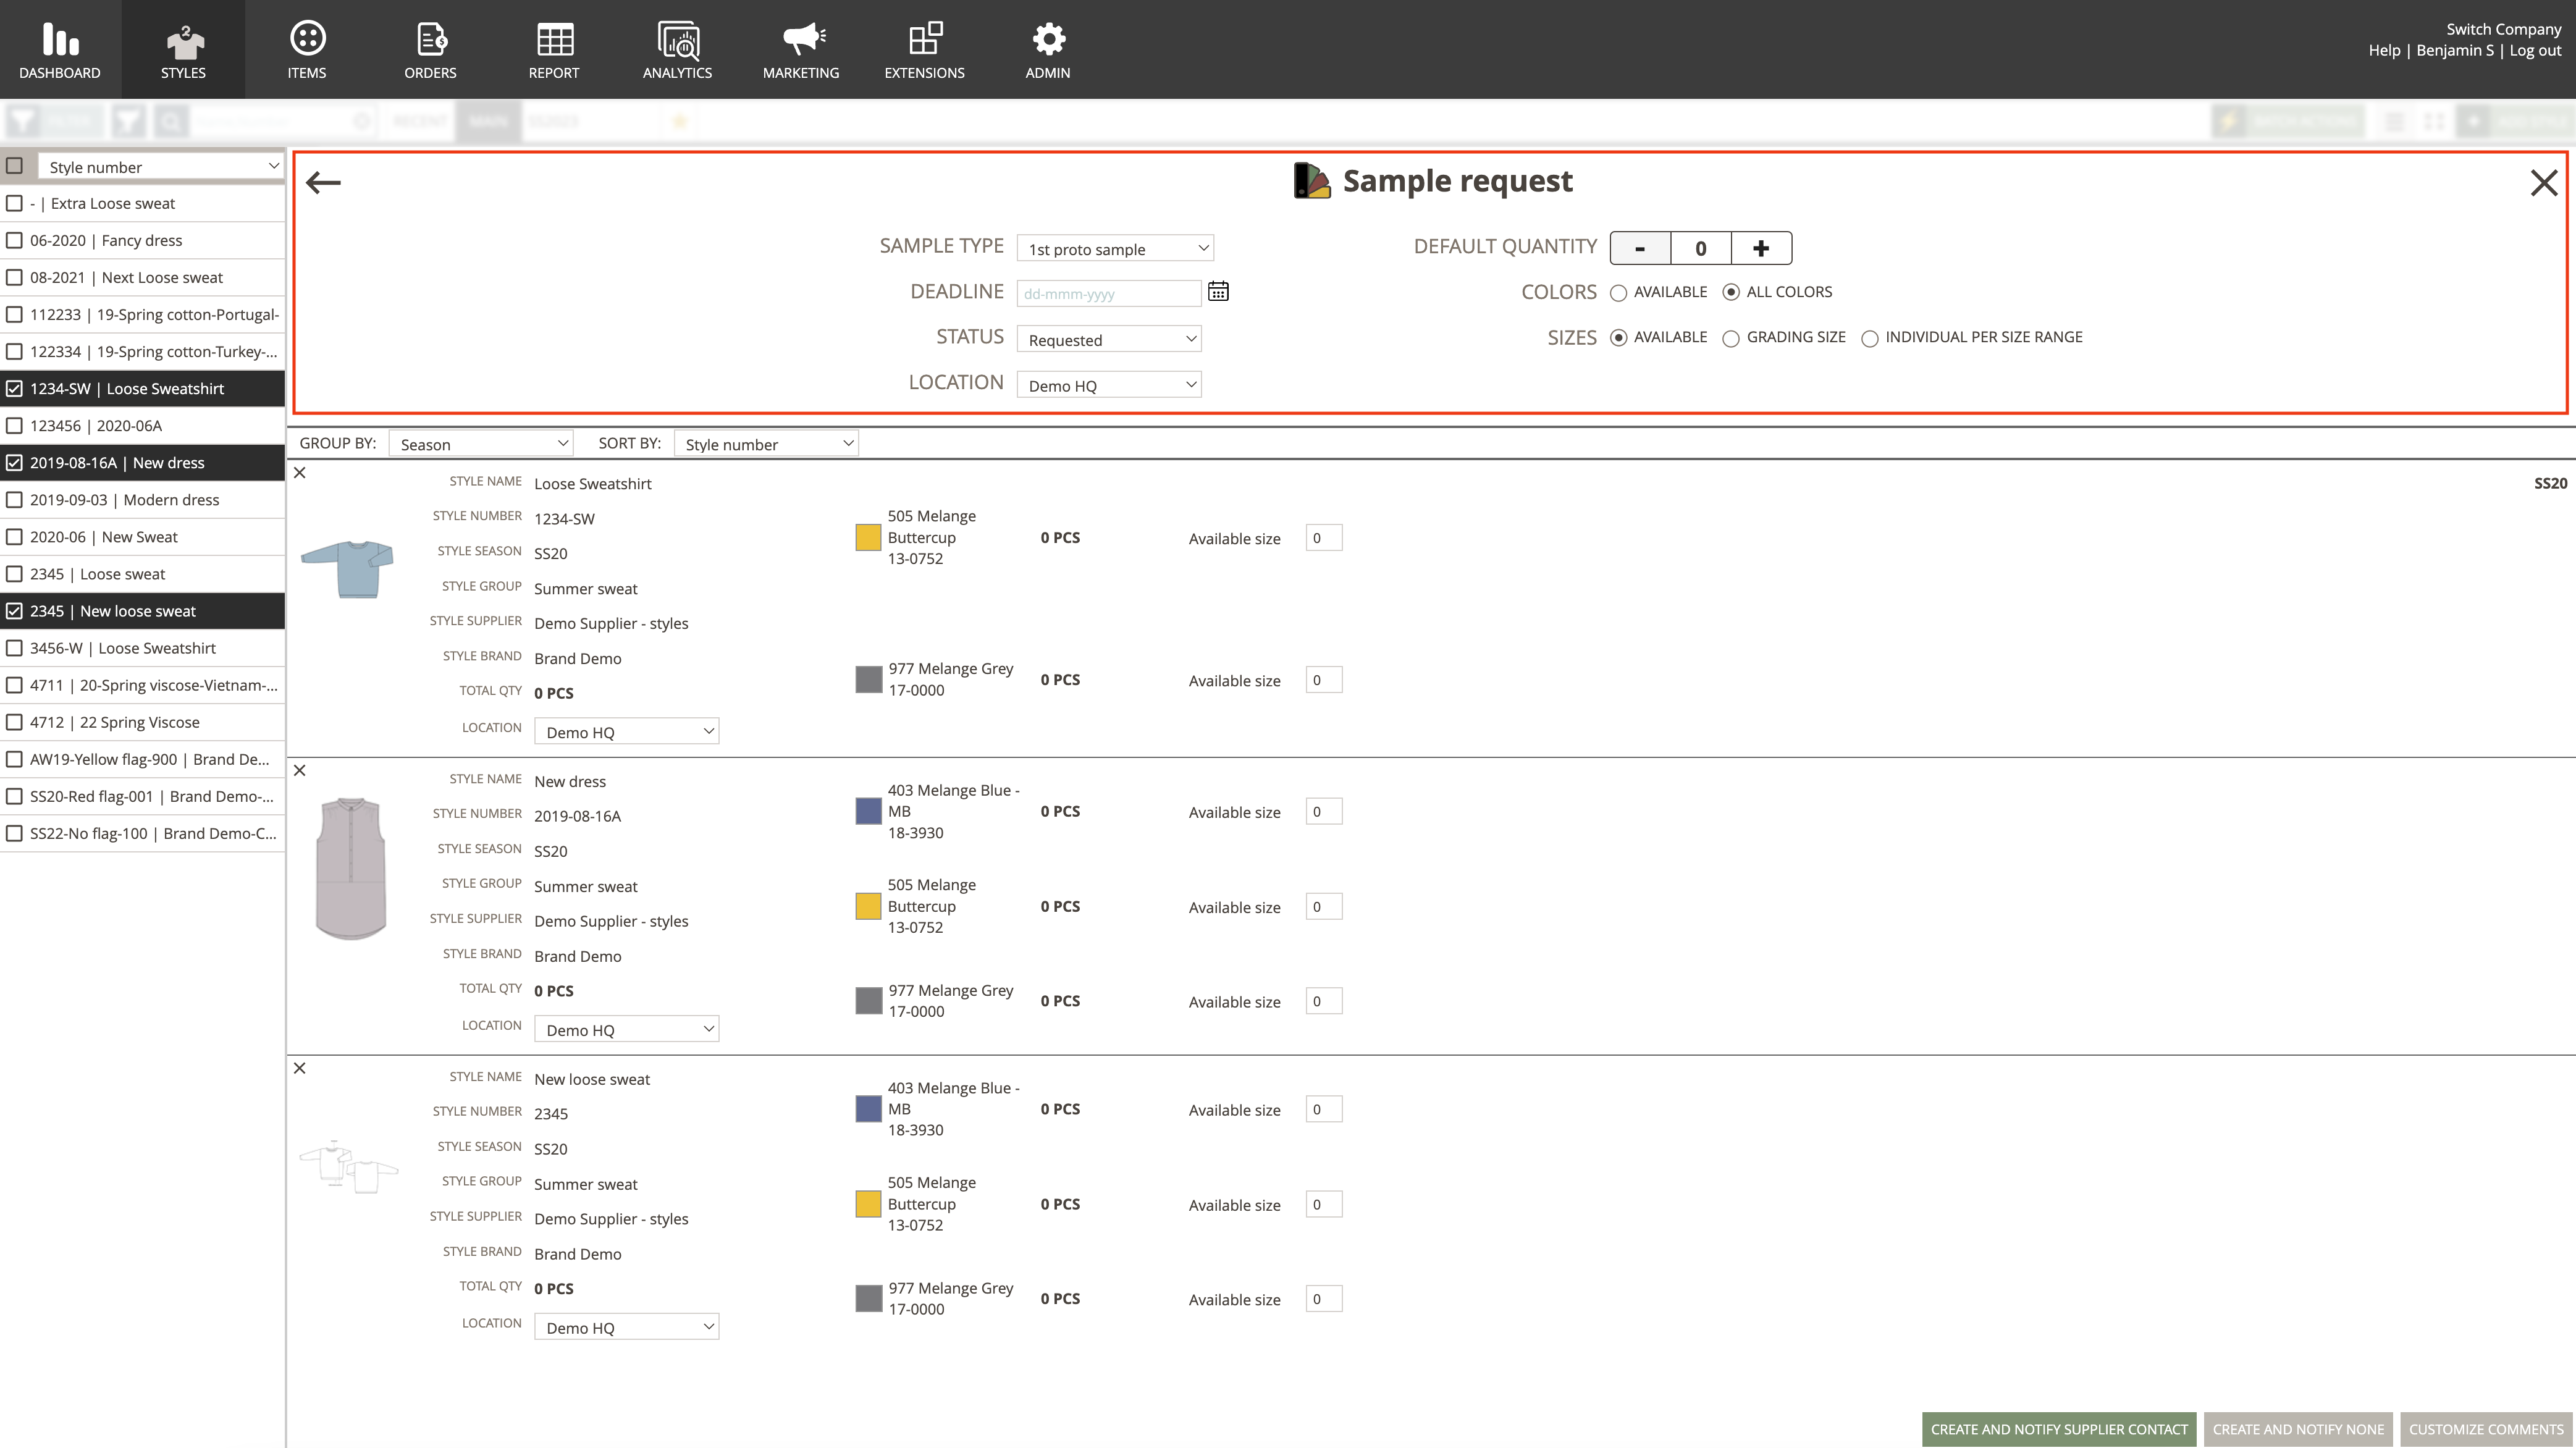
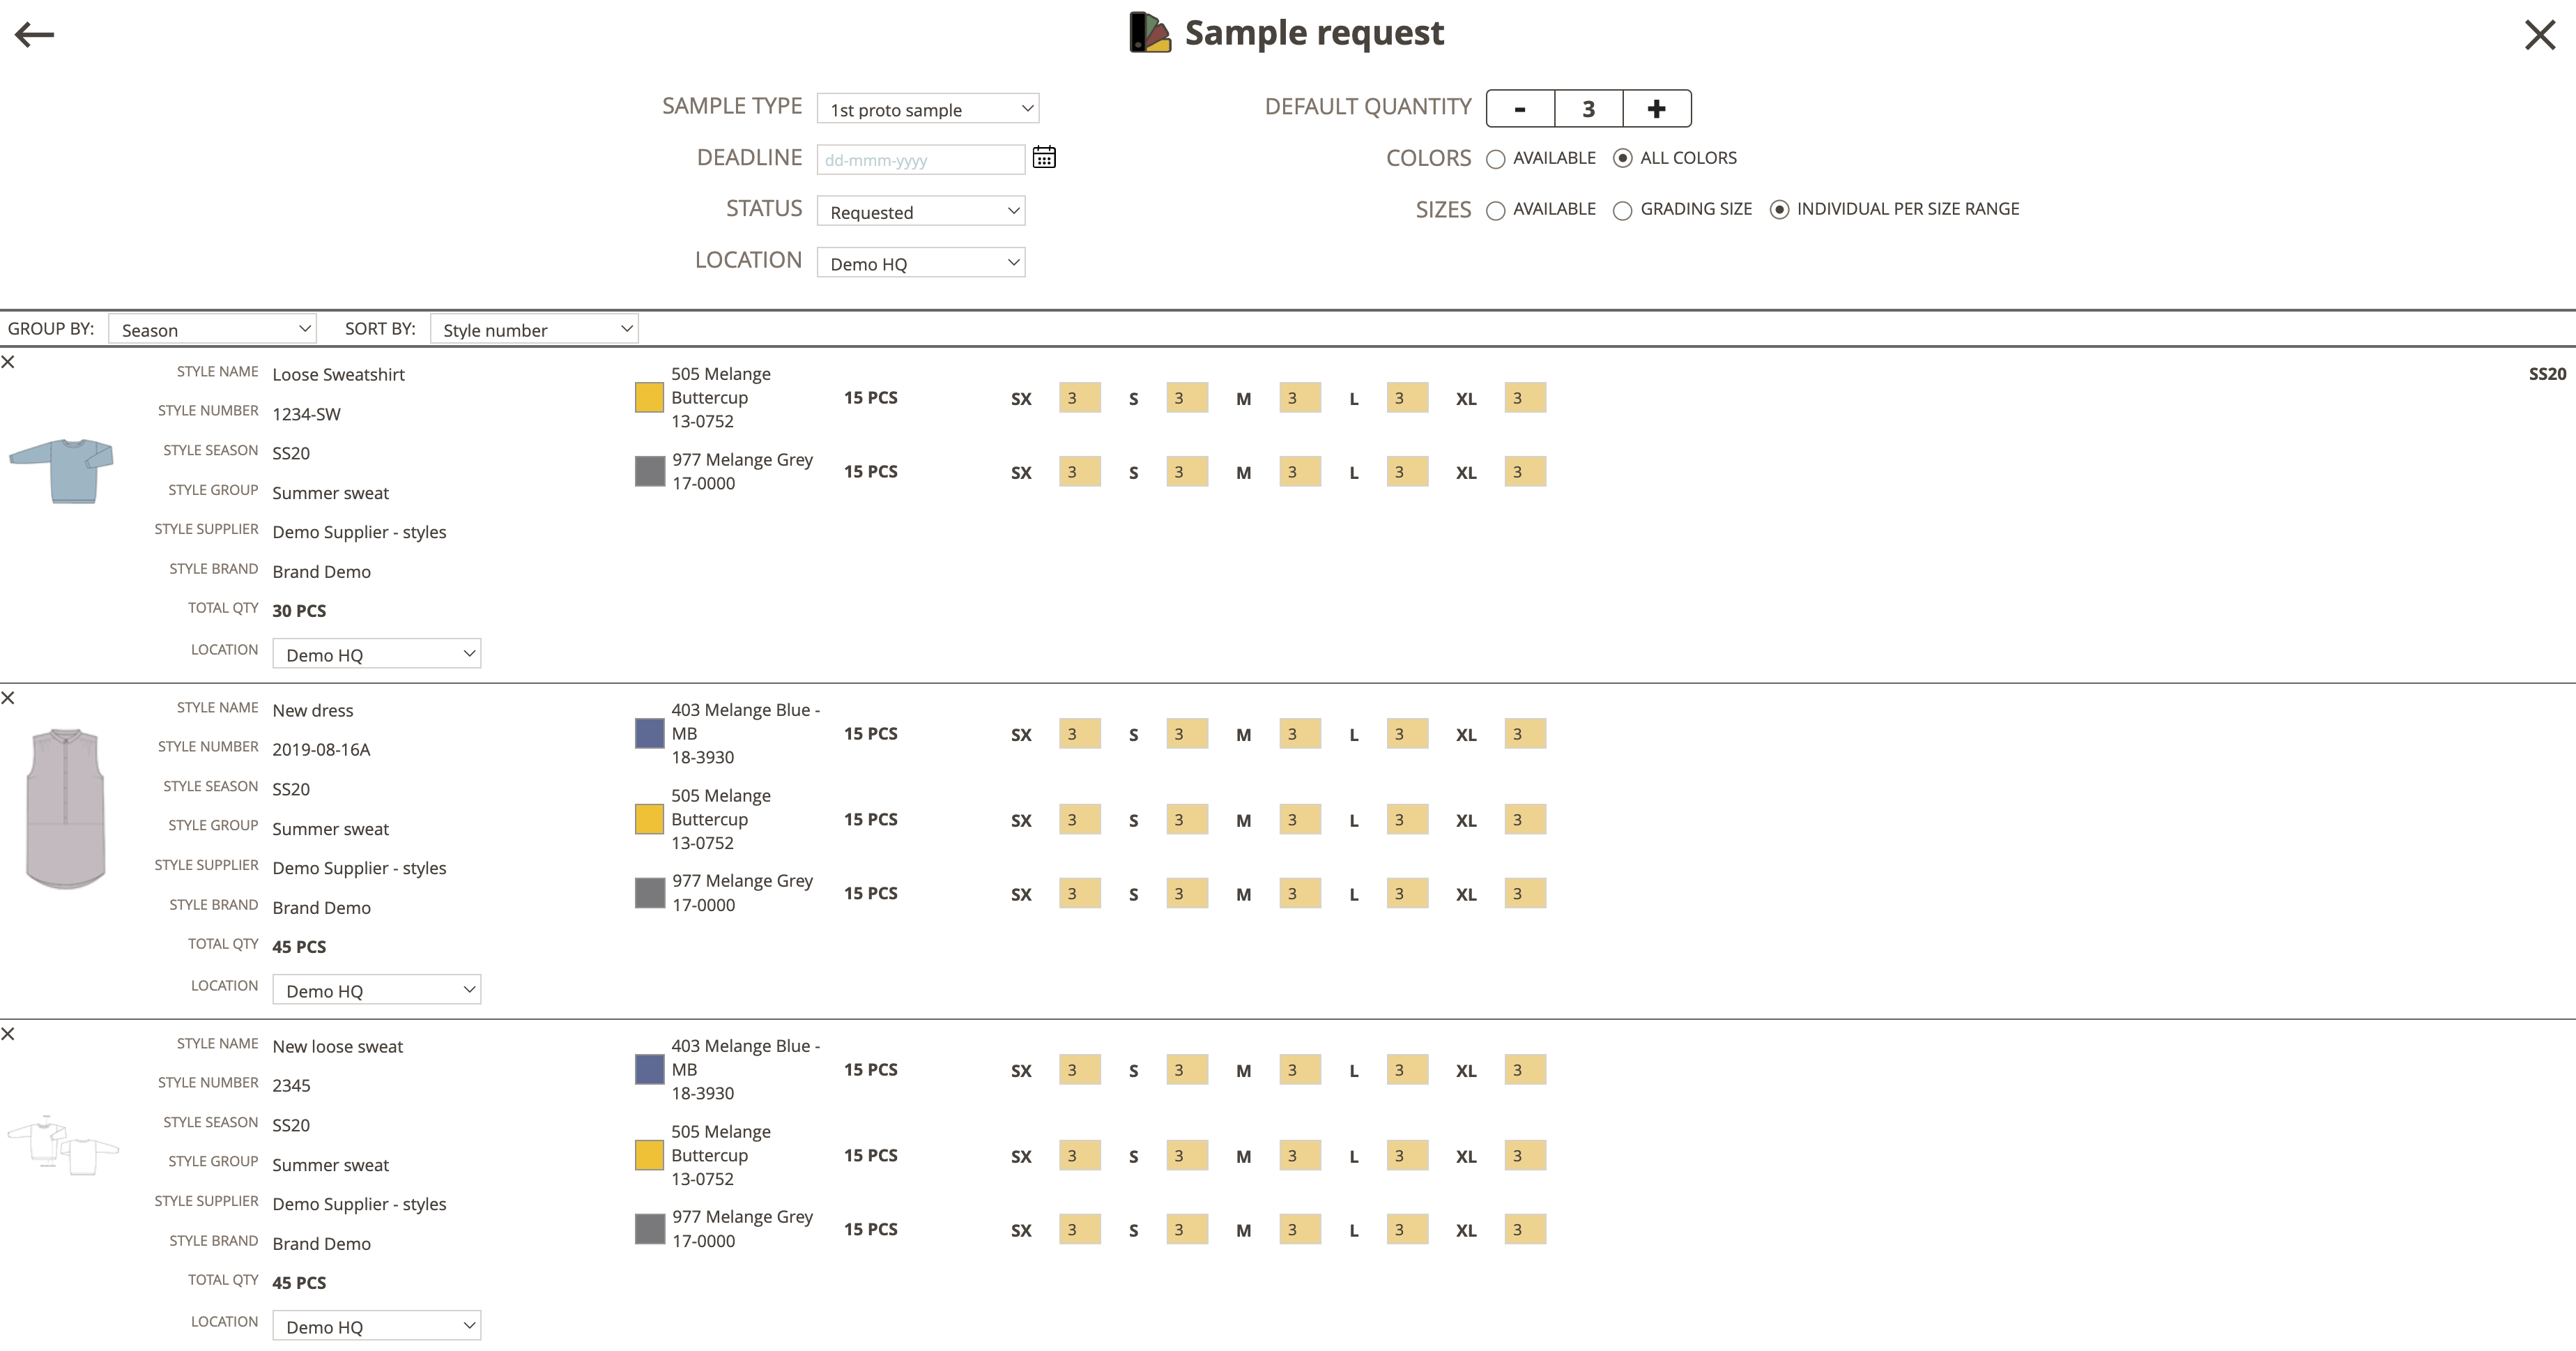
BATCH CREATE SAMPLE REQUESTS - HEADER
In the header of the Batch Action pop-up, you will have multiple options to select data for the Sample Requests.
You might know the fields and options already, as it's the same as when you create a single sample request on a style.
The options are:
- Sample type
- Deadline
- Status
- Location
- Default Quantity
- Colors
- Sizes
The samples for the selected styles will be visible and identifiable by the standard data, you just have defined in the options.
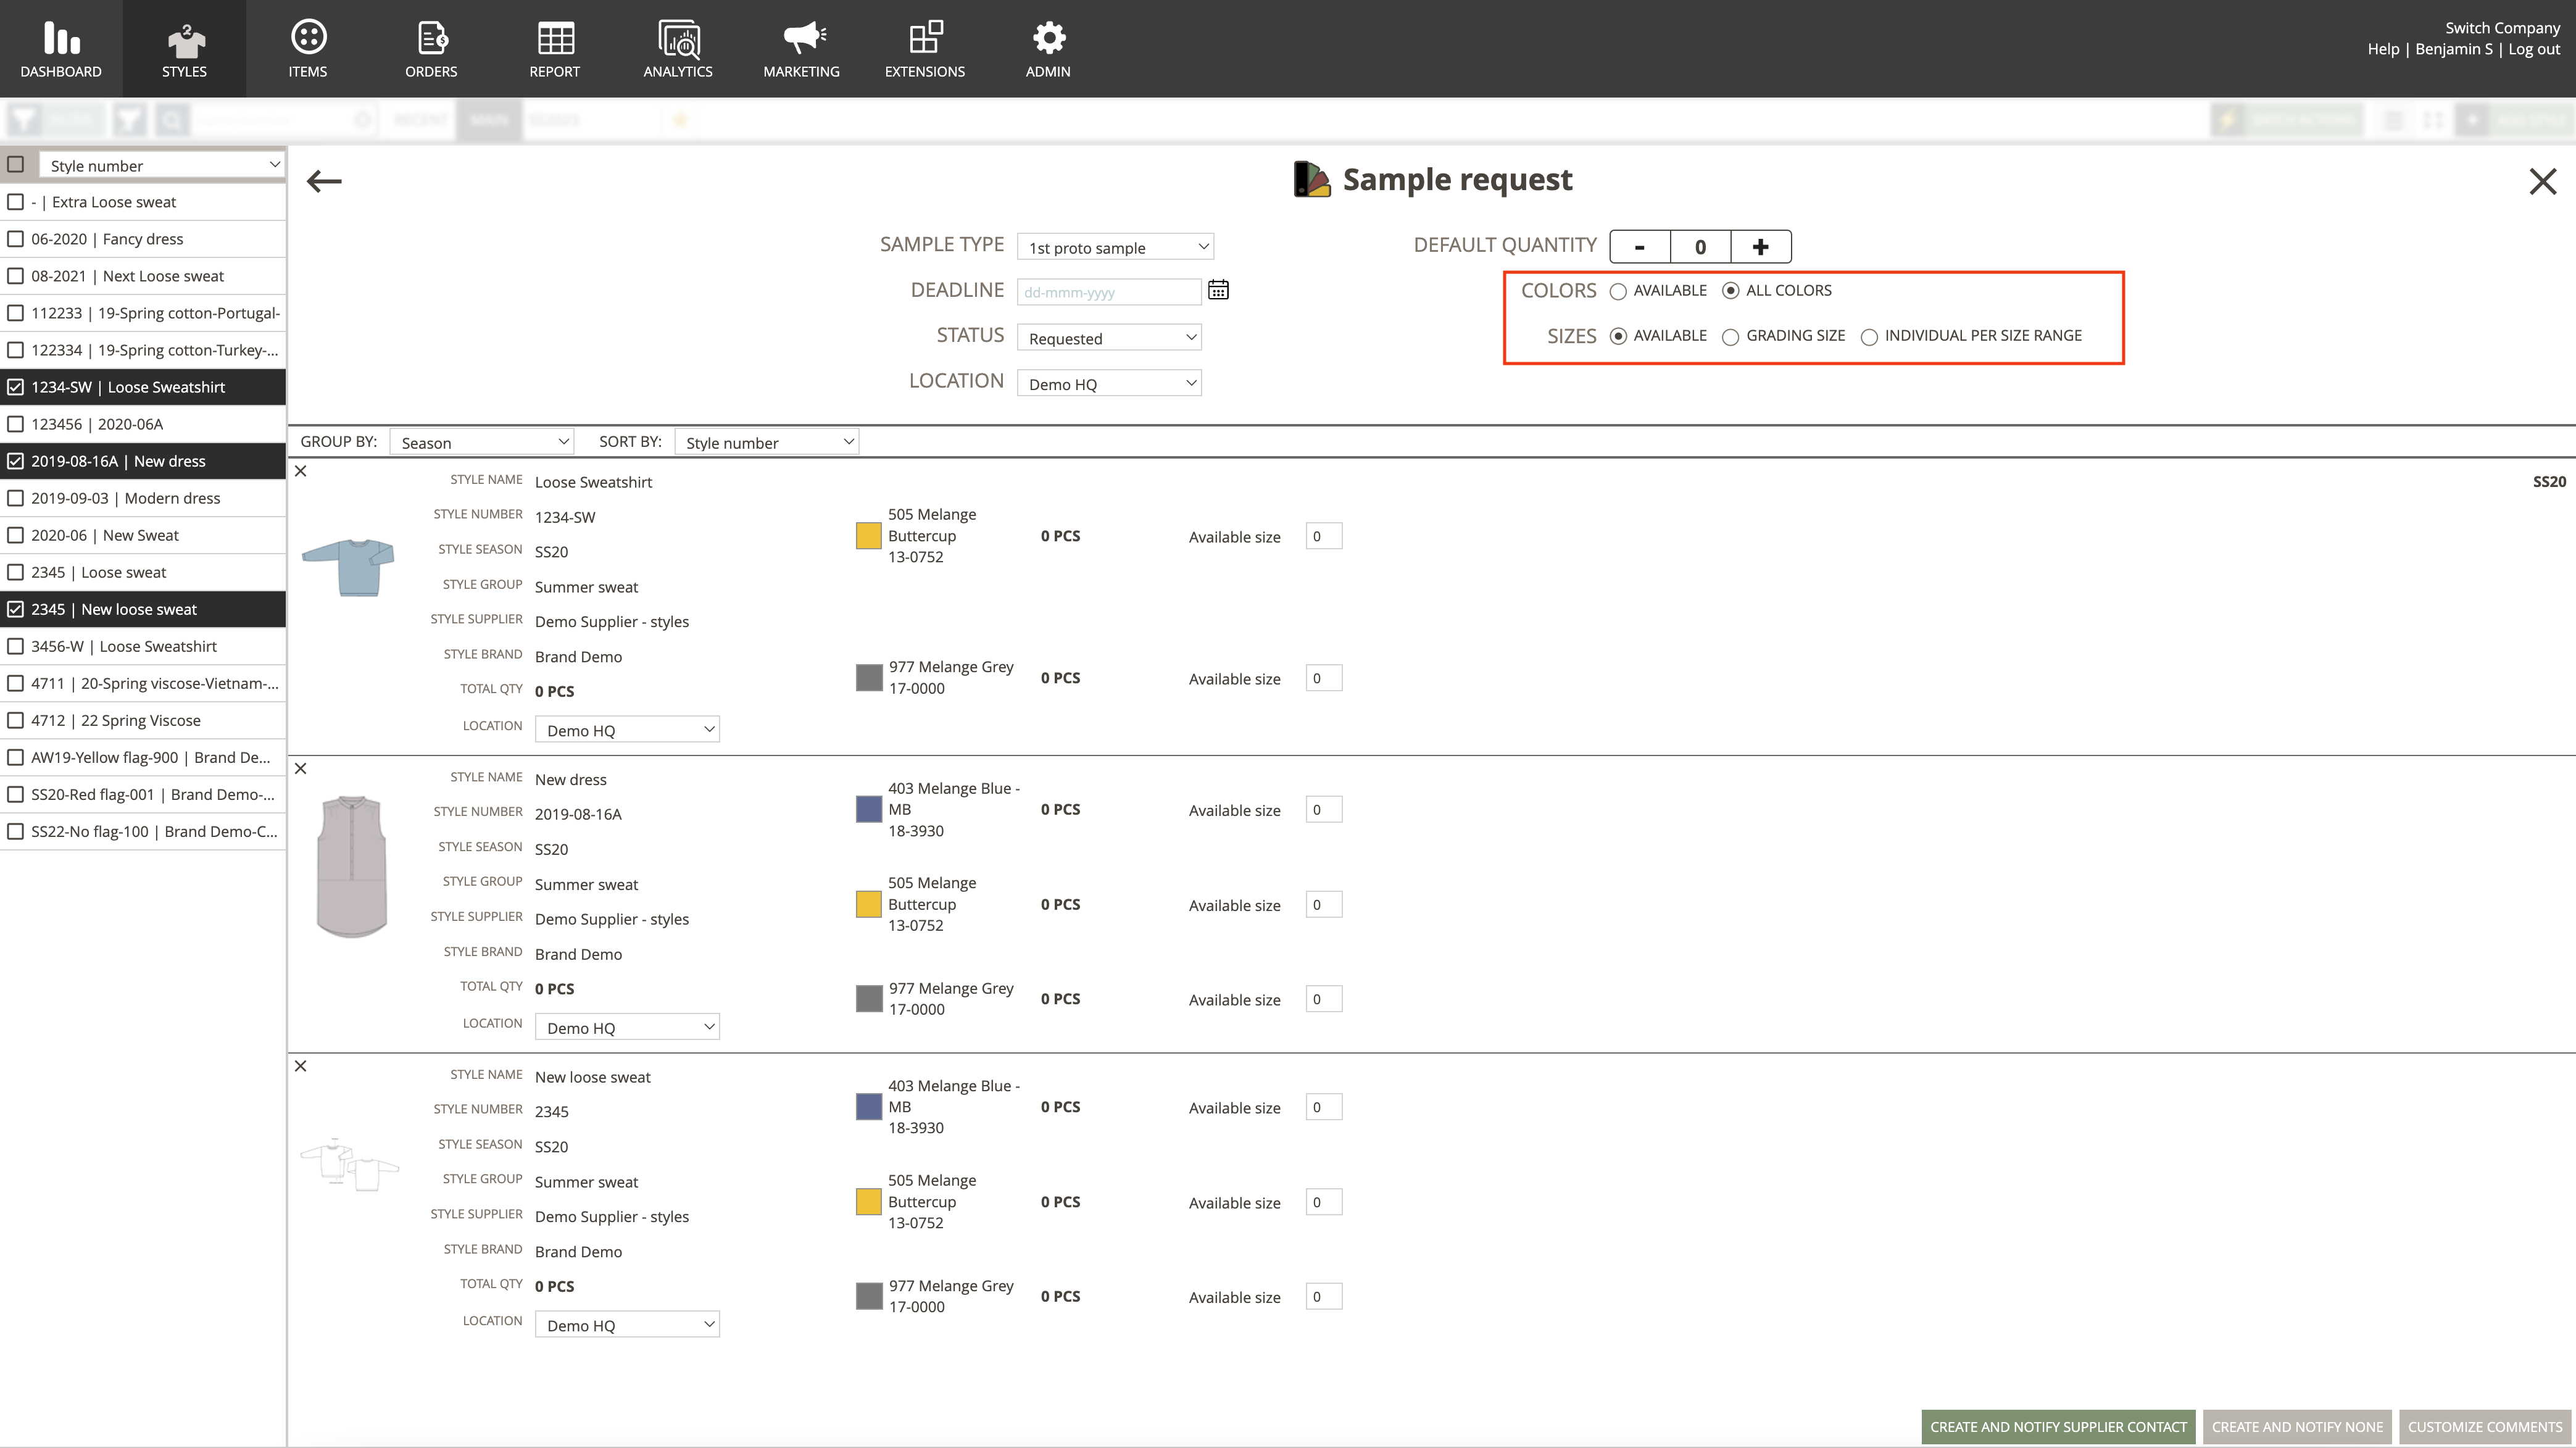
However, you must notice that Sample Requests can be created in 6 different ways.
It means there are 6 different views the pop-up can have, depending on the setting of the Color/ Sizes in the Header:
- Available color / available size
- Available color/grading size
- Available color/individual per size range
- All colors / available size
- All colors/grading size
- All colors/ individuals per size range
You can adjust the wanted quantity pr. sample, according to the way you have set up the Color/ Size in the Header.
Tip: If you have added a Milestone Deadline for a season, that is added to all of the styles, you will see the Milestone Deadline next to the Deadline-field
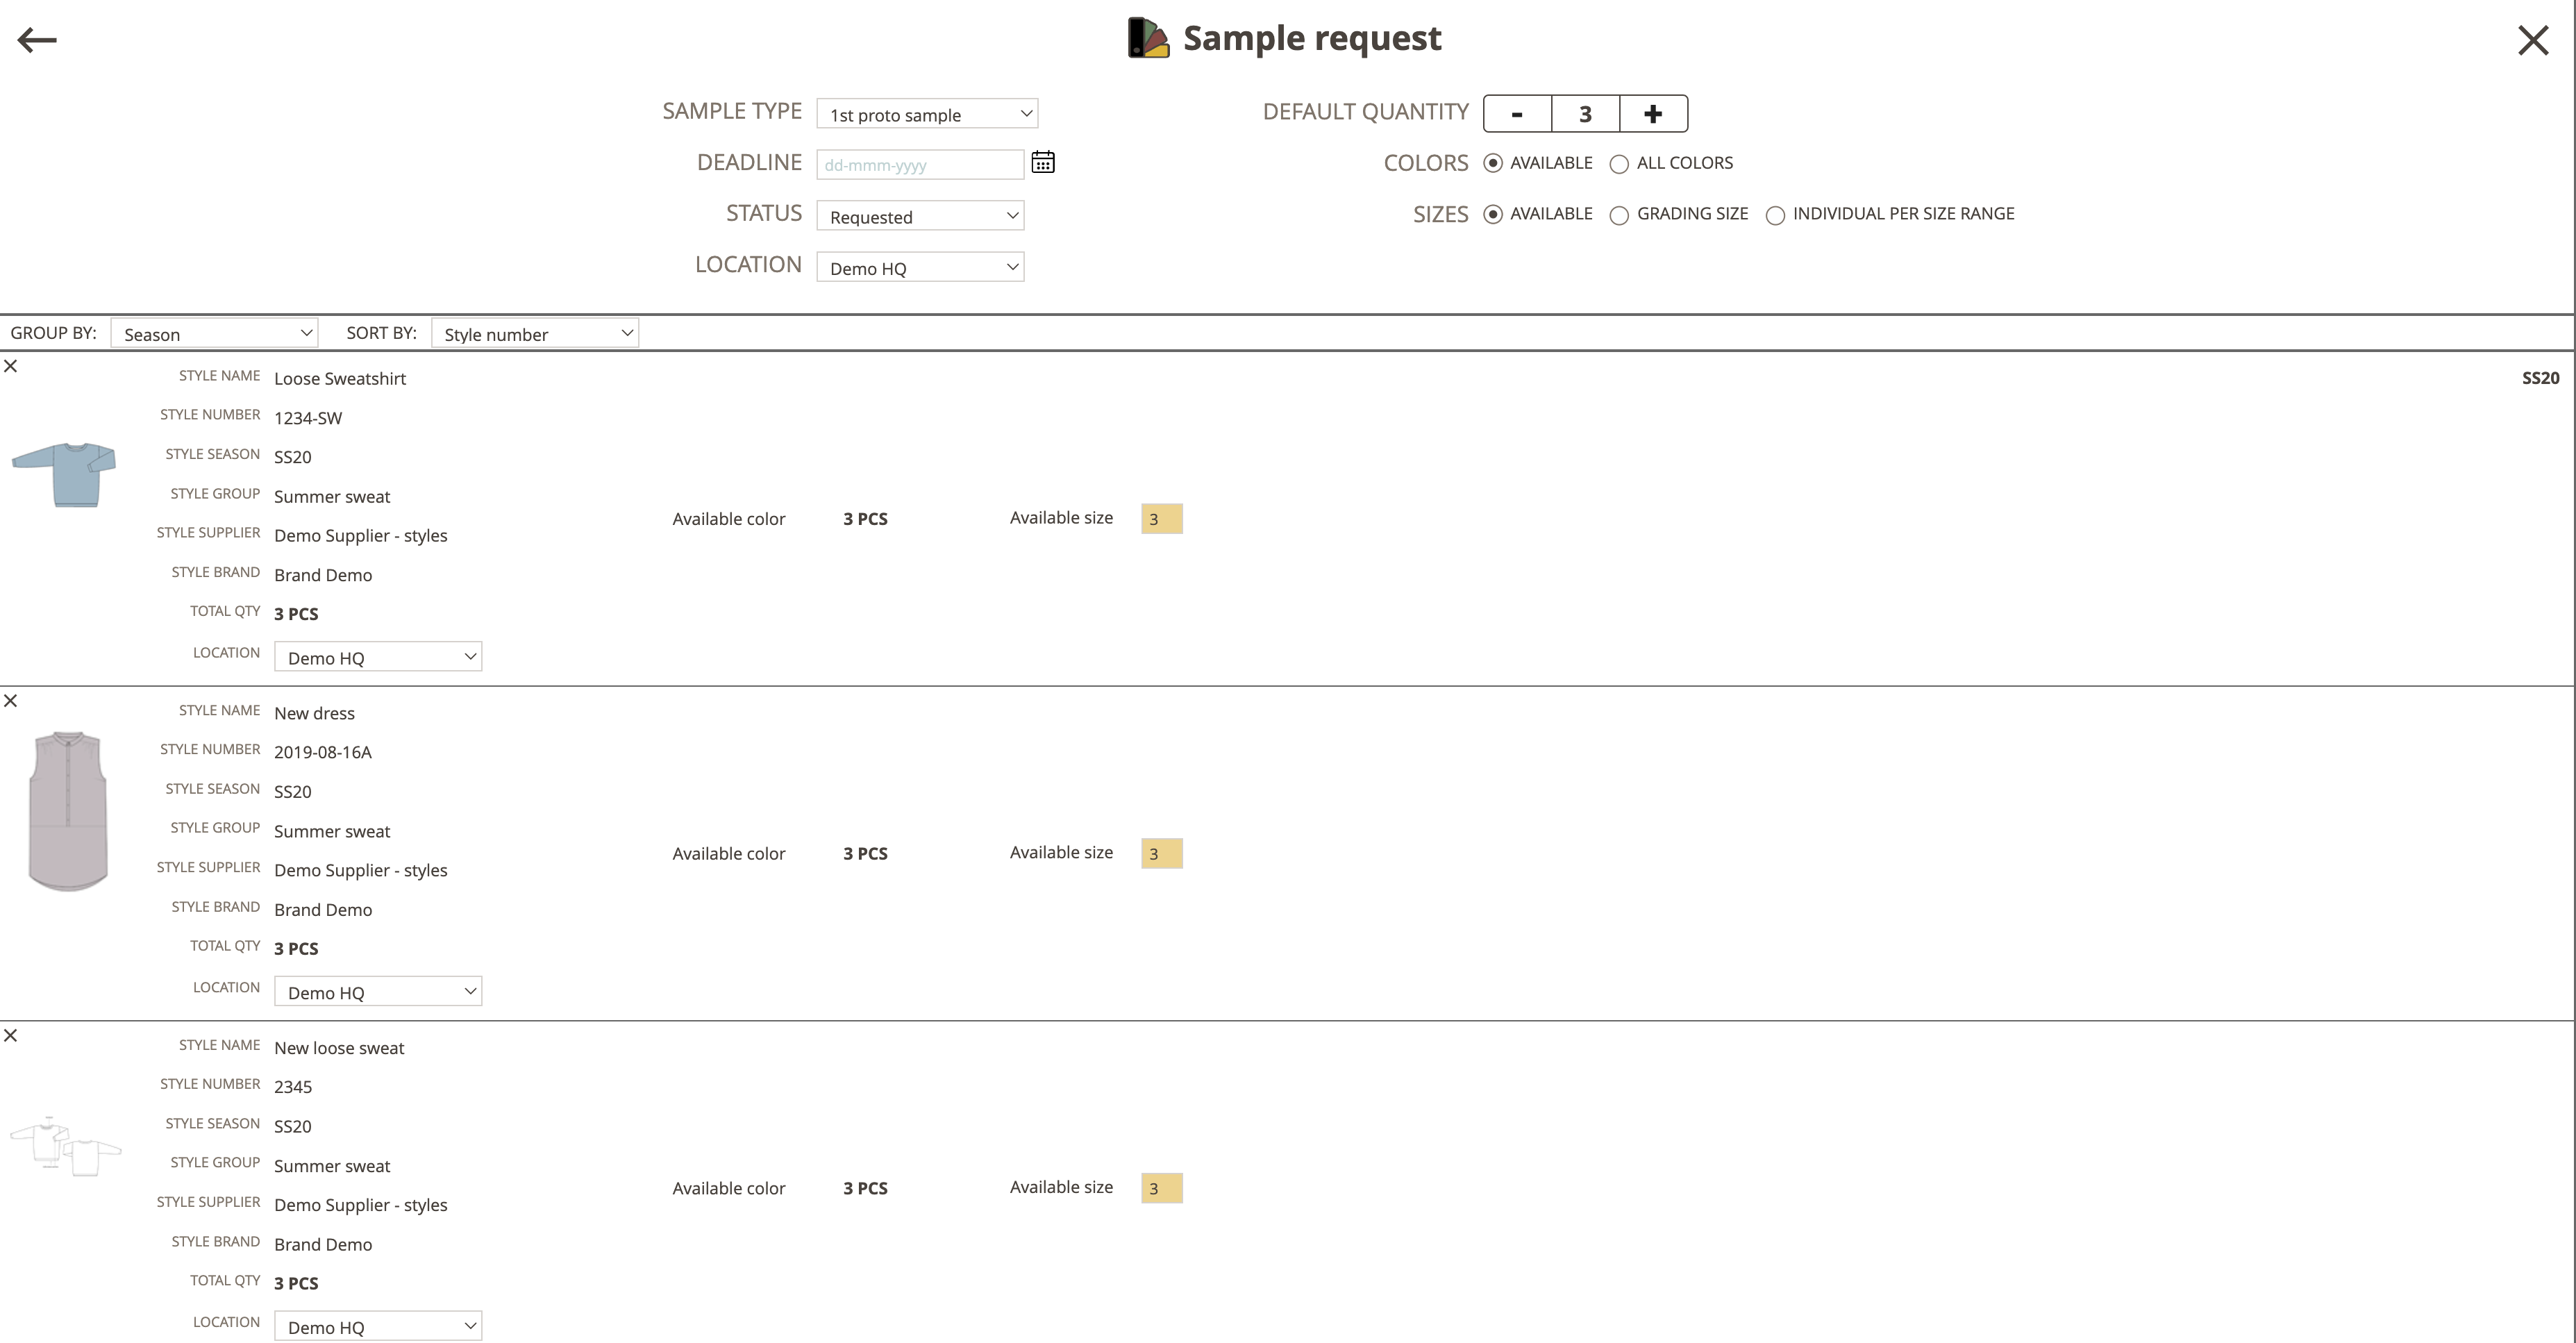
BATCH CREATES SAMPLE REQUESTS - SAMPLES PR. STYLE
Underneath the Header, you will see an area with samples pr. style.
Each sample contains the data you have defined in the Header.
From here, you can adjust the wanted quantity pr. sample for the setting of the Color/ Sizes.
Available color / available size
For this setting, you can only change the number of wanted Quantity.
You do this by moving your cursor to the yellow field, deleting the data, and typing in new data.
You can't change anything else, as you simply request the color and size that is available.
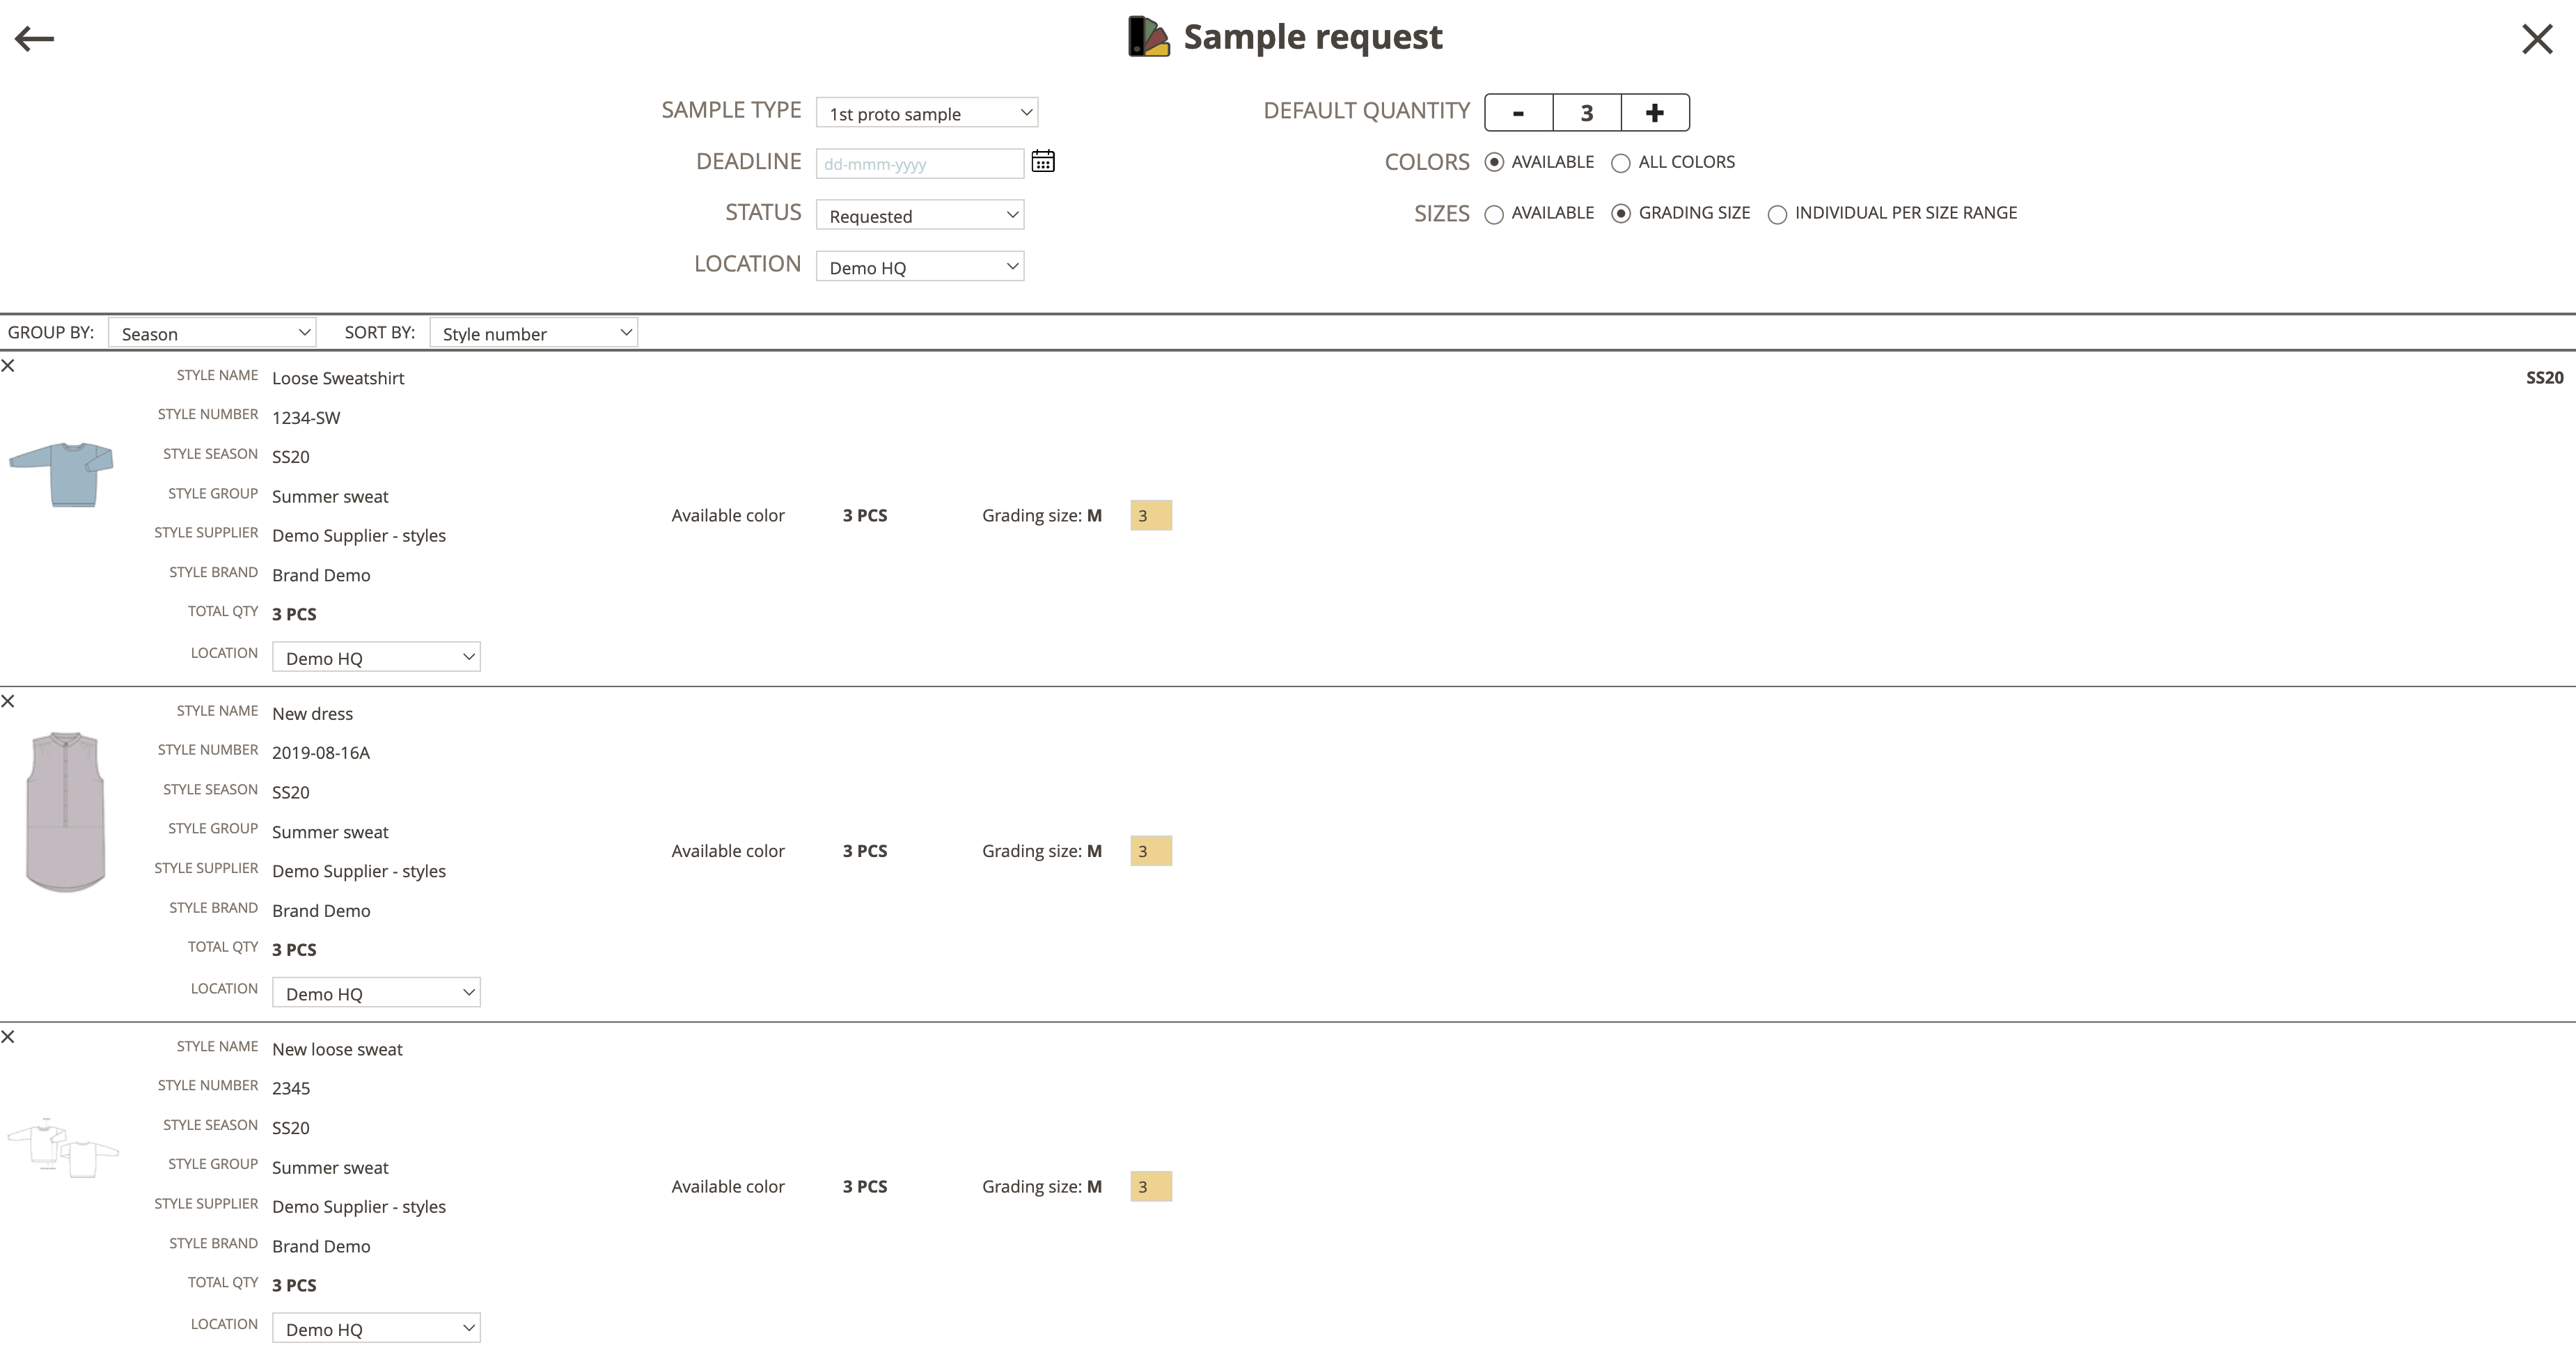
Available color/grading size
For the "Available color/grading size" setting, you can change the number of wanted Quantities.
You do this by moving your cursor to the yellow field, deleting the data, and typing in new data.
You can't change anything else, as you request the available color and grading size.
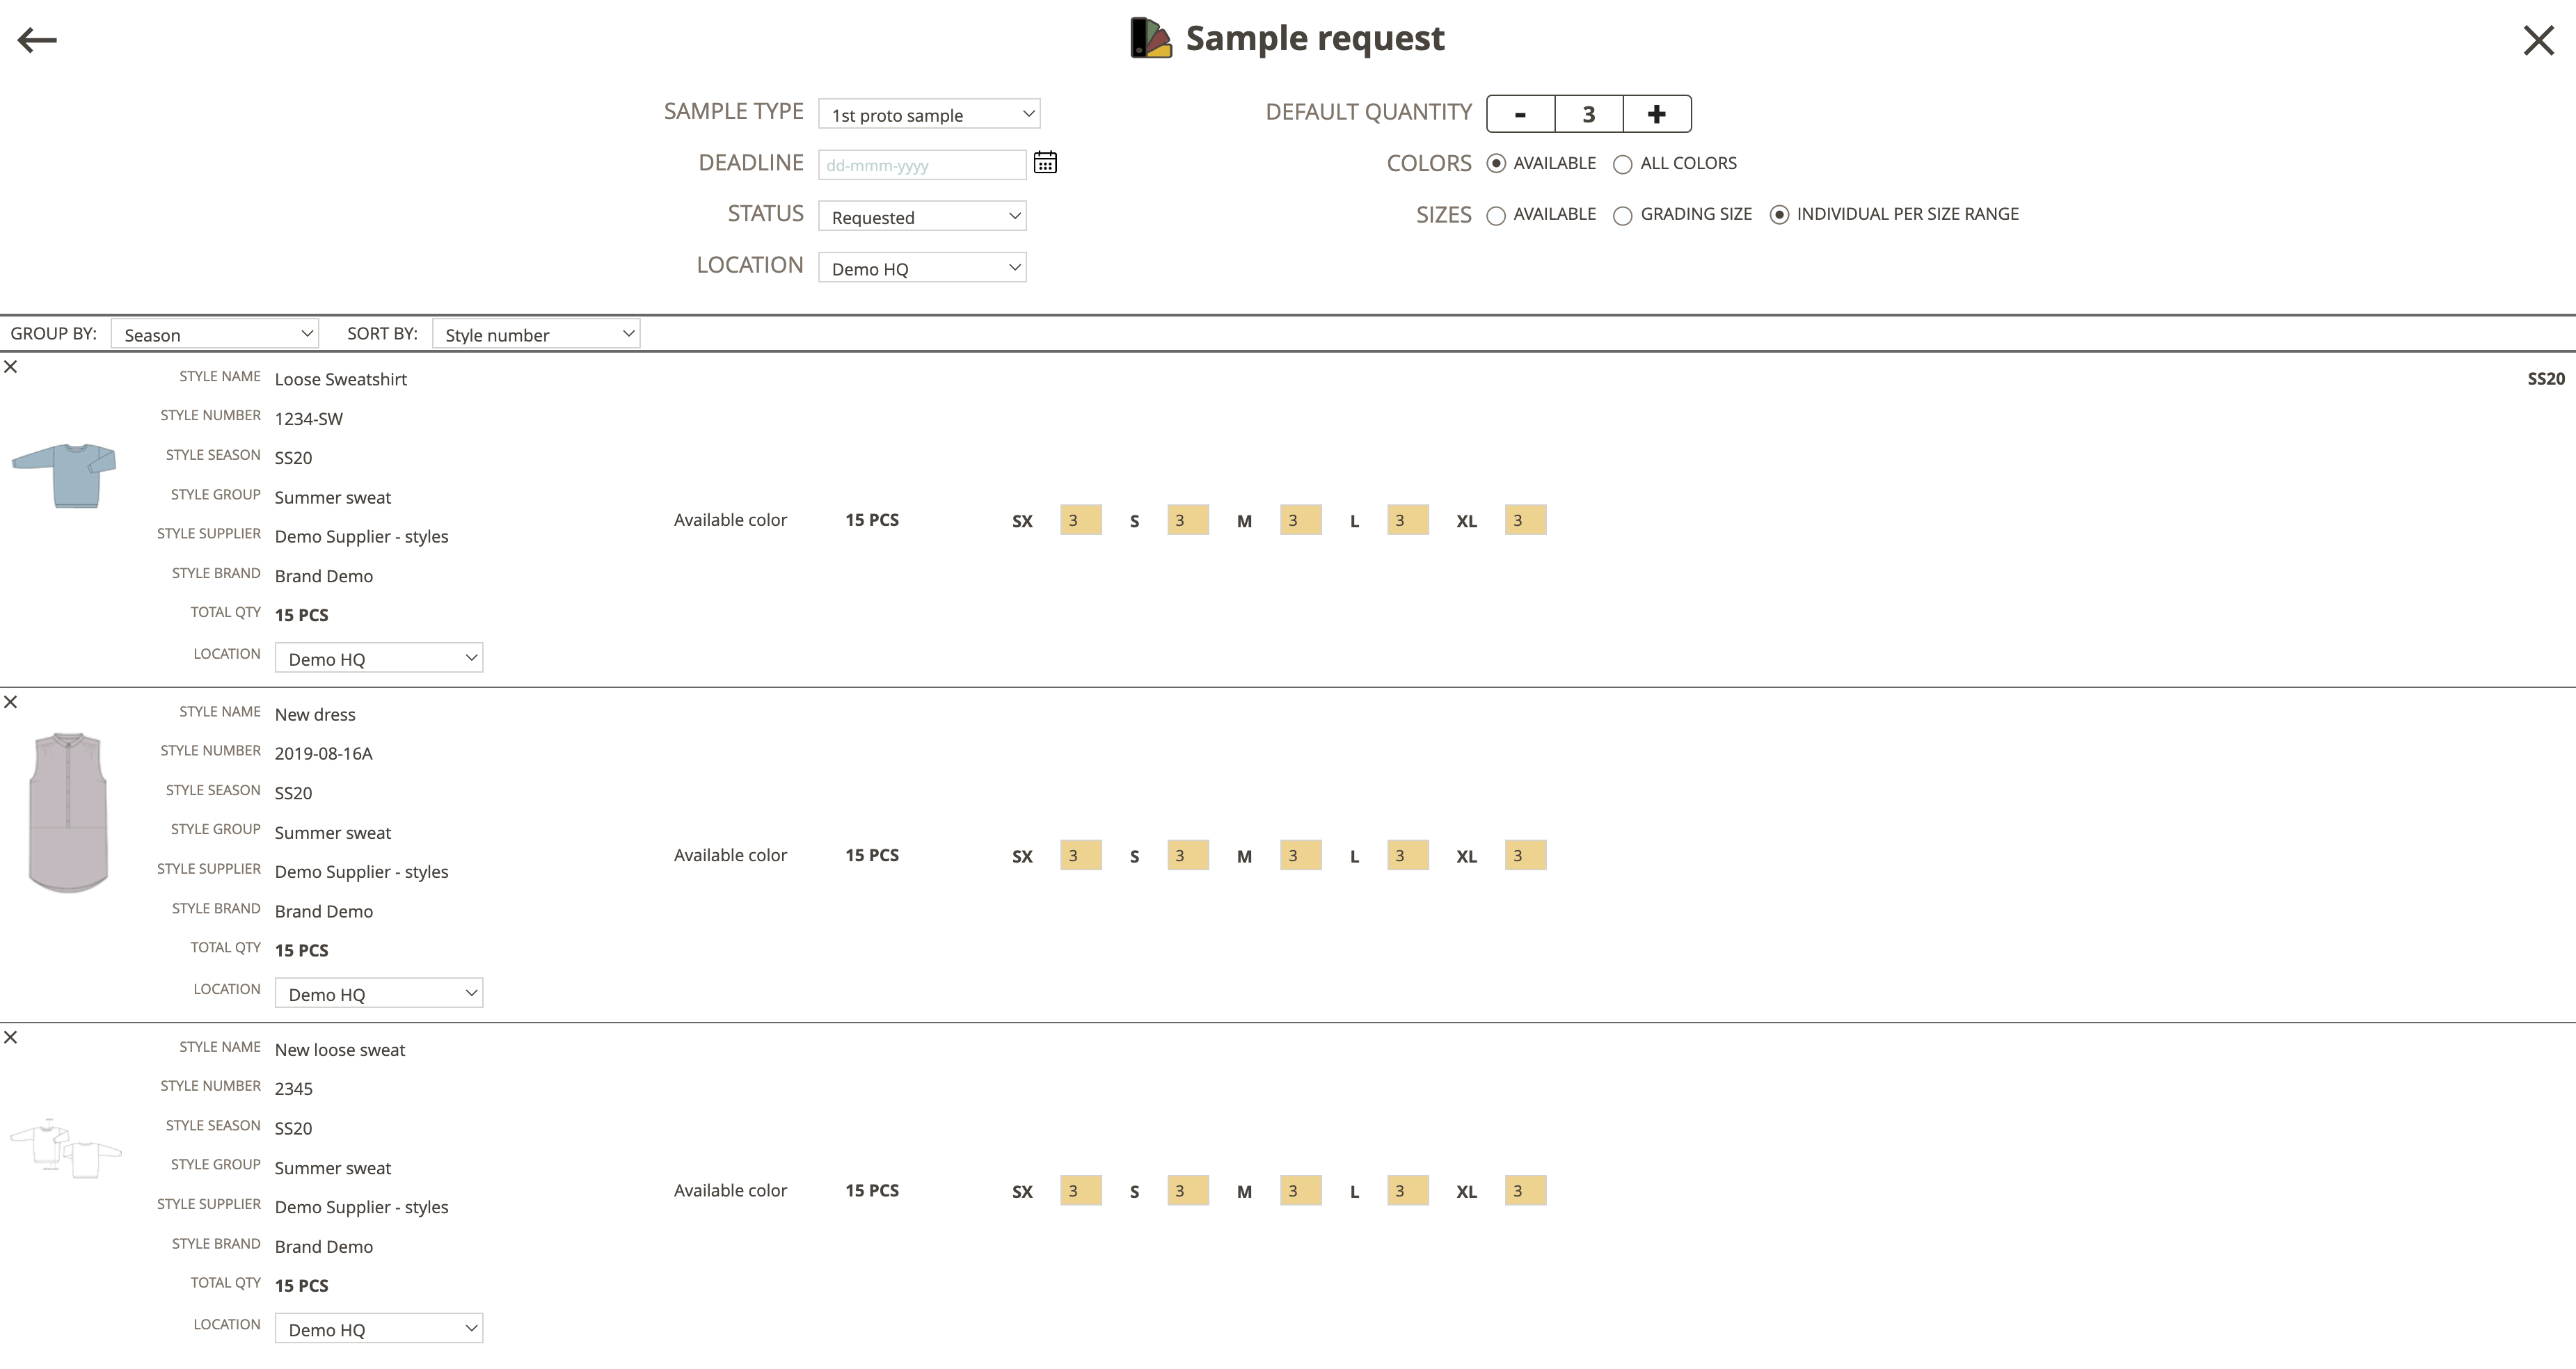
Available color/individual per size range
In this setting, you can change the wanted quantity pr. size.
Simply move your cursor to the yellow field, delete the quantity, and type in the new wanted quantity pr. size.
By default, each size will have the wanted quantity as defined in the Batch Action pop-up's header.
But you can also choose that some sizes should not have any quantity at all.
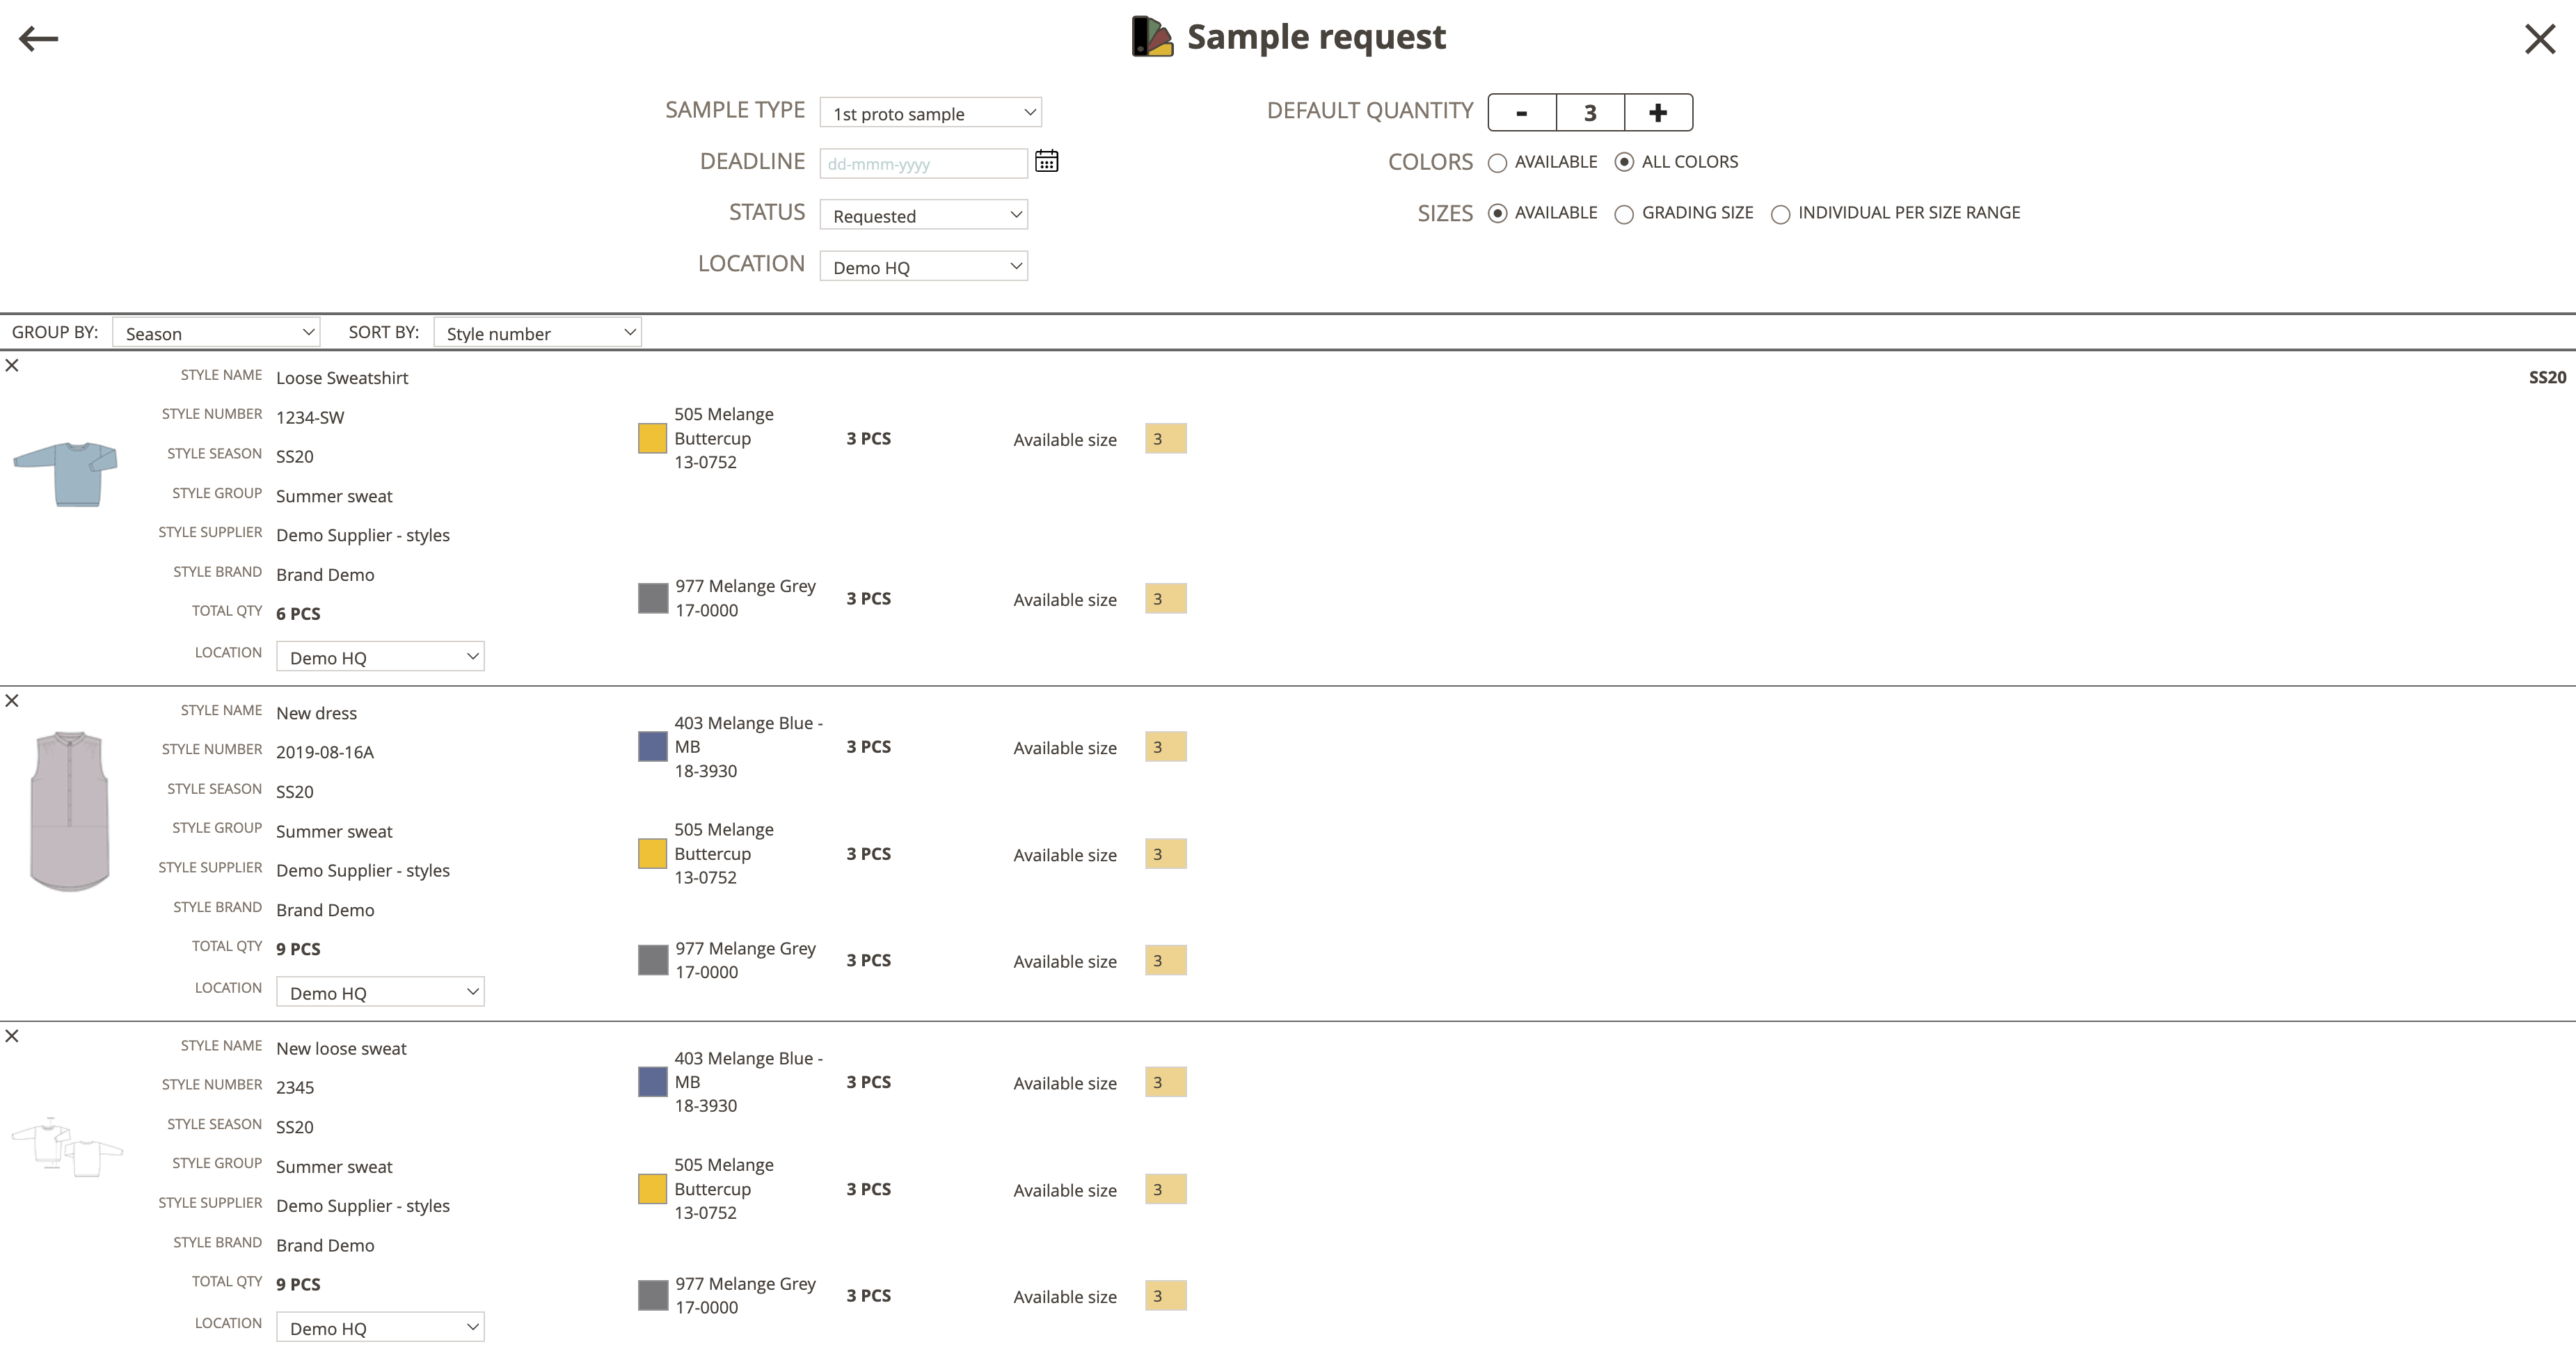
All colors / available size
If you select the "All colors / available size" setting, you will see a list of all colors that are added to each style.
You can then change the wanted quantity by the color - but not the size as you request the available le size.
Simply move the cursor to the yellow field and change the quantity.
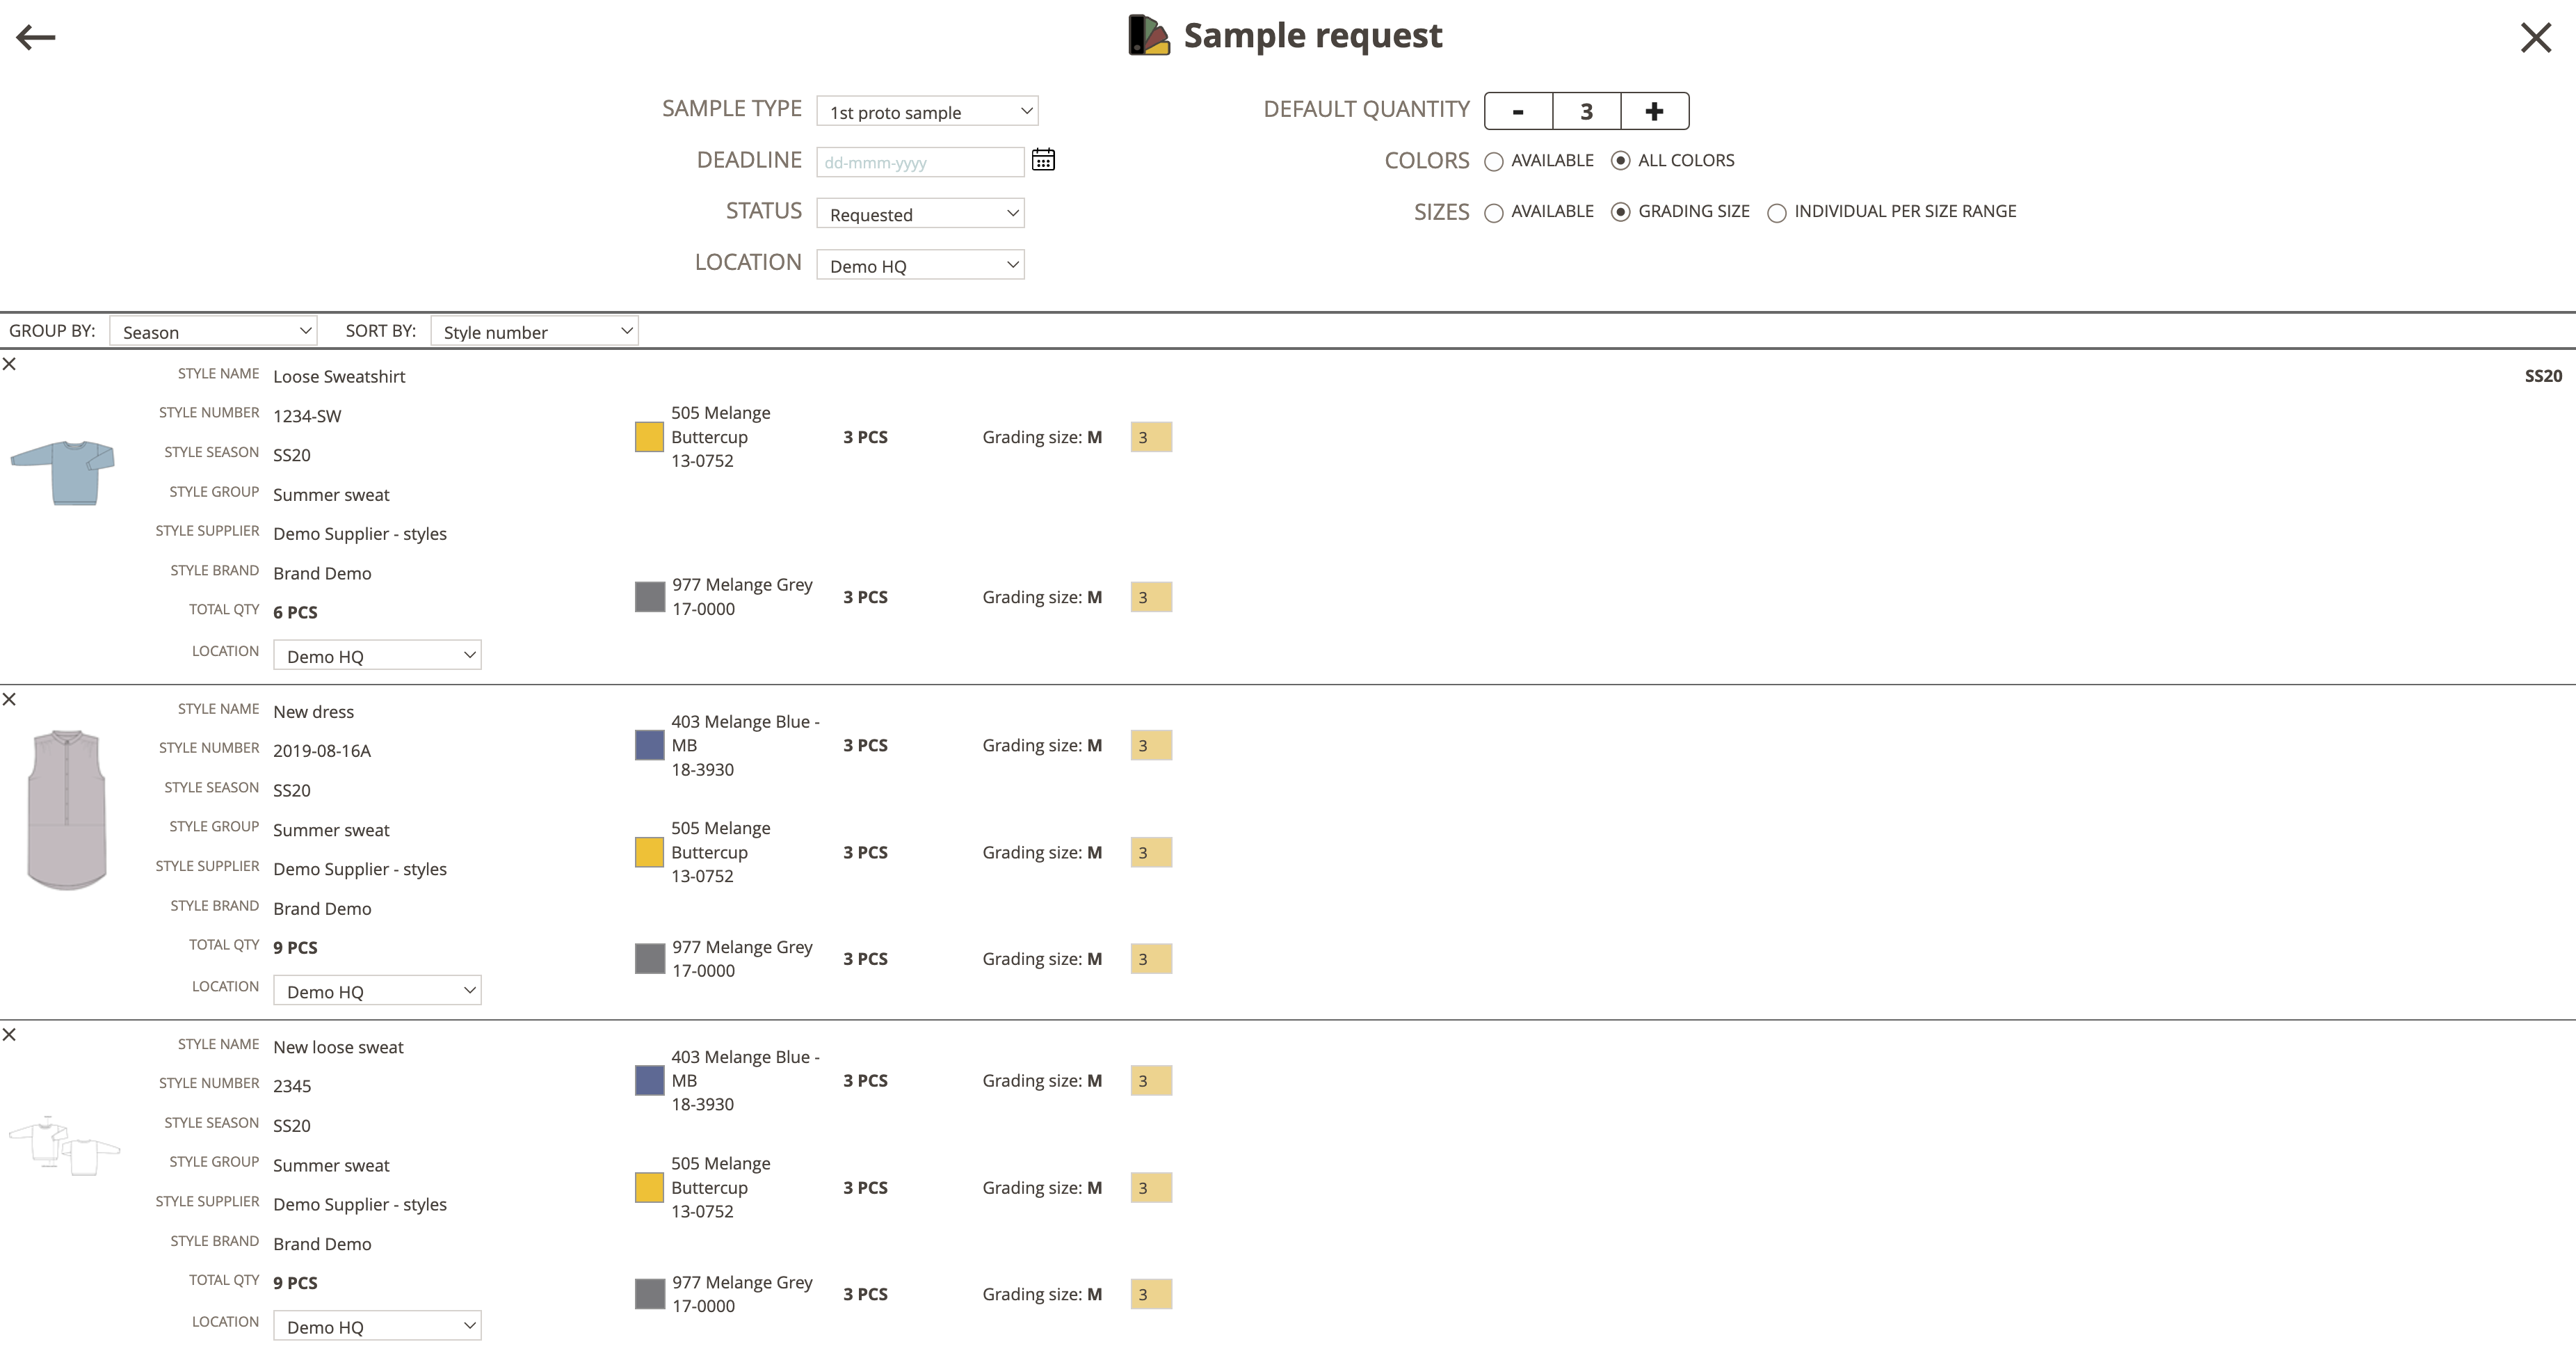
All colors/grading size
For this setting, you can only change the wanted quantity by the color - but not the size as you request the grading size pr. style.
Simply move the cursor to the yellow field and change the quantity.
All colors/individuals per size range
With this setting, you can decide the quantity pr. color and pr. size.
This means you select the wanted quantity for each color in the exact size you want.
Move the cursor to the yellow field where you want to change the wanted data - delete the data and add a new quantity.
Tip 1: Below the header, there will first be a section for grouping and sorting the selected styles.
Tip 2: You can use the Tab-button and Arrow keys on your keyboard when shifting between the number of quantity pr. color/ size.
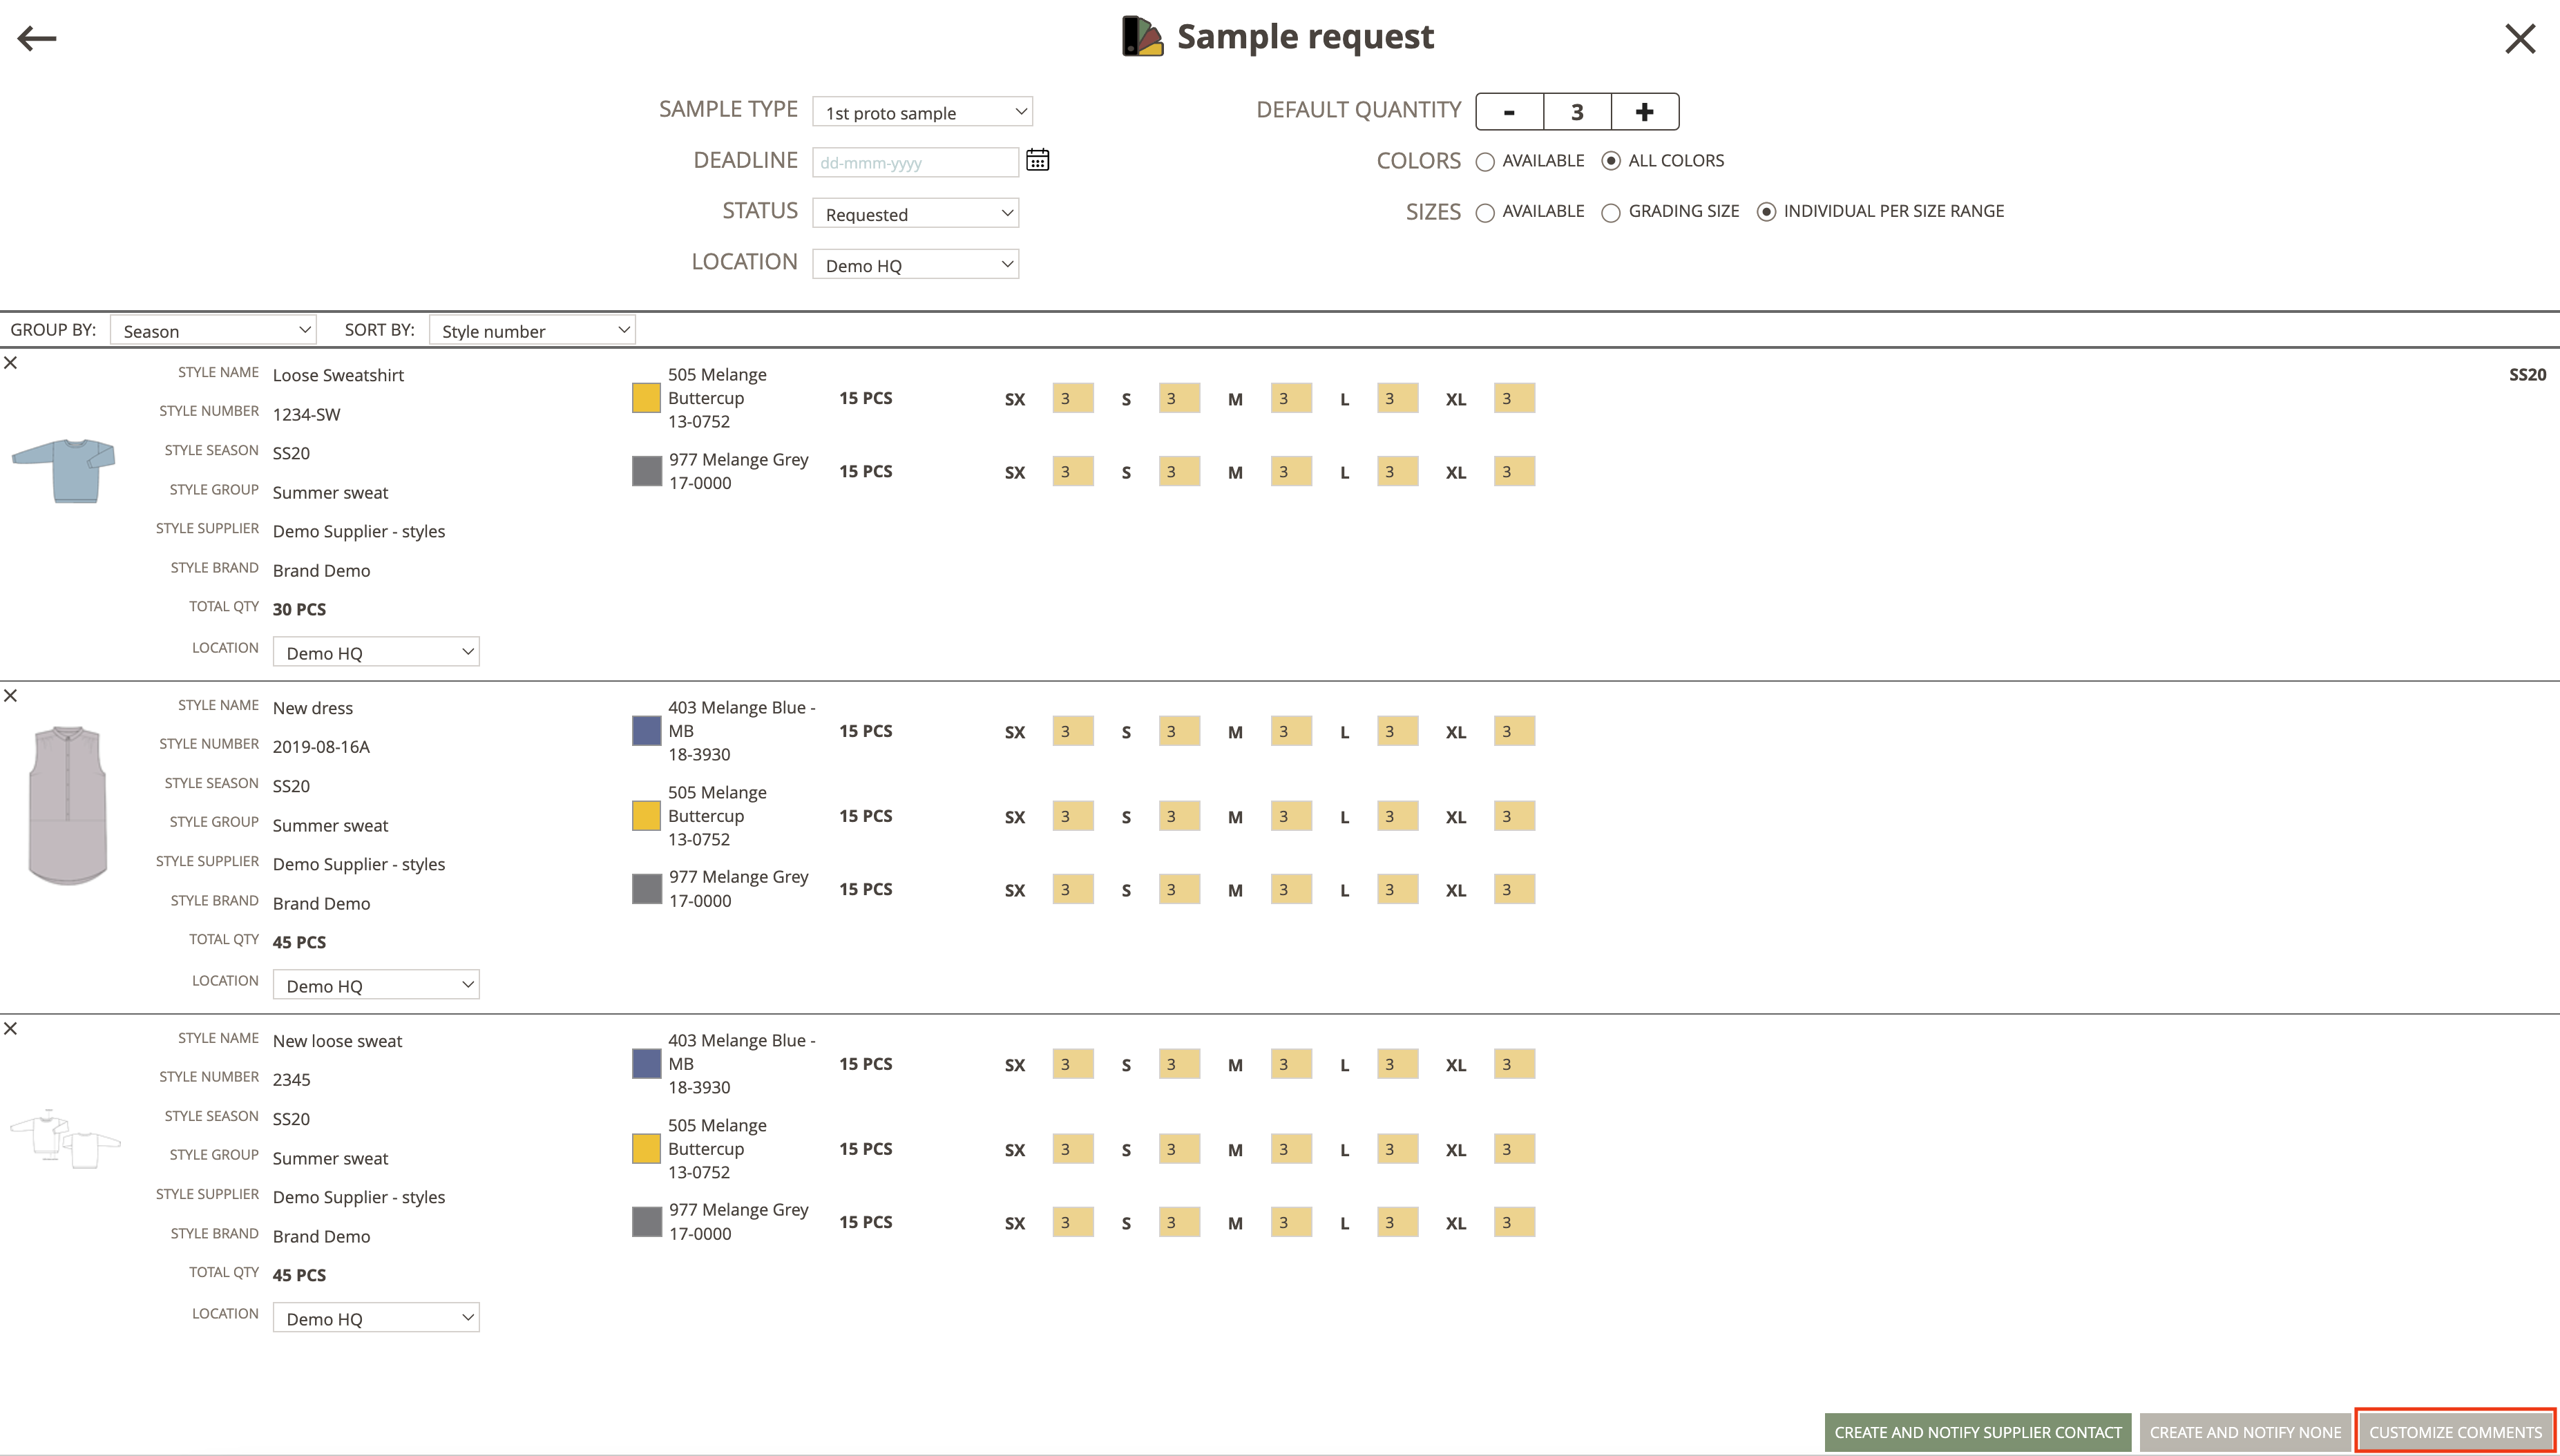
CREATE AND NOTIFY ABOUT BATCH ACTION SAMPLE REQUESTS
Once you have set up the data for the Batch Action - Sample Request, you are ready to request your samples.
It means that you will create the sample requests pr. selected style and you will notify the suppliers.
For this, you have 4 different options:
Notify Multiple Suppliers
You can choose to notify all the suppliers (supplier pr. style) at one time - and give them the same message.
Simply click on the green button "CREATE AND NOTIFY SUPPLIER CONTACT".
All suppliers pr. style will now receive an email, that they have a new requested Sample.

Send the same comment to all Suppliers
As a Company User, you can send the same Sample Comment to Suppliers.
1) Click on the button CUSTOMIZE NOTIFICATIONS
2) You will now see a new window. Make sure you are on the tab called "SAME COMMENT TO ALL SUPPLIERS".
You can select your colleagues and/or you can select which Supplier users you want to notify by dropdowns.
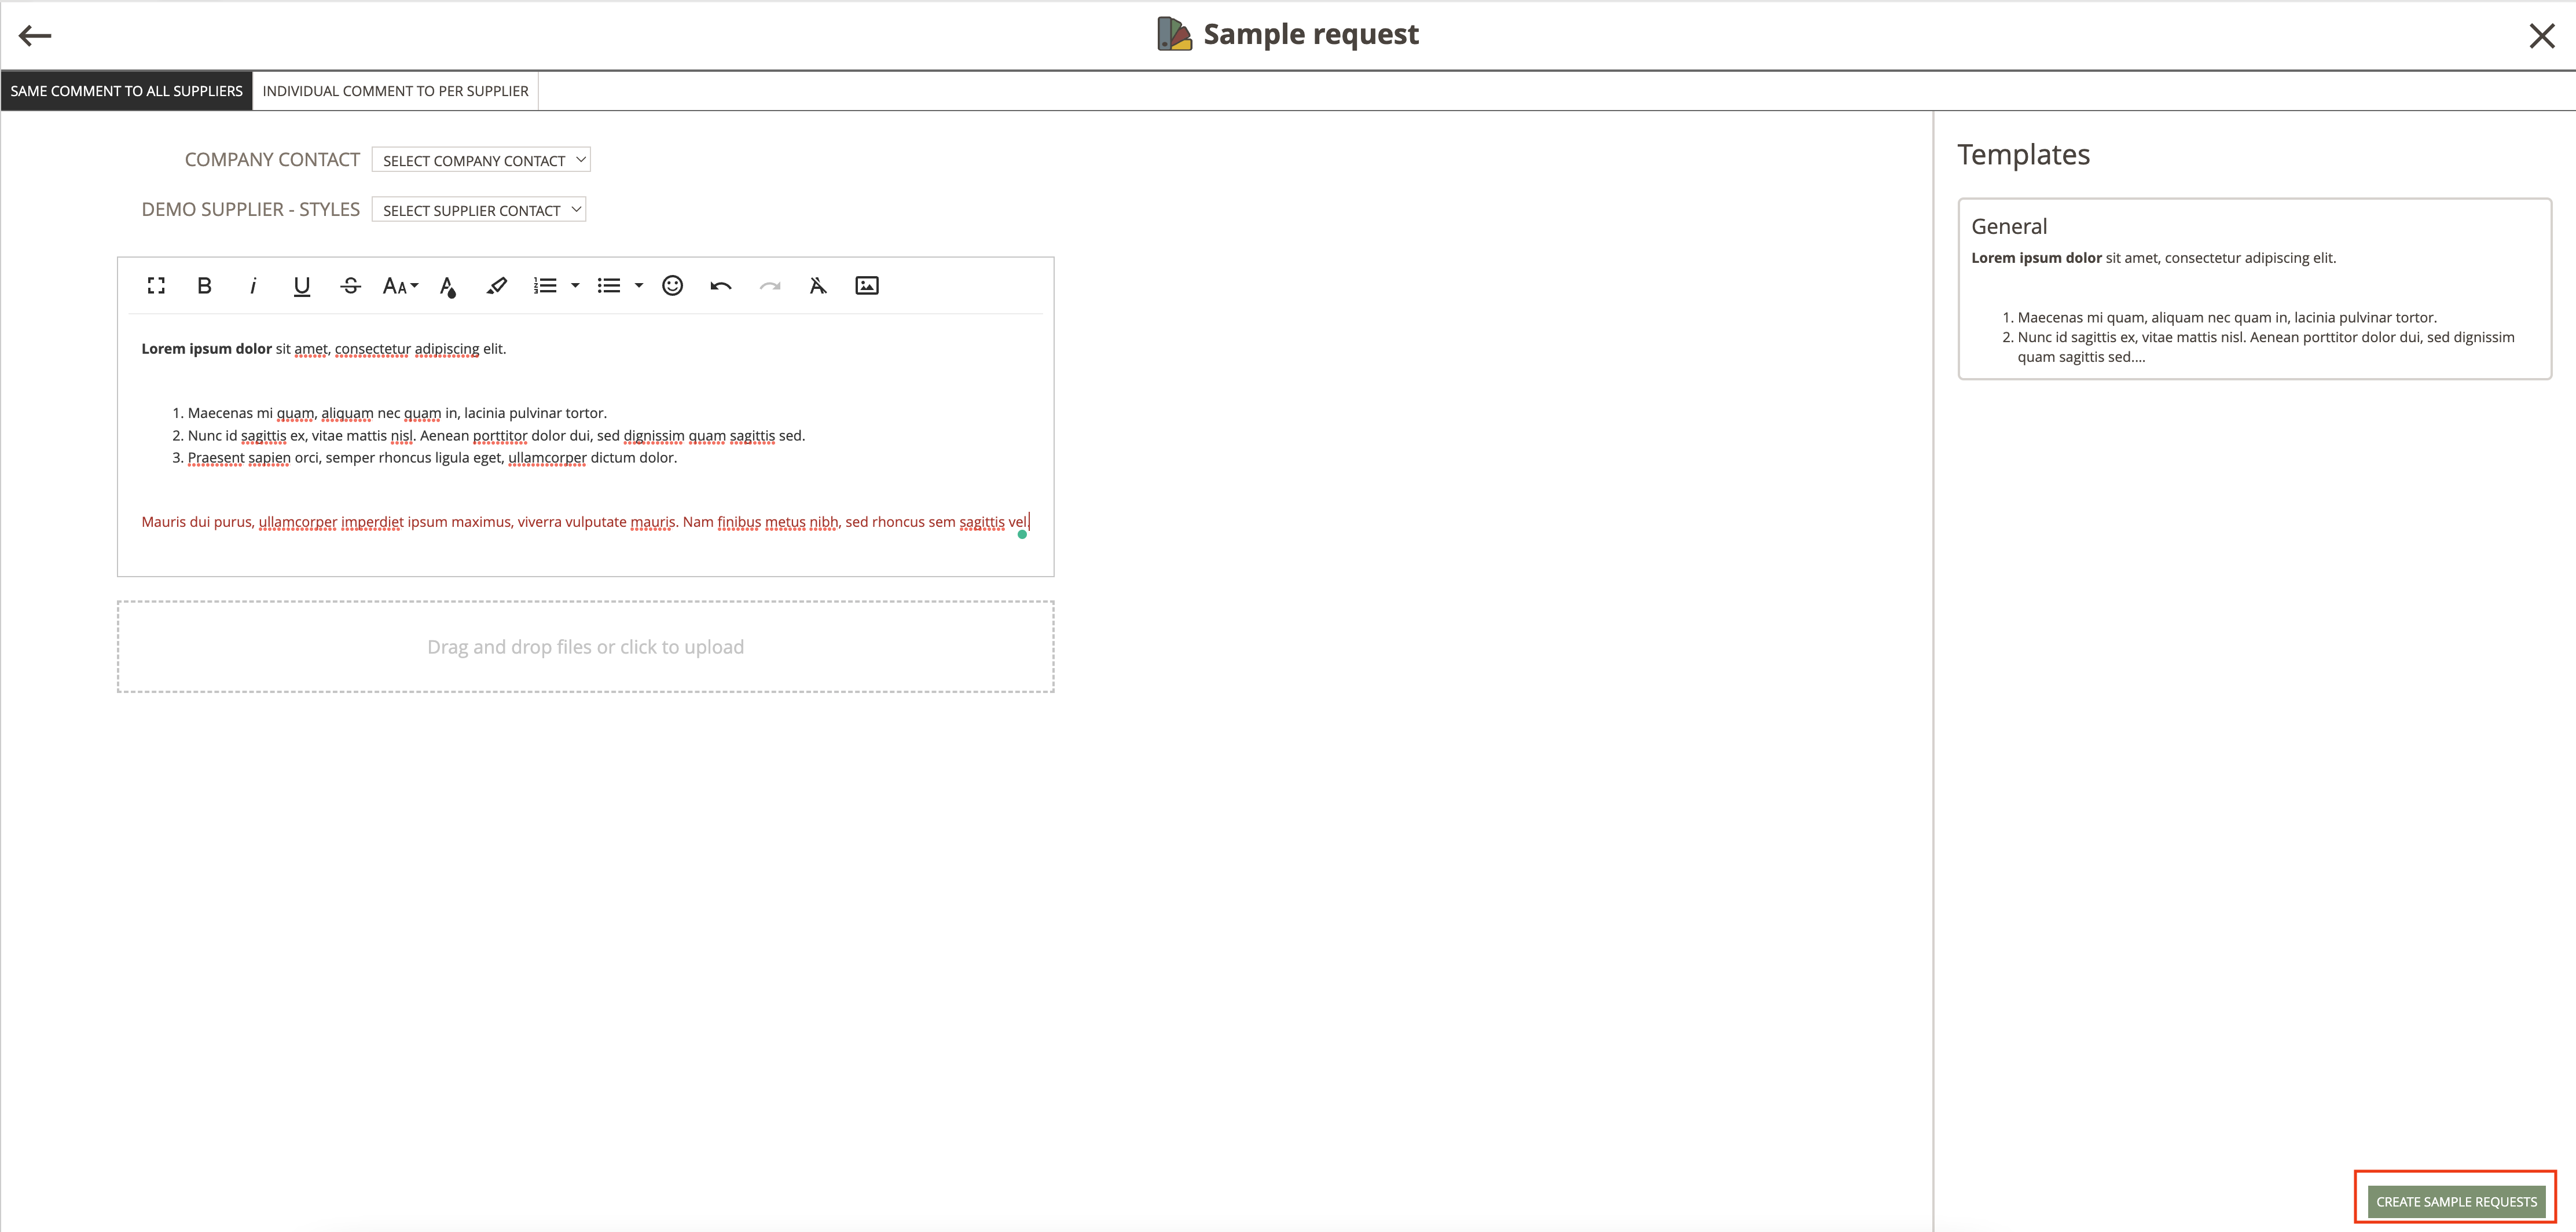
You write the message you want in the text field and add visual comments by dragging and dropping files.
On the right side, a list of Sample request text templates will be shown.
Simply drag and drop or click on the Text template you want to use - and the text will be moved to the text field.
Here you can adjust the text or use it as it is.
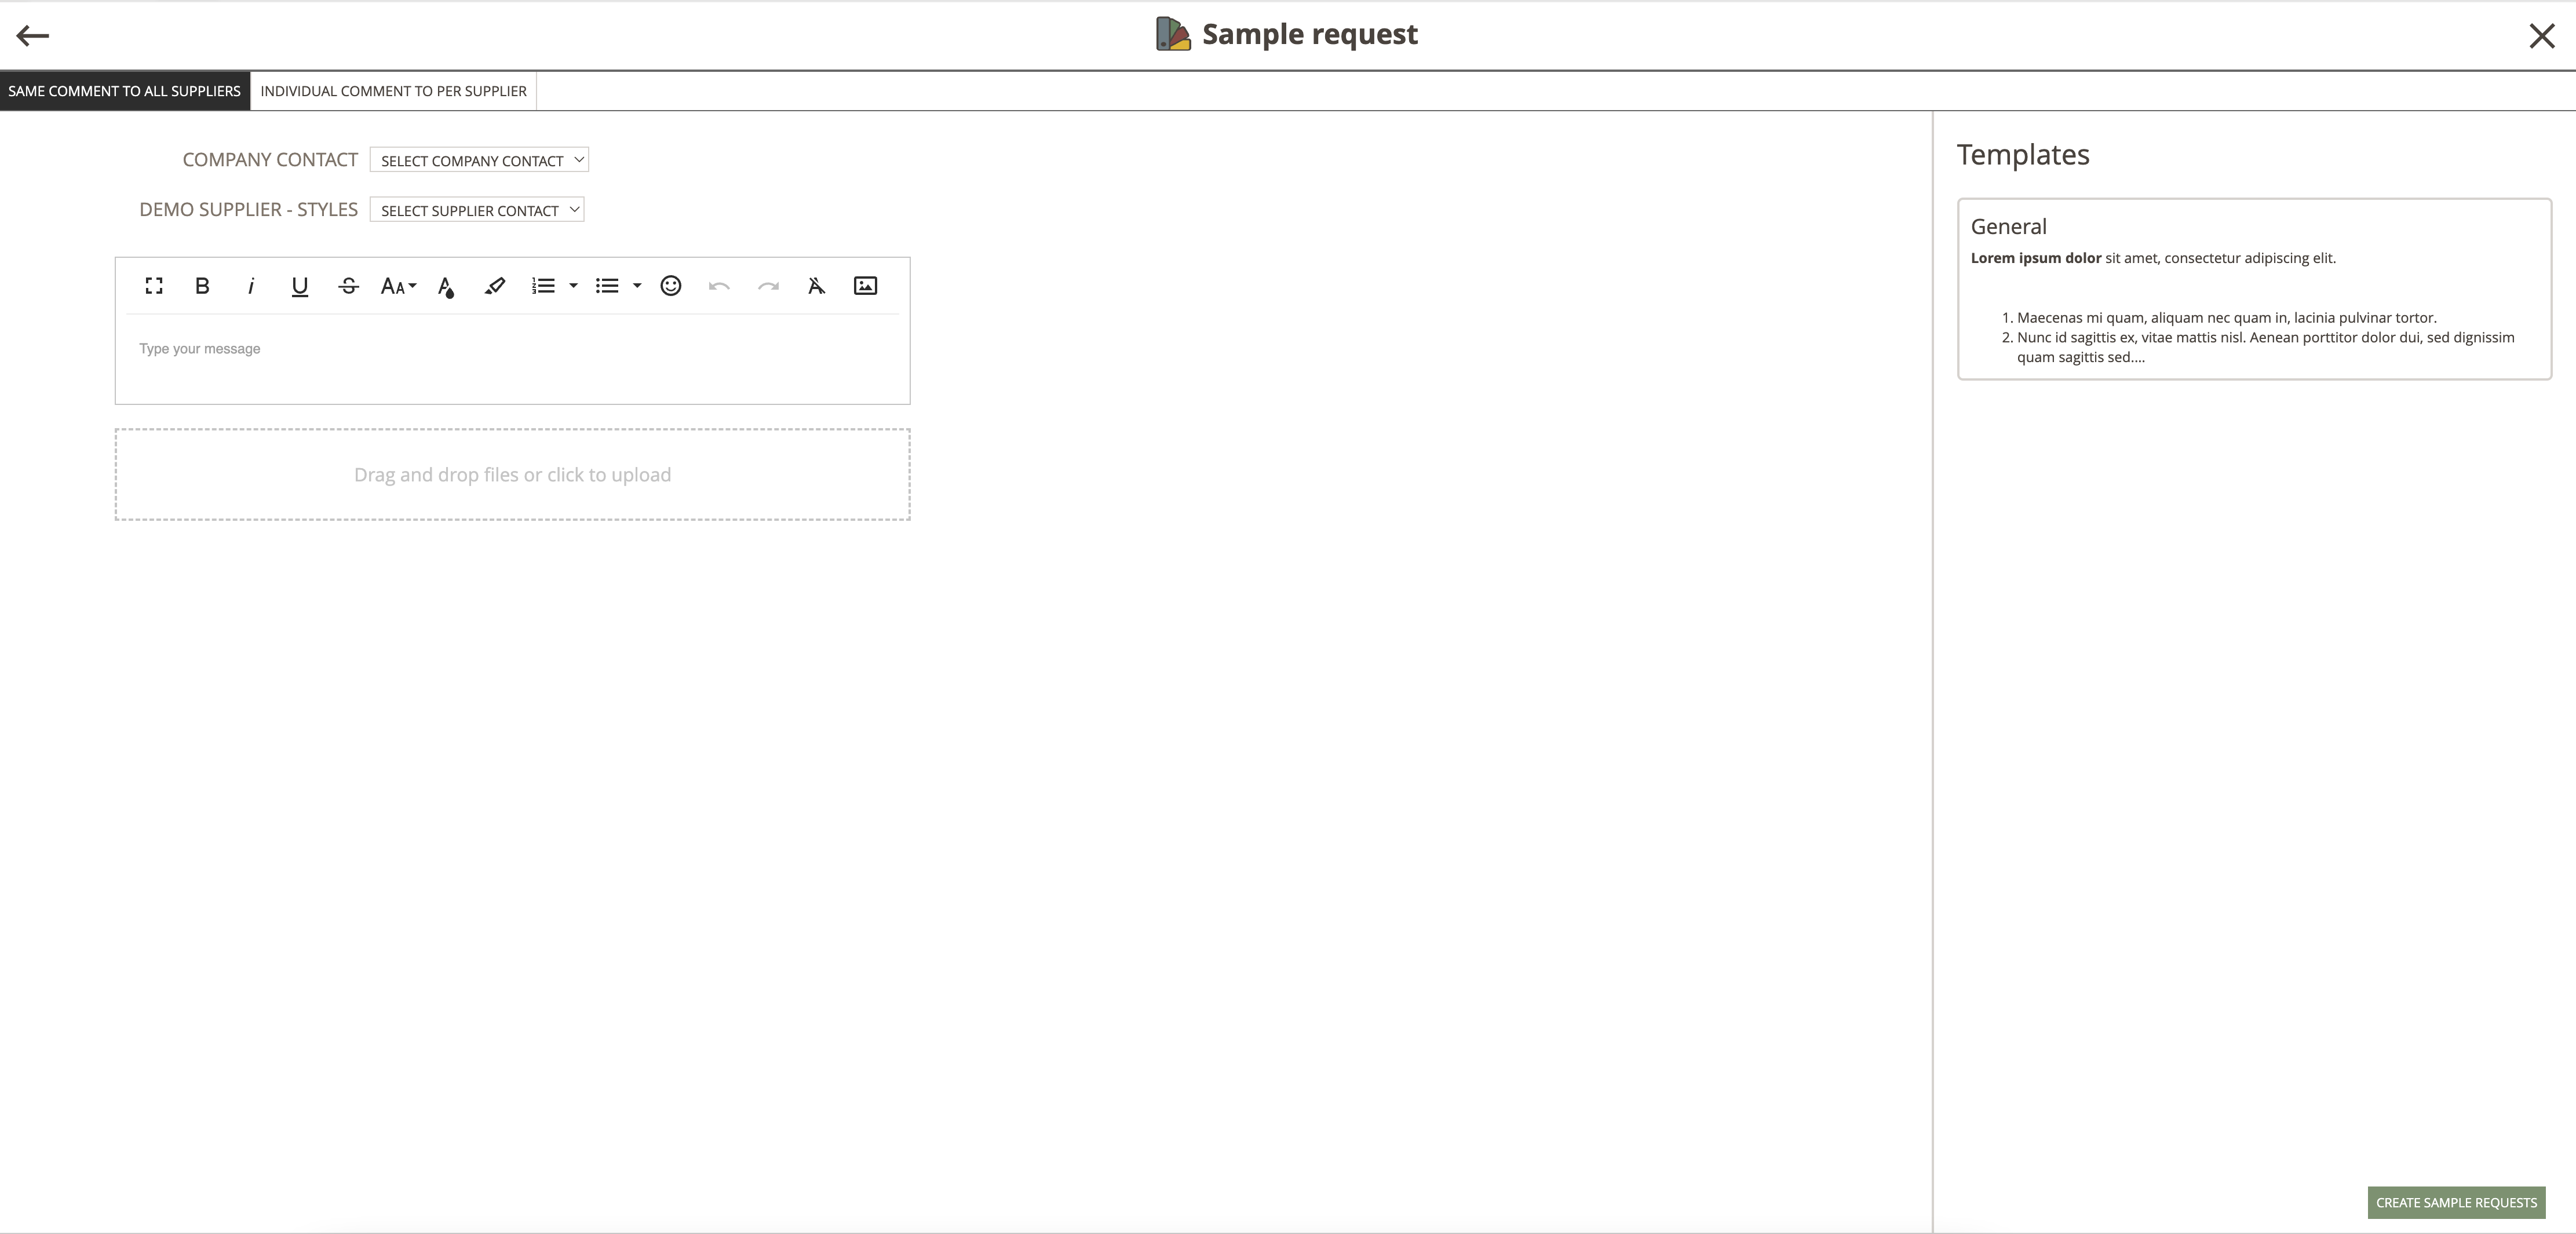
3) When you have customized your message, you click on the green button "Create Sample Requests".
The selected suppliers (pr. style) will now receive an email with the message/ comment, you just have set up.
The Sample Requests will be created on the selected styles.
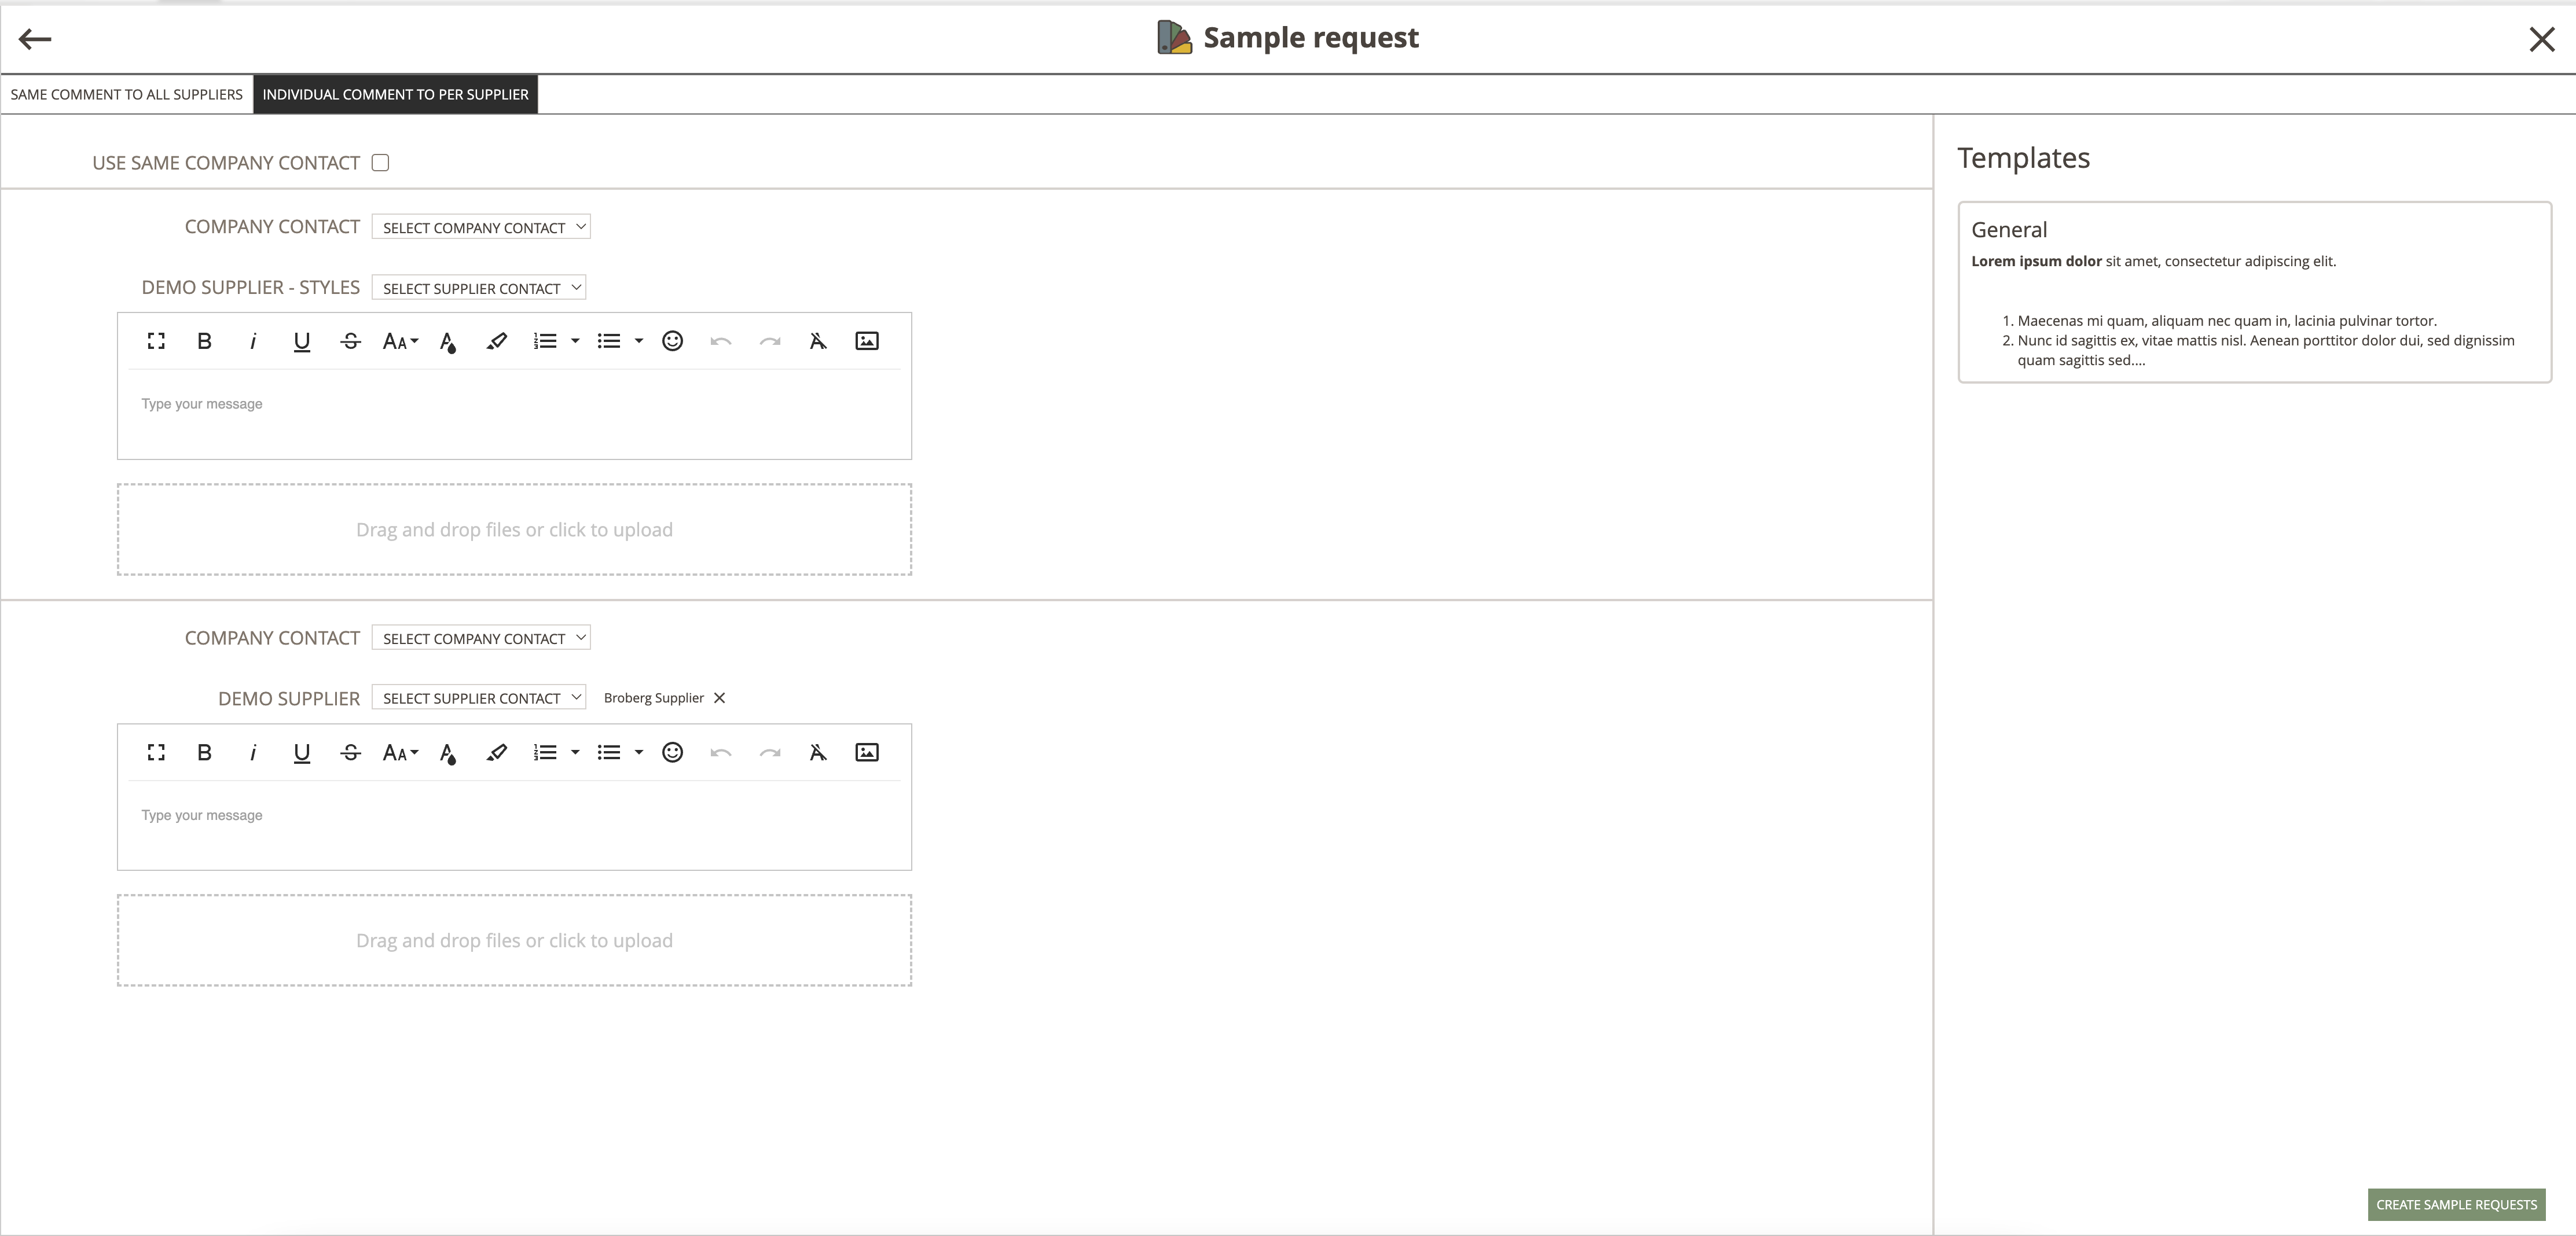
Send an individual comment to Suppliers
You can also decide to send a customized individual sample comment to a supplier.
1) Click on the button "CUSTOMIZE NOTIFICATIONS"
2) You will now see a new window. Make sure you are on the tab called "INDIVIDUAL COMMENT PERSUPPLIERS".
You will see a list of each sample.
Here you can select your colleagues and you can select which Supplier user from each Supplier Company (pr. style) you want to notify.
You define this by dropdowns
Underneath the dropdowns, you can write the message you want in the text field and add visual comments by dragging and dropping files.
On the right side, a list of Sample request text templates will be shown.
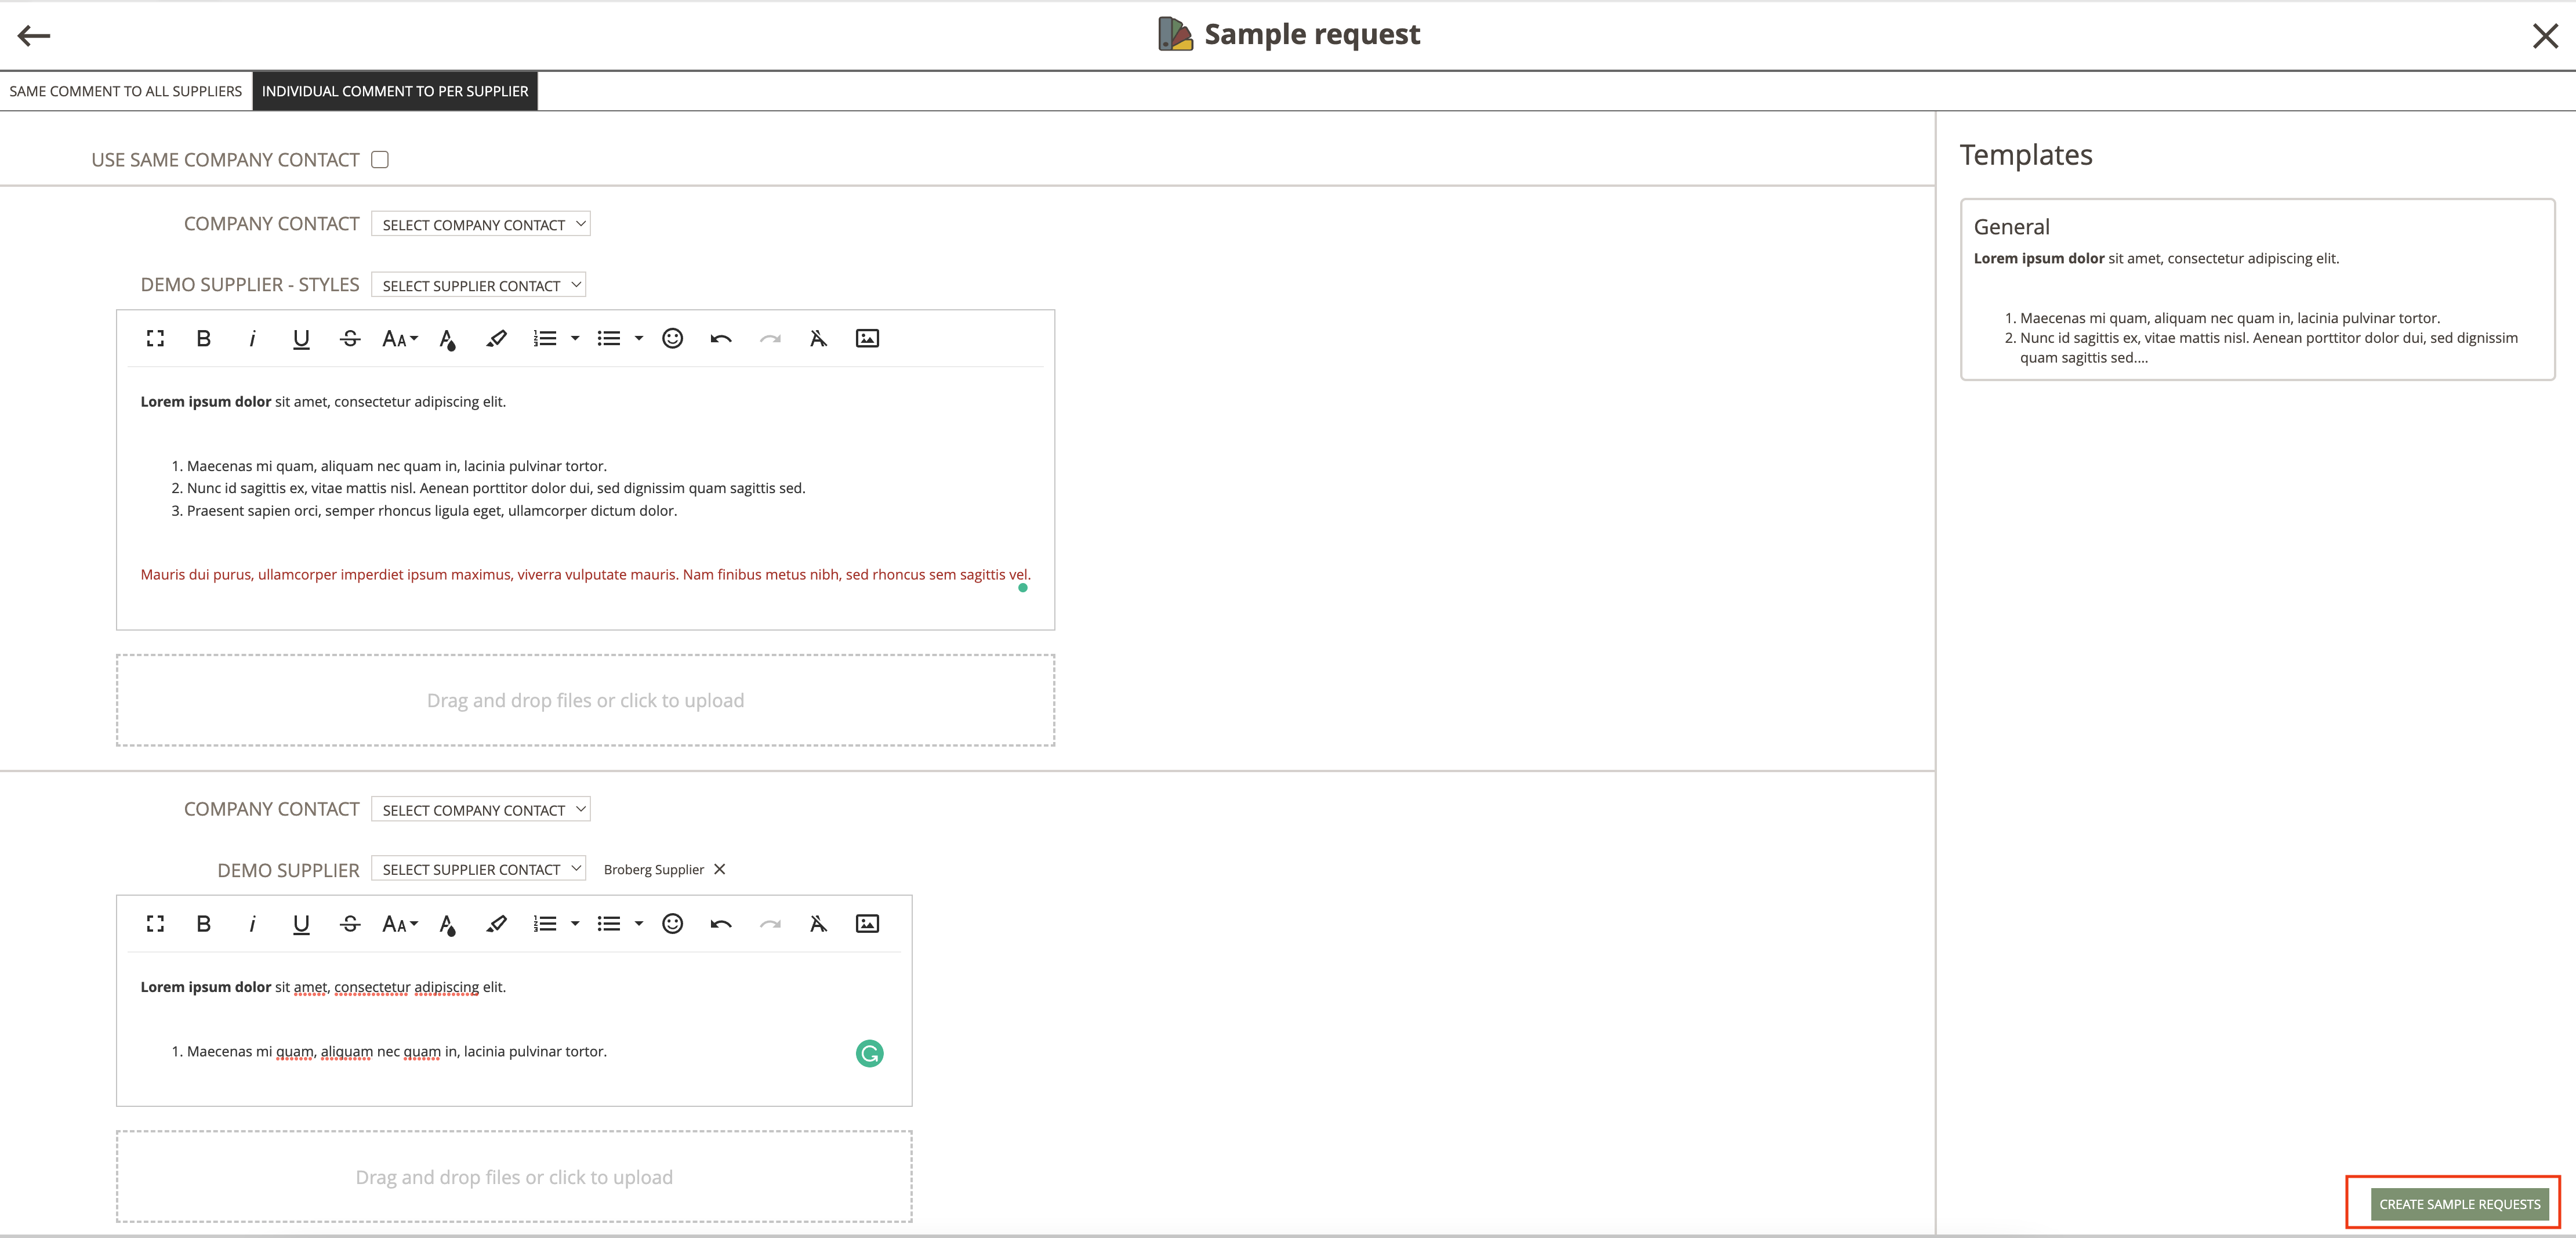
Simply drag and drop or click on the Text template you want to use - and the text will be moved to the text field.
Here you can adjust the text or use it as it is.
3) When you have customized your messages pr. sample, you click on the green button "Create Sample Requests".
Each supplier will now receive an email with the individually customized comment.
The Sample Requests will be created on the selected styles.
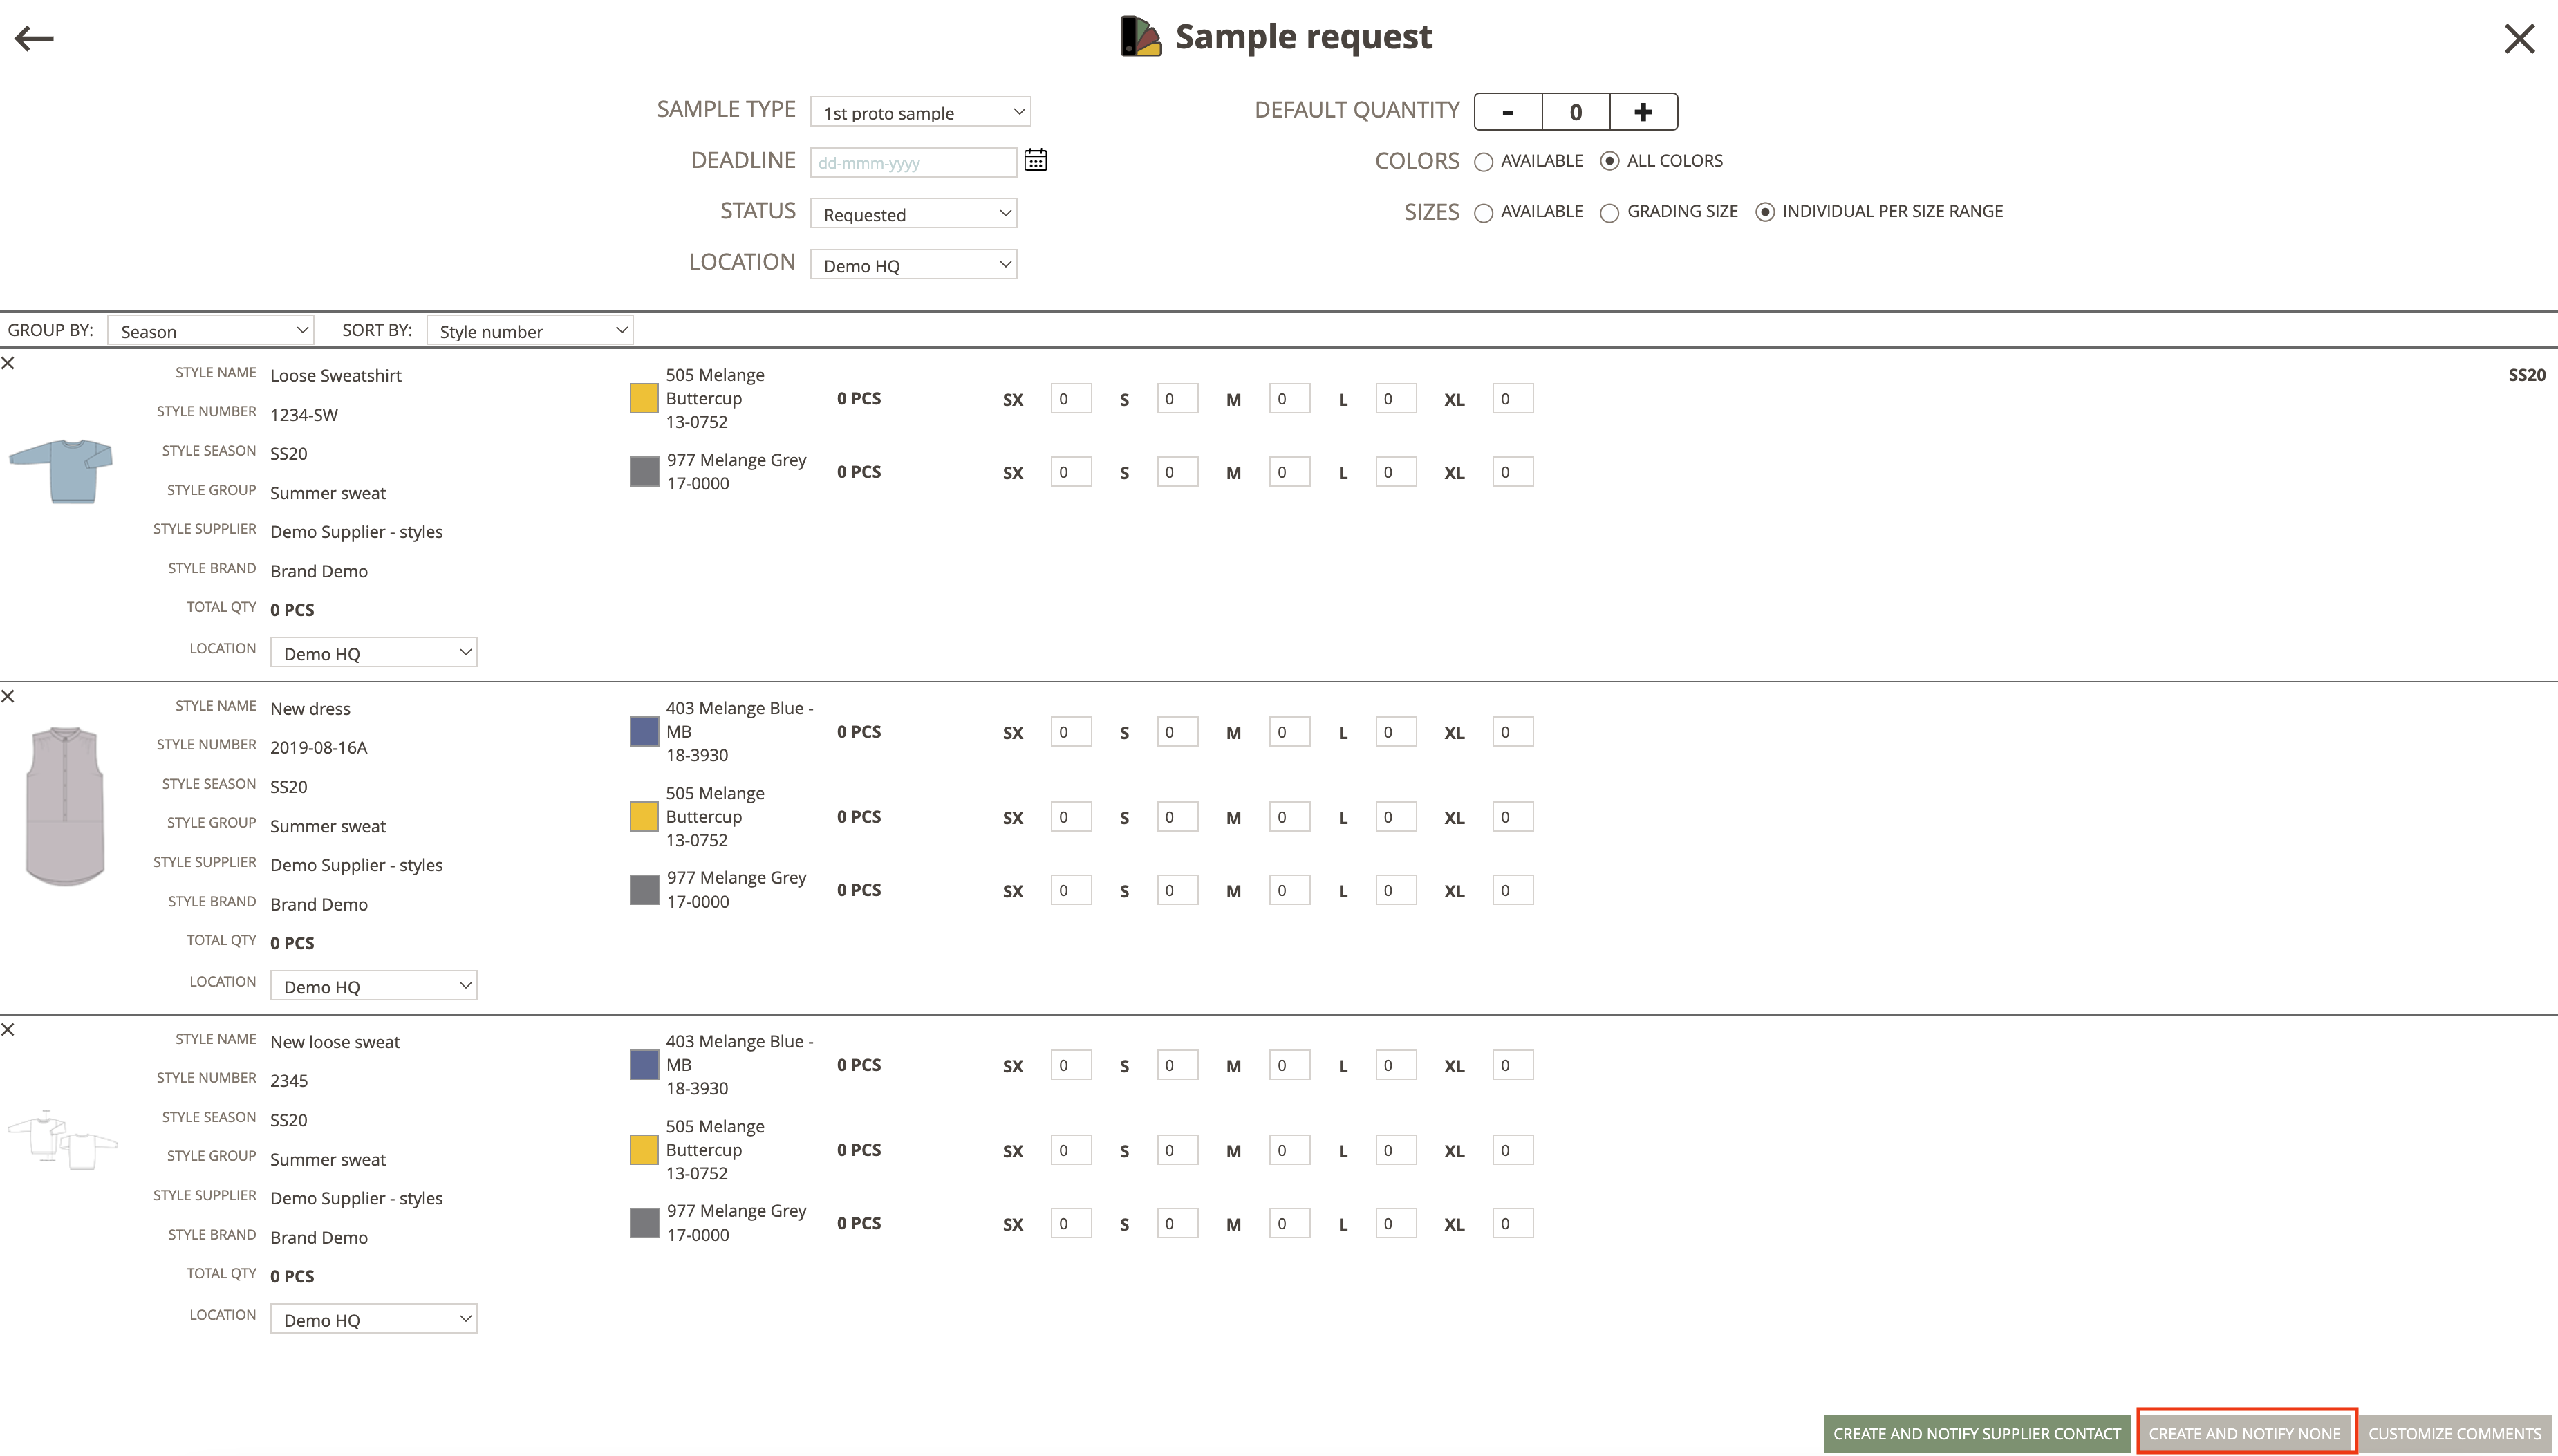
Create the style and notify no Suppliers
If you don't want to notify any suppliers, but only want to create the Sample Requests, you simply click on the button "CREATE AND NOTIFY NONE".
The sample requests will be created on the styles, but no one will receive an email about the new samples.
MAKE UNPUBLISHED STYLES INTO PUBLISHED
In Delogue PLM, you can't have a requested Sample Request on an unpublished style.
If you have selected an unpublished style in your Batch Action setup of Sample Requests, you have the option to publish the style.
Simply click on the button "PUBLISH STYLE" in the pop-up - and the Style will be published.
If you don't want to publish the style but want to add the Sample Request, you can click on the button "CREATE PLANNED".
The style will still be unpublished, but the system will create the Sample Request as Planned - meaning, that no suppliers can see the Sample Request yet.
Note: The pop-up will appear if you have unpublished styles when you are about to create the Sample Requests.
